
Floral Designs with Flowering Trees
By Shari Russell
Spring! We made it through the monochrome silence of winter and now, suddenly, spring clashes with a crescendo of color and I just can’t wait to get my hands on the proof, the promise of life - flowers. I love watching while tree and flower friends wake up from their long, quiet naps. Every year I am sure I am the first to greet them. Hello, my beautiful friends!
My true love for flowers officially began in 2001 when I started working in a busy flower shop in downtown Boston. The concept of creating art with living materials was and is so exciting to me. Creating a flower arrangement is like building a mini garden in its prime. It doesn’t have to be perfect to be beautiful. Say it again, It doesn’t have to be perfect to be beautiful! A flower arrangement (much like a garden) is fleeting, ephemeral, a snapshot of existence. Just enjoy it while it lasts, it will be different tomorrow.
Below is a step-by-step tutorial on how to create a centerpiece with spring flowering tree branches as a base. This poem by E.E. Cummings fits so well in my arborist/florist's heart. I hope it inspires you to gather some flower friends this spring and say hello. I would love to see your creations!
Spring is like a perhaps hand
by E. E. Cummings, 1894 - 1962
III
spring is like a perhaps
Hand in a window
(carefully to
and fro moving New and
Old things, while
people stare carefully
moving a perhaps
fraction of flower here placing
an inch of air there) andwithout breaking anything.
Spring is like a perhaps hand
(which comes carefully
out of Nowhere)arranging
a window, into which people look(while
people stare
arranging and changing placing
carefully there a strange
thing and a known thing here)andchanging everything carefully
Step 1
Tips Before We Begin
Floral Design is a Living Sculpture
As you go through the process of creating your floral sculpture keep these tips in mind:
Work in clusters
Create layers of blooms to build depth of field
Odd number groupings are pleasing to the eye
Negative space is important to let the eye rest
Helpful tools
A lazy susan similar to this one can be very helpful in accessing your arrangement as you build.
My favorite hand pruners for floral design and light yard work are the Japanese made Saboten 1210 Thinning Shear.
Green chicken wire or a floral frog and adhesive. I personally try to avoid floral foam while designing as most foam products are not environmentally friendly.
Step 2
Gather
Collect blooms and branches that complement each other. Working with one or two tones of the same color is an easy way to define the mood of your design. All of the plant materials I used I collected from our family farm.
Included in this design: Honeysuckle foliage, Crabapple, Korean Spice Viburnum, Redbud, Yellow dogwood, Flowering quince, Lenten rose, Ostrich fern, Solomons seal, and Daffodil

Step 3
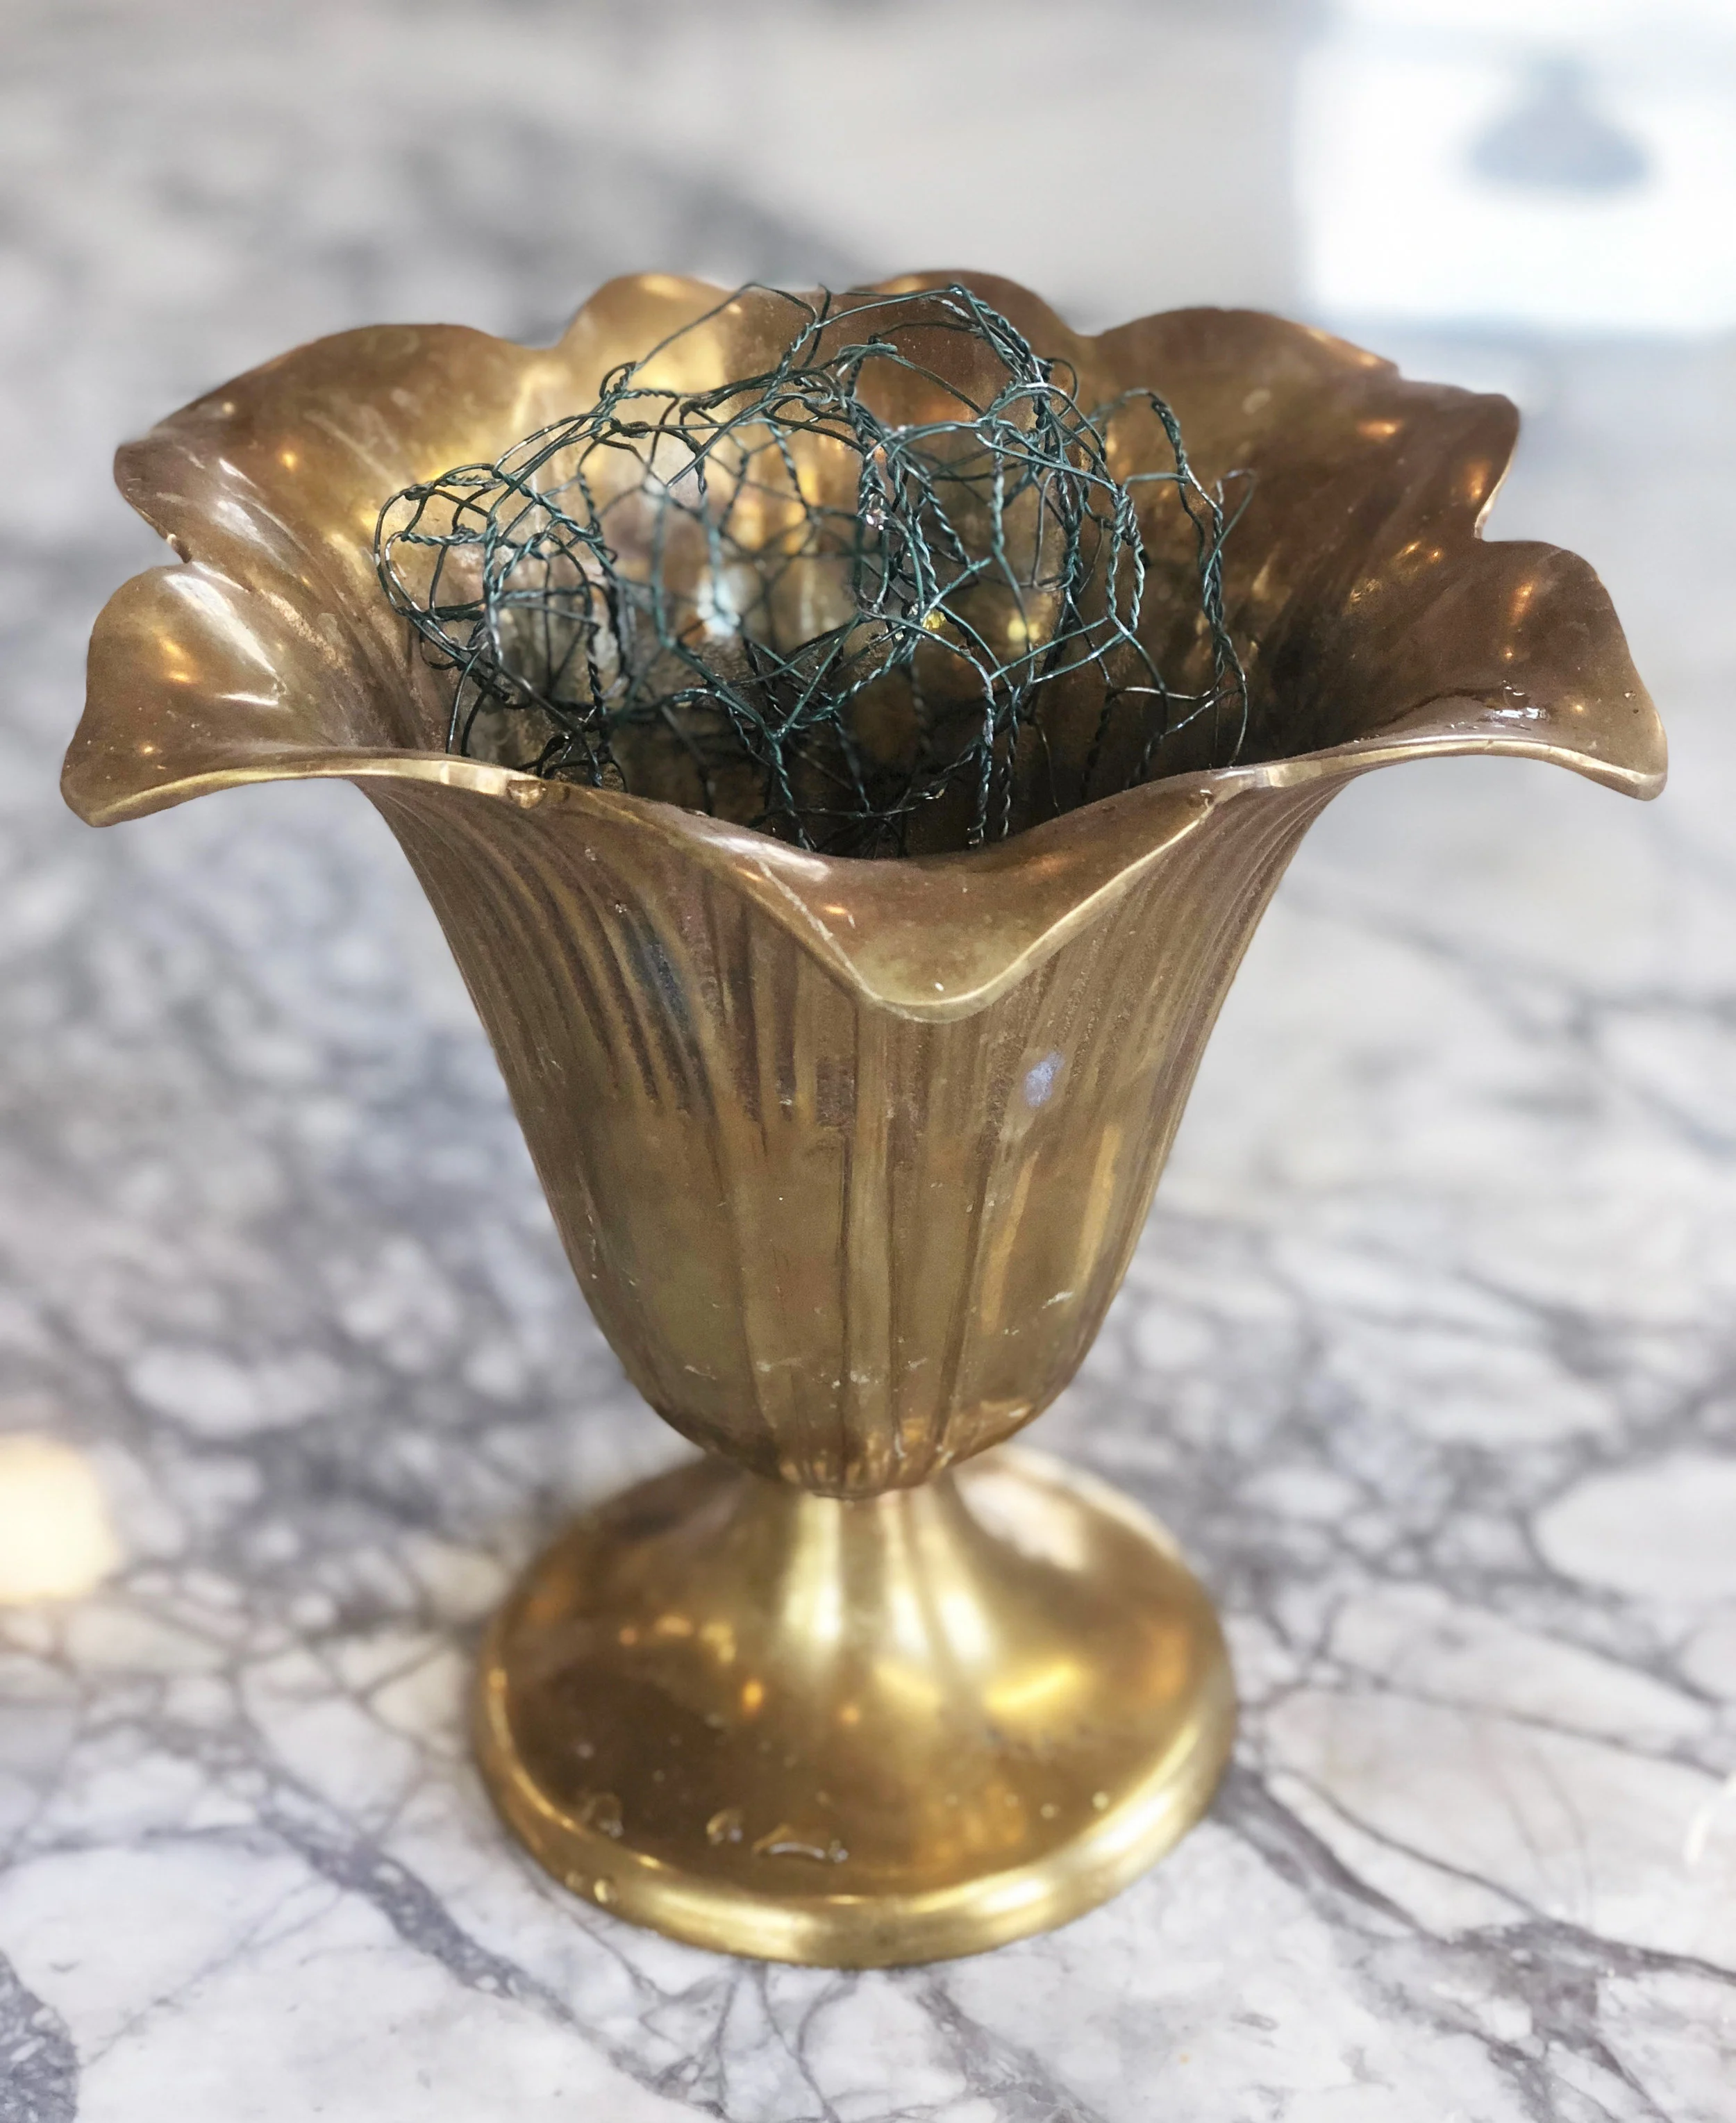
Find Your Vessel/Vase
Secure it with a wire frame, preferably a floral frog (adhered with floral putty) or chicken wire rolled in a loose ball and add water.
Step 4
“Green Up” your vessel
Add large woody stems of foliage first to create a backbone for the design and to provide structure for more delicate blooms to rest. Keep turning your arrangement as you build to maintain balance. It’s easy to get focused on one side.
Included in this step: Honeysuckle

Step 5
Line Flowers: Work from the outside in
Leaving space in the center of the arrangement helps the design stay light and airy, like an actual garden. Use the branches that are most linear to create the structure of the design.
Included in this step: Crabapple + Flowering Quince

Step 6
Add focal blooms
Focal blooms are the heavy hitters of the design. It’s where the eye will be drawn first. Place these blooms at varying heights, creating high points and low points.
Included in this step: Korean Spice Viburnum (Its scent rivals the lilac in deliciousness!) + Lenten rose - my all time favorite flower

Step 7
Layer in filler flowers
Filler flowers are more delicate and tend to offer the texture a design seeks. Fuller, multi-stemmed blooms (such as or single, smaller blooms (such as ranunculus or sweet pea) are excellent filler flowers.
Included in this step: Solomon seal + Daffodil

** TIPS **
For hellebores (aka the Lenten Rose): to prevent the flowers from wilting slice lengthwise along the stem. This will allow more water to flow to the flower and your bloom will last significantly longer.
For daffodils: when cut, daffodils secrete a sap that can shorten the lifespan of other flower types in the same vase. To avoid this problem, place the cut daffodils in a separate vase for 30 minutes before adding them to the mixed arrangement.

Step 8
Add Some Magic
Small touches like a perfectly blooming redbud stem help make the arrangement extra special.
Included in this step: Redbud

Step 9
ENJOY!
Look at your arrangement from all angles. Check for balance and harmony. Ask yourself if each flower is being seen.
Remember - it doesn't have to be perfect to be beautiful.

Books to Inspire
I would love to see some of your spring arrangements by posting your photo on Instagram/Facebook and tag @RussellTreeExperts! Here are some of my favorite floral design books to further help inspire:
Flower House Detroit by Heather Saunders
Flowers Every Day by Florence Kennedy
Foraged Flora by Louesa Roebuck & Sarah Lonsdale
In Full Flower by Gemma & Andrew Ingalls
Bringing Nature Home by Ngoc Minh Ngo
Foraged Flower Arranging by Rebekah Clark Moody

Shari Russell | Managing Member & Co-Owner, Russell Tree Experts
Shari Russell graduated magna cum laude from The Ohio State University with a Bachelors in Landscape Horticulture and Cultural Anthropology. She is a member of the International Society of Arboriculture and has been a Certified Arborist since 2008. She is currently preparing for the June 2019 LSAT.