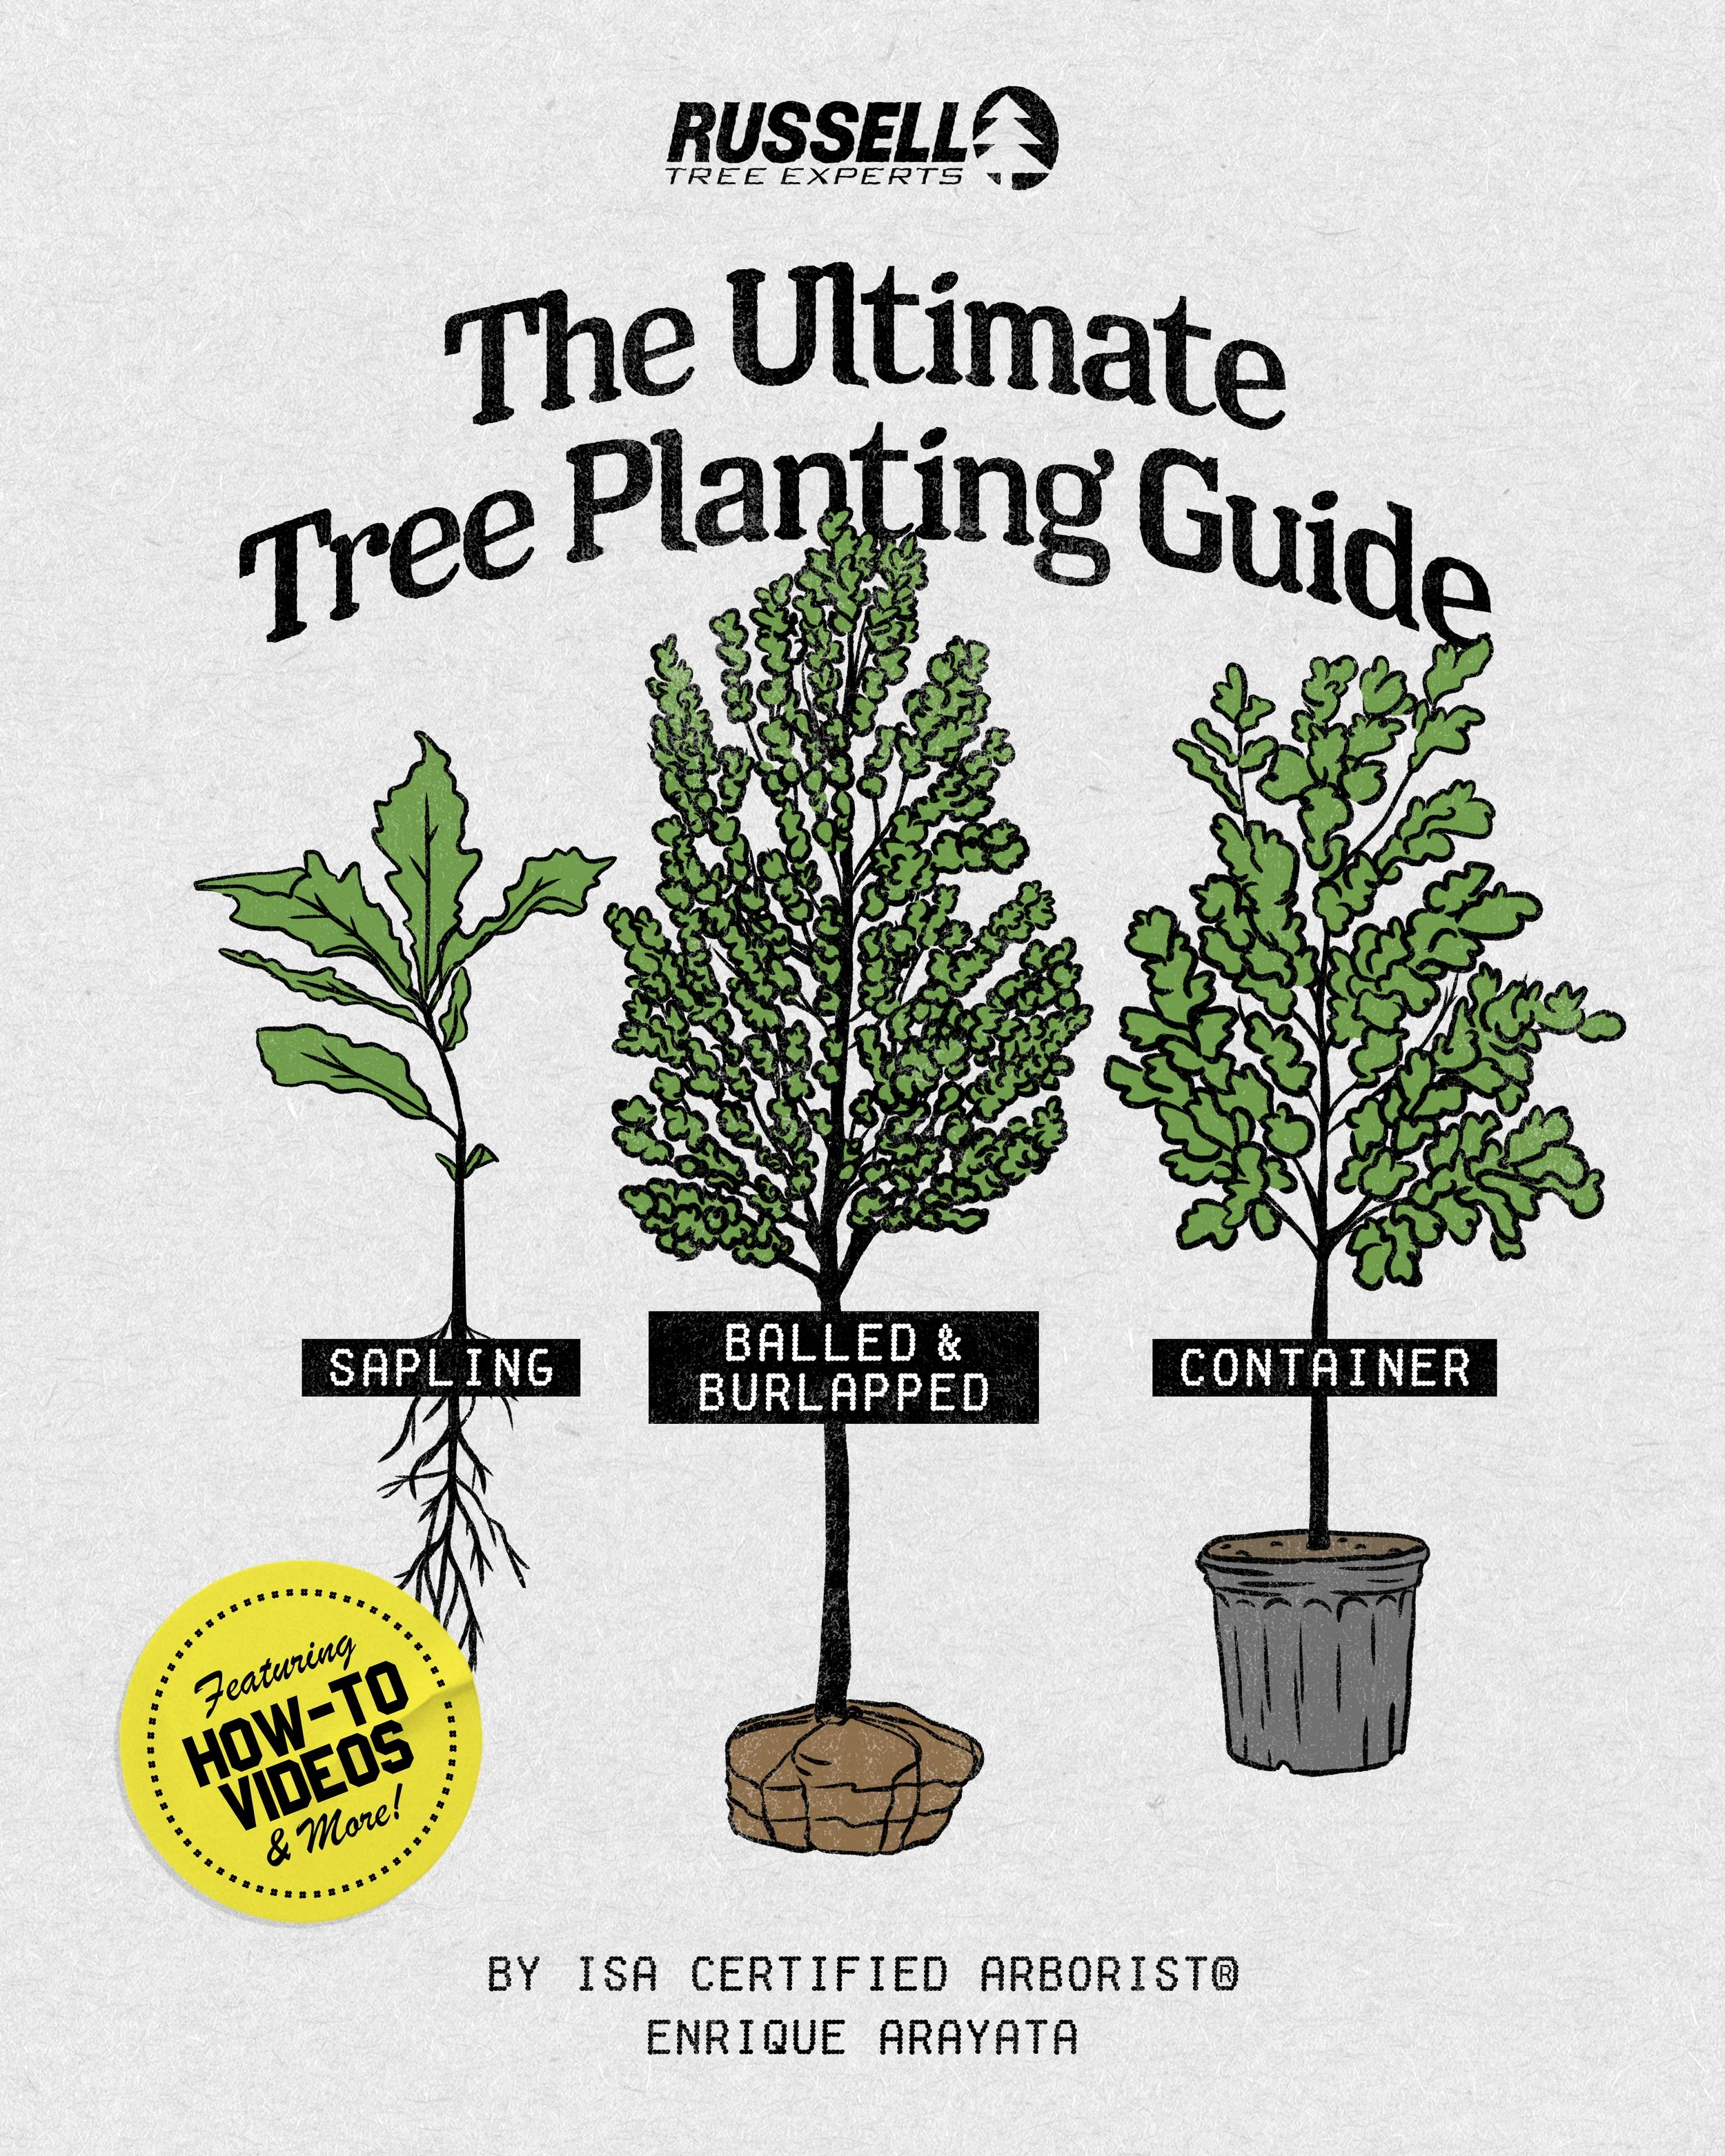
The ULTIMATE Tree Planting Guide!

By Enrique Arayata
ISA Certified Arborist® OH-7252A
May 29, 2025
- - - -
We’re in the middle of the growing season, which means tree planting time! There are generally 3 commonly sized trees: Tree saplings, container trees, and balled-and-burlapped trees! In today’s article we’ll be discussing how to best plant each of these 3 tree types. With the focus being on installation, we’re not going in-depth on tree selection, planting site selection, or post-installation watering, maintenance, and protection, but articles written by my fellow coworkers and ISA Certified Arborists® on all these supplemental topics will be linked further in this article!
The first 3 steps for planting any type of tree that I’ll briefly acknowledge but skip past will be to:
SELECT YOUR TREE PLANTING SITE! -> [More Info]
SELECT A TREE THAT’S COMPATIBLE WITH YOUR SELECTED PLANTING SITE!
NOTIFY YOUR LOCAL UTILITY PROTECTION SERVICE! Call before you dig! It might feel like an unnecessary hassle to begin with, but it’s free and a significantly smaller headache compared to hitting an underground line. In Ohio, it’s OUPS and can be contacted by visiting oups.org. Nationally, you can call 811 to speak with your local utility protection service company! -> [More Info]

Since a tree sapling’s root system is so small, bare root trees are the smallest, cheapest, and easiest trees to purchase and plant! Another benefit is that they will establish their roots to the planting site easier than a container or balled-and-burlapped tree, making it less susceptible to leaning or falling over during high winds compared to the other 2 tree types. Some disadvantages to consider are that it will take more time to reach full maturity, and they are harder to spot by a distracted lawn mower operator. Somehow both my dad and my uncle mowed over a tree sapling by accident.
Steps
SOAK YOUR TREE! Soak your tree sapling in water for 5-7 minutes to thoroughly moisten the sapling’s root system.
DETERMINE YOUR HOLE SIZE! Measure the sapling’s base of the root to its root flare (meeting point between the roots and the trunk) to determine the depth of your hole.
DIG YOUR HOLE! Your tree hole needs to only be as deep as the measurement between the root flare and bottom of the tree sapling’s roots. Regarding width, a 1 feet diameter circle is more than enough.
DOUBLE CHECK YOUR MEASUREMENTS! Double check your hole’s depth and width! Adjust if necessary. To test this, place your sapling in the hole and ensure that the root flare is equal to the surrounding soil level. Do not cover or bury the root flare. It should be above ground level.
PLACE YOUR TREE IN THE HOLE! Make sure the tree is straight and not leaning. Ensure that the root flare is visible at or slightly above ground level.
BACKFILL THE SOIL! Place the dug-up soil back into the hole. Lightly compact the soil as you begin to reach ground level. You can use your feet/shoes to compact the soil around the tree sapling. Optionally, a 2-4 inch layer of organic wood chip mulch is recommended for numerous reasons such as increased water retention, minimizing temperature fluctuations, increased trunk protection, having less grass to mow, and subjectively, improved aesthetics and curb appeal.
WATER THE TREE! Lightly water the soil (or mulch) around your tree to add moisture back into the surrounding ground. This is especially important when planting saplings in dry or summer-like conditions.
AND... DONE! Voila, your tree sapling has been installed!
Video

STEPS
DETERMINE THE SIZE OF YOUR HOLE! The hole should be a few inches wider than the tree’s pot, but 1-4 inches shallower than the height of the soil in the tree’s pot. This height difference is because it’s very common for a tree’s root flare (the boundary between the root and the trunk) to be buried in a nursery pot, which is no good. This will be addressed in an upcoming step. The overall shape of the hole should be half of a sphere with its deepest portion being in the middle.
DIG YOUR HOLE! If you’re digging next to grass and you care about your lawn, I would recommend placing your dug-up grass in a wheelbarrow or on a tarp.
DOUBLE CHECK YOUR MEASUREMENTS! Once you’re done digging, double check your work! Again, the hole should be a few inches wider than the tree’s pot, and the depth should be 1-4 inches below the soil’s height. Make adjustments if necessary.
Many of my fellow ISA Certified Arborists®, including myself, like to plant trees 1-3 inches above the surrounding ground level as trees commonly settle over the next couple of years. This is to also ensure that the root flare is exposed and not buried, which can cause stem girdling roots.
SLICE THE ROOT BALL 4 TIMES! Take the tree out from the pot and slide 4 straight, evenly distributed lines across the root ball every 90 degrees. This will break up and loosen both the dirt and roots which will help minimize the risk of stem girdling roots and encourage outward growth. Optionally, you can also clean up and remove any small or entangled surface roots.
TEST FIT YOUR TREE! Place your tree in the hole! Triple check that the hole’s shape, depth, width, and height is adequate. As mentioned earlier, if the root flare is 1-3 inches above ground level, this is perfectly fine as the soil will likely settle over time. Make adjustments if needed.
BACKFILL YOUR HOLE! It’s perfectly fine to use the existing, dug-up soil, but optionally, you can mix the dirt with a soil amendment like compost, manure, or topsoil in a 1:1 ratio to add more nutrients into the ground. If you want to save yourself some future weeding, I strongly recommend taking the time to remove any grass from the dug-up soil. As you’re backfilling, break up any chunks of dirt to obtain a fine, porous texture to improve water infiltration and gas exchange. Additionally, observe the tree’s lean or lack thereof to ensure that it is still straight and plumb. The tree can easily lean during the backfilling process. Compact the soil every couple of inches with your hands or feet to eliminate any large air pockets. You want to aim for a compaction level between large air pockets that you can hide your penny collection in, and construction-grade compacted soil where little air and water can transfer through.
I strongly recommend adding a 2-4 inch layer of organic wood chip mulch in a ring around the tree. The mulch should match the surrounding grade and not be piled into a mound or volcano-like shape. The radius can be as small as 2 feet wide or as wide as the canopy drip line (the farthest point that leaves or branches extend out to). There are numerous benefits such as reducing the risk of stem girdling roots, less resource competition with nearby grass and above-ground plants, increased water retention, minimizing trunk damage, soil decompaction, and subjectively, increased visual aesthetics and curb appeal.
WATER THE SOIL! You want the soil (or mulch) to be dark brown and saturated with water. Avoid any sitting or pooling water.
PRUNE YOUR TREE! Perform a few, minor pruning cuts. Look for any branches that are rubbing, crossing, or dead and prune them back to the base of a union.
REMOVE TAGS! If there are any tags on the tree and you haven’t removed them already, now’s the time to take them out!
AND VOILA, DONE! Congratulations, your new tree is now installed!
Video

STEPS
DETERMINE THE SIZE OF YOUR TREE HOLE! Measure your tree so you can determine the size of your hole. For a balled-and-burlapped tree, the International Society of Arboriculture (ISA) recommends a hole diameter 1.5 to 2 times larger than the diameter of the root ball. So, if for example your root ball is 3 feet wide, then a hole diameter of 4.5 to 6 feet is recommended. Regarding hole depth, it should be approximately as deep as the root flare of your tree. It is important to note that many balled-and-burlapped trees are already too deep within their own root ball and wire cage. Do not assume that the top of the root ball is the trunk flare. My experience is that more often than not, I have to remove a few inches of soil from above the trunk flare at the time of planting. Many of my fellow ISA Certified Arborist® coworkers and myself like to even plant the tree with the root flare 1-3 inches above ground level to compensate for the soil settling over time. The worst outcome would be for the root flare to be buried and/or below ground level. If the trunk flare is below grade, the tree will be planted too deep and will be more prone to stem girdling roots, reduced vigor, and will become more vulnerable to pests and disease. It is perfectly acceptable if the root flare is slightly above ground level and not perfectly in line with the surrounding grade.
DIG YOUR HOLE! This is definitely the most laborious step, so make sure you have water nearby and you take breaks as needed! Have a game plan for what to do with any dug-up soil and grass. One idea could be to place the top portion of grass into a yard waste bag and place the below-ground soil on a tarp or wheelbarrow. The nearby grassy lawn will thank you for not placing dirt directly on top of it.
DOUBLE CHECK YOUR WORK! Once you’re done digging, double check your measurements! Again, the hole should be 1.5 to 2 times wider than the root ball’s diameter and the depth in the center should be the measurement from the bottom of the root ball to the tree’s root flare. You can be 1 to 3 inches below this measurement in order to ensure that the tree is planted with or slightly above the surrounding grade. Make adjustments to your hole if needed.
TEST FIT YOUR TREE! Place your tree in the center of the hole. Make sure it’s stable before letting go and taking a step back. You can backfill a tiny portion of soil and tamp it against the root ball with your feet. Trust me, I’ve seen a few trees fall down and have broken limbs during this step. After the tree is standing upright in the hole, verify it is positioned correctly: centered, upright and plumb, and at a height where the trunk flare is at or slightly above the surrounding grade. Make adjustments to your hole if necessary. You may or may not have to take the tree of out of the hole.
STABLIZE YOUR TREE! If you’re satisfied with the general shape of your hole and with the general placement of your tree, stabilize your tree a little more to prepare for the next step. Backfill some of the dug-up soil to the bottom of the root ball and tamp it down with your feet once more until the tree feels relatively secure and in-place. The tree may move during this, so when you’re finished, triple check your work and make adjustments if necessary.
REMOVE THE TWINE, TOP 1/3 OF BURLAP, AND TOP 1/3 OF WIRE CAGE. Remove the twine around the trunk, remove the top third of the burlap and remove the top third (approximately) of the wire cage. The purpose of removing these materials is to prevent damage to the trunk and buttress roots as they grow over time. Removing the twine, burlap and wire cage is the subject of much debate amongst landscape contractors, tree producers, and arborists. In an effort to be brief, my recommendation to remove the top third of the wire cage, the exposed burlap (approximately the top third), and the twine is a balance between ensuring root ball stability, new tree survivability, and planning for the long term health of the tree over the next hundred years. There may be some instances, like planting new evergreen trees in exposed/windy sites where it may be acceptable to leave the entire wire cage, burlap and twine intact for one full growing season before returning to remove it later. You will likely need some type of wire cutter or saw to remove a portion of the wire cage, so be sure to wear proper PPE including safety glasses and gloves! This step is also an annoying opportunity for the tree to shift around, so quadruple check the tree’s placement and make adjustments if necessary once you are done!
Optional: If you’re planting a tree in summer or drought-like conditions, I would recommend watering the hole to add moisture back into the soil. You only need to add enough water to turn the soil dark brown, avoid any pools of water.
BACKFILL THE SOIL! You can use only the dug-up soil if you’d like, but you can also optionally mix in a 1:1 ratio of dug-up soil and soil amendments such as compost, manure, or topsoil. It’s your choice and the level of necessity will vary from planting site to planting site. If you want to reduce resource competition for the tree and save yourself some weeding, you can filter out any grass you find during this process. As you’re backfilling, lightly tamp the soil to remove air pockets with your hands or feet but be careful not to overly compact soil as pore space is needed for water and oxygen. You don’t want air pockets where you can hide your penny collection, but you also don’t want construction-grade compacted soil.
MULCH AROUND THE TREE! Apply a 2-4 inch layer of organic wood chip mulch in a circular ring around the trunk of the tree. The width can vary from options such as 1 foot wide, as wide as the dug-up grass, or as wide as the canopy drip line of the tree (the farthest point that leaves or branches extend out to). Avoid covering the root flare of the tree. The mulch should match the surrounding grade of the planting site and not be mounded up in the shape of a volcano. Mulch does a great job of retaining moisture around newly planted trees in addition to reducing competition from weeds, regulating soil temperatures, reducing soil compaction and adding nutrients to the soil. Linked is my previous ARBOR ED™ article on how to create a tree mulch ring including all of its benefits!
WATER AROUND YOUR TREE! Watering a newly planted tree correctly is as important as selecting the right tree. Watering is the single most important maintenance factor in the establishment and success of planting a new tree. The best way to water a tree is slowly and deeply so that water is trickling down into the root ball of the tree and not washing away into the lawn. A newly planted balled-and-burlapped tree should be watered at the time of planting and then once a week until temperatures are consistently below freezing. Watering in this same fashion should resume when the tree breaks dormancy and leafs out the following spring. It generally takes 2 - 3 growing seasons before a balled-and-burlapped tree is established and can fend for its own water. Establishment could take longer with larger trees. For more information on watering, see my coworker, ISA Board Certified Master Arborist® TJ Nagel’s ARBOR ED™ article on proper tree watering!
PRUNE YOUR TREE! If a tree could only be pruned once in its life, pruning at planting is the time to do so. The overall goal of pruning at planting is to improve the structure of the canopy, to remove crossing and broken limbs, or to reduce/remove upright limbs that might be competing to be the central dominant leader. Note: It is equally important not to over-prune a newly planted tree, as having the appropriate amount of leaf area in the canopy next season is essential to maintaining good health and vigor.
REMOVE TAGS AND ENJOY YOUR TREE! Your new tree is now planted! Enjoy it! If there are any tags on the tree and you have not already removed them, you can remove them now!
OPTIONAL: PROTECT YOUR TREE! Protect your tree from mechanical damage. This step may not be necessary for every newly planted tree. If you live in an urban area without deer and have large, generous planting beds free of turf, you can likely skip this step. When planting in rural areas, TJ often recommends using some sort of deer protection to protect the trunk of trees until they have surpassed 8-10 inches in diameter. You can use a 4-foot-tall wire fencing cut into a 7-8-foot length and then then wrap it around the tree. In addition to protecting the trunk, the fencing also makes it more difficult for deer to feed on lower limbs. Trunk guards or corrugated drainpipe can also work to protect tree trunks, but they must be removed before the heat and humidity of the summer. I also recommend trunk protection for folks that have trees in areas where turf is tightly managed with large, fast-moving mowers and string trimmers.
Video
In Conclusion…
Now that your tree has been planted, the next, most important step will be to properly water it! Watering can vary drastically based on tree size and season. If I had to best explain it in 1 sentence, it would be to water a tree slowly through some type of drip irrigation system (such as a tree watering bag, low pressure hose, or watering bucket) in the morning or evening (to minimize evaporation) anywhere from every day to every other day (depending on the season and amount of sunlight the tree receives daily). Other maintenance recommendations that can be optional or highly recommended depending on the tree and planting site would be to create a tree mulch ring (if you have not done so already), add deer protection, and/or stake the tree! Below are articles on some of these mentioned topics!
ADDITIONAL ARBOR ED™ ARTICLES!


Enrique Arayata I Media Production Manager, Russell Tree Experts
Enrique is an ISA Certified Arborist® and FAA Certified Remote Pilot. In his free time, he enjoys working out, hanging out with his family and girlfriend, video production, photography, cars, technology, and cooking. Enrique has a BA in moving image production with a double minor in film studies and studio art specializing in photography from The Ohio State University, and an AA in web graphic design from DeVry University. His favorite tree is the Kwanzan cherry tree.
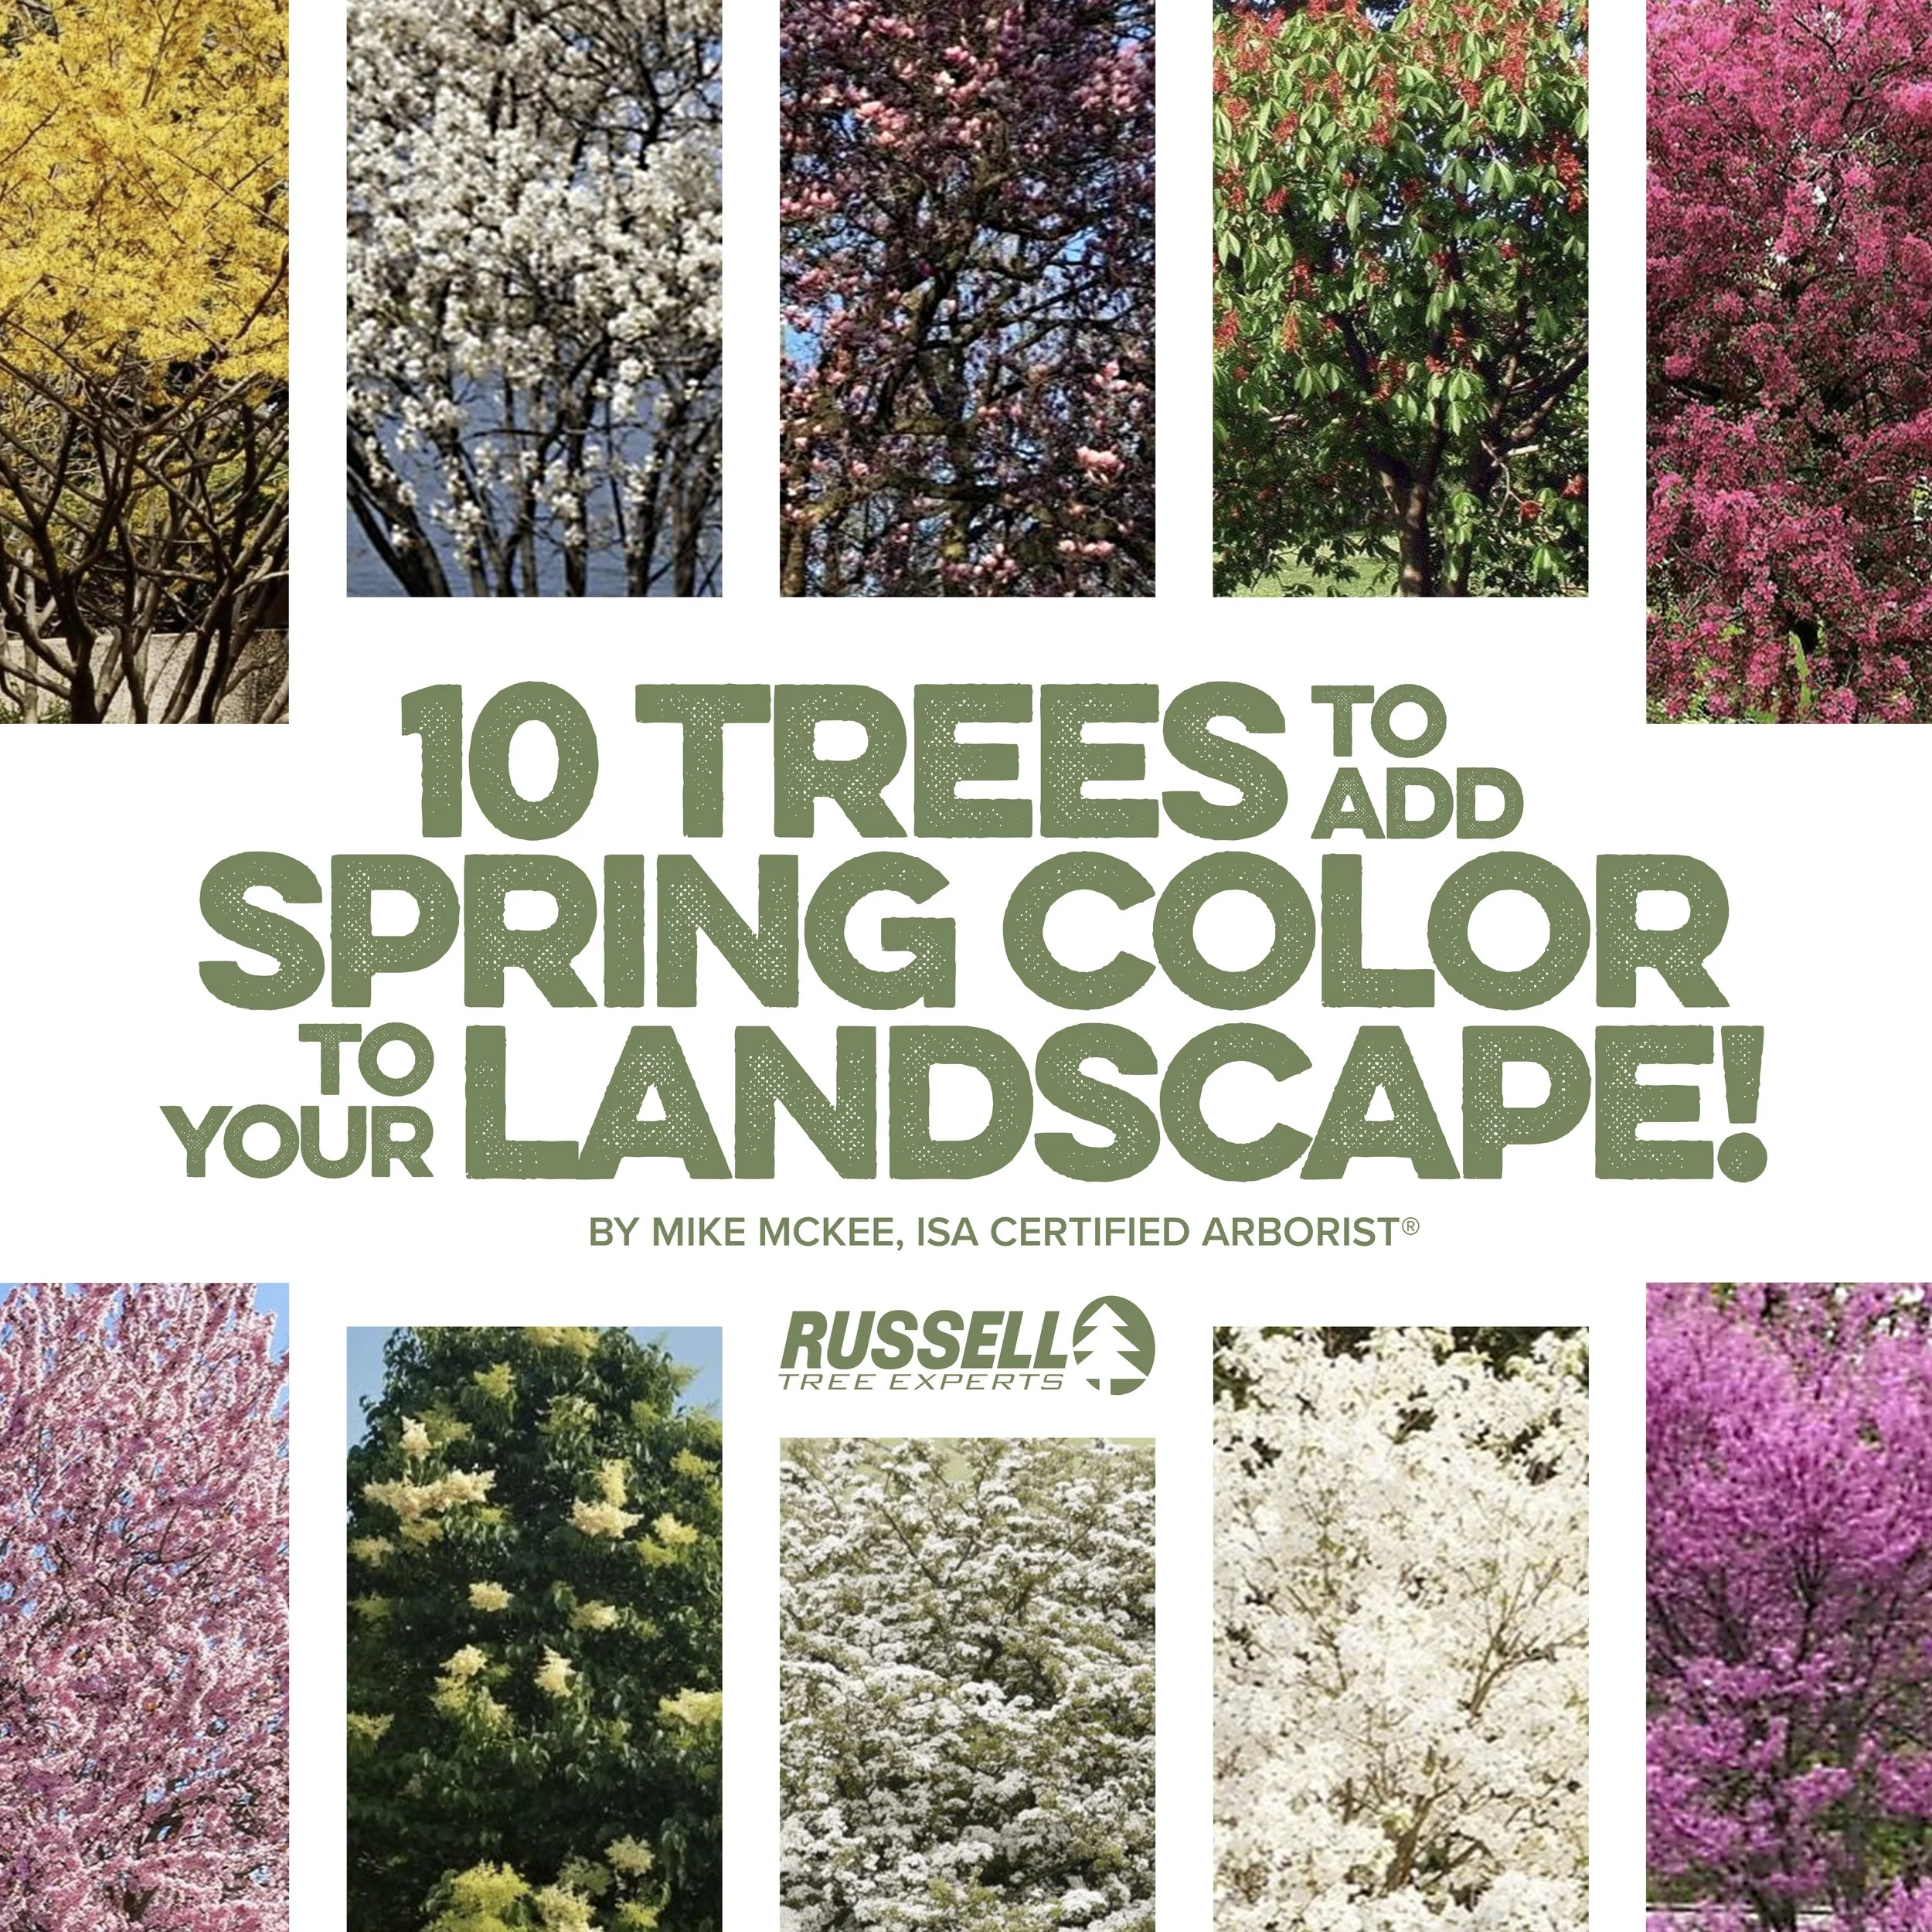
10 Trees to Add Spring Color to Your Landscape!

By Mike McKee
ISA Certified Arborist®
April 17, 2025
Flowering trees can be a great addition to any landscape. There is an unlimited range of options to add that splash of color to your property. The list is very large so I will pick 10 of my favorites that I have planted over my 35+ year career as an ISA Certified Arborist®. Flowering trees not only add a variety of colors, but additionally fragrance and many environmental benefits to pollinators, birds, and more! The timing of the blooms can be spread over several months with proper selections. There are many options among these genera, but I will concentrate on my favorites and best performers. The trees discussed in this article will stay in the small-to-medium size range.
Red Buckeye
I will start with one of my personal favorites, the red buckeye. Blooming in the April to May timeframe, this tall red blossom display is hard to beat in your landscape. This ovular shaped tree will produce red upright panicles that average 4 to 8 inches in length. This will make for a great specimen tree in your yard! If you’re an Ohio State fan, they will eventually produce buckeyes as well!
Common Name: Red Buckeye
Scientific Name: Aesculus pavia
Mature Height: 10 to 20 feet
Mature Width: 10 to 20 feet
Sun Preference: Partial to Full Sun
Spring Foliage Color: Green leaves with red flowers
Other noteworthy characteristics: Brown buckeye nuts. Brown leaves in the fall.
2. Flowering Dogwood
Dogwoods can be one of the most popular trees in central Ohio landscapes. There are many varieties which cover a wide color spectrum, mainly whites, yellows, pinks, and even some reds. These are also trees that can have all season interest due to their bark character, showy fruit, and vibrant fall color display. Cornelian cherry dogwood will be one of the first trees to bloom in the spring with small yellow flowers, but the species I prefer is flowering dogwood with its white spring bracts.
Common Name: Flowering Dogwood
Scientific Name: Cornus florida
Mature Height: 15 to 30 feet
Mature Width: 15 to 30 feet
Sun Preference: Partial to Full Sun
Spring Foliage Color: Green leaves in the spring with white flowers.
Other Noteworthy Characteristics: Red to purple fall color. Persistent red fruit in the winter.
3. Okame Cherry
Another of my favorite early flowering trees would be the Okame cherry. This tree typically blooms in March with vibrant pink flowers. This too is a compact tree that should stay under 25 feet tall. This tree was made famous with its display in Washington DC. It has a mild fragrance and attracts many pollinators.
Common Name: Okame Cherry
Scientific Name: Prunus x okame
Mature Height: 15 to 25 feet
Mature Width: 15 to 20 feet
Sun Preference: Full Sun
Spring Foliage Color: Pink flowers
4. Allegheny Serviceberry
Another tree with all season appeal would be the serviceberry. There are a few species and many cultivated varieties of serviceberry, but I prefer the Allegheny serviceberry. It produces early spring white flowers followed by edible fruit and finally, brilliant fall color!
Common Name: Allegheny Serviceberry
Scientific Name: Amelanchier laevis
Mature Height: 15 to 25 feet
Mature Width: 15 to 25 feet
Sun Preference: Partial to Full Sun
Spring Foliage Color: Green leaves with white flowers
Other Noteworthy Characteristics: Reddish orange fall color
5. PRAIRIFIRE CRABAPPLE
The crabapple is another longtime favorite among central Ohio landscapes. There are more varieties than I can count so I will just list a few of my favorites. If you are looking for white flowers, you cannot go wrong with Adirondack. My favorite pink choice would be prairiefire, with strawberry parfait coming in a close second.
Common Name: Prairifire Crabapple
Scientific Name: Malus x ‘Prairifire’
Mature Height: 15 to 20 feet
Mature Width: 15 to 20 feet
Sun Preference: Full Sun
Spring Foliage Color: Spring maroon leaves with pink flowers
Other Noteworthy Characteristics: Green leaves with red veins in the summer, bronze leaves in the fall

©Russell Tree Experts
6. Saucer Magnolia
Next on my list are magnolias. Once again, there are too many varieties to list, but the longtime favorites are the saucer magnolia, which has pink flowers, and the star magnolia which has white flowers. The saucer magnolia typically blooms around late March to early April and puts on quite the show! If you are looking for fragrance, make sure you add a sweetbay magnolia to your landscape!
Common Name: Saucer Magnolia
Scientific Name: Magnolia x soulangeana
Mature Height: 25 to 30 feet
Mature Width: 25 to 30 feet
Sun Preference: Partial to Full Sun
Spring Foliage Color: Green leaves with pink flowers
7. Eastern Redbud
Another early blooming favorite that is being produced with several new cultivated varieties is the eastern redbud! They are being developed with a variety of leaf colors, variation in bloom color, and growth habit as well, such as weeping. A classic selection that you cannot go wrong with is the straight species of eastern redbud with its beautiful pinkish purple flowers in the spring! This is the early flowering tree that is often seen along the edge of the woods in natural areas as well as in many landscapes. It flowers at a similar time as magnolia trees but is less likely to be damaged by freezing temperatures and Ohio’s wishy-washy weather.
Common Name: Eastern Redbud
Scientific Name: Cercis canadensis
Mature Height: 20 to 30 feet
Mature Width: 25 to 35 feet
Sun Preference: Partial to Full Sun
Spring Foliage Color: Dark green heart-shaped leaves with pinkish purple leaves
8. Washington Hawthorn
One of the later bloomers in the spring would be the Washington Hawthorn. This is another tree that can have all season interest with the white flowers, fragrance, red fruit, and fall color, making this a great selection for your landscape. Its abundant red fruit supports many pollinators, birds, and more!
Common Name: Washington Hawthorn
Scientific Name: Crataegus phaenopyrum
Mature Height: 25 to 30 feet
Mature Width: 15 to 25 feet
Sun Preference: Full Sun
Spring Foliage Color: Green leaves, white flowers, and red fruit
Other noteworthy characteristics: Orange and scarlet leaves in the fall
9. IVORY SILK JAPANESE TREE LILAC
Next on this list is the ivory silk tree lilac. This is a plant that produces a creamy/white plume, usually long after other trees have bloomed.
Common Name: Ivory Silk Japanese Tree Lilac
Scientific Name: Syringa reticulata
Mature Height: 20 to 30 feet
Mature Width: 15 to 25 feet
Sun Preference: Full Sun
Spring Foliage Color: Dark green leaves with creamy white plumes
Other Noteworthy Characteristics: Golden to bronze fall color. Cherry-like bark that is attractive in the winter.
10. American Witch Hazel
Last (or first) on this list is witch hazel! Some witch hazels bloom in early spring such as Jelena and vernal witch hazel, but a personal favorite (and classic) is the American witch hazel. This plant blooms in the fall with beautiful yellow color that persists into winter, sometimes up to early spring.
Common Name: American Witch hazel
Scientific Name: Hamamelis virginiana
Mature Height: 15 to 25 feet
Mature Width: 15 to 25 feet
Sun Preference: Partial to Full Sun
Spring Foliage Color: Green leaves that turn yellow in the fall and winter
This is just a small list of trees that could add a splash of color to your landscape. With a little research and planning, you can have color, fragrance, fruit, and other interesting characteristics throughout the year! Choose wisely and plan for the mature size of your plants when making selections and picking planting locations.
Please review our other articles on planting, mulching, watering, and other related topics before adding additional trees to your landscape in the coming year. For a free tree quote by one of our 20+ ISA Certified Arborists®, visit RussellTreeExperts.com/Quote or speak with our friendly, local office staff at (614) 895-7000!
ADDITIONAL ARBOR ED™ ARTICLES!


Mike McKee | Regional Manager, Russell Tree Experts
Mike graduated from Hocking College in 1983 with a degree in Natural Resources specializing in urban tree care. He has been an ISA Certified Arborist® since 1991. Mike started his career in the private industry in 1985 before becoming a municipal arborist in 1989. He retired after serving thirty years before joining us at Russell Tree Experts in September 2018. His love of trees has never waned since trying to climb up the ridges of the massive Cottonwood tree in front of his childhood home.
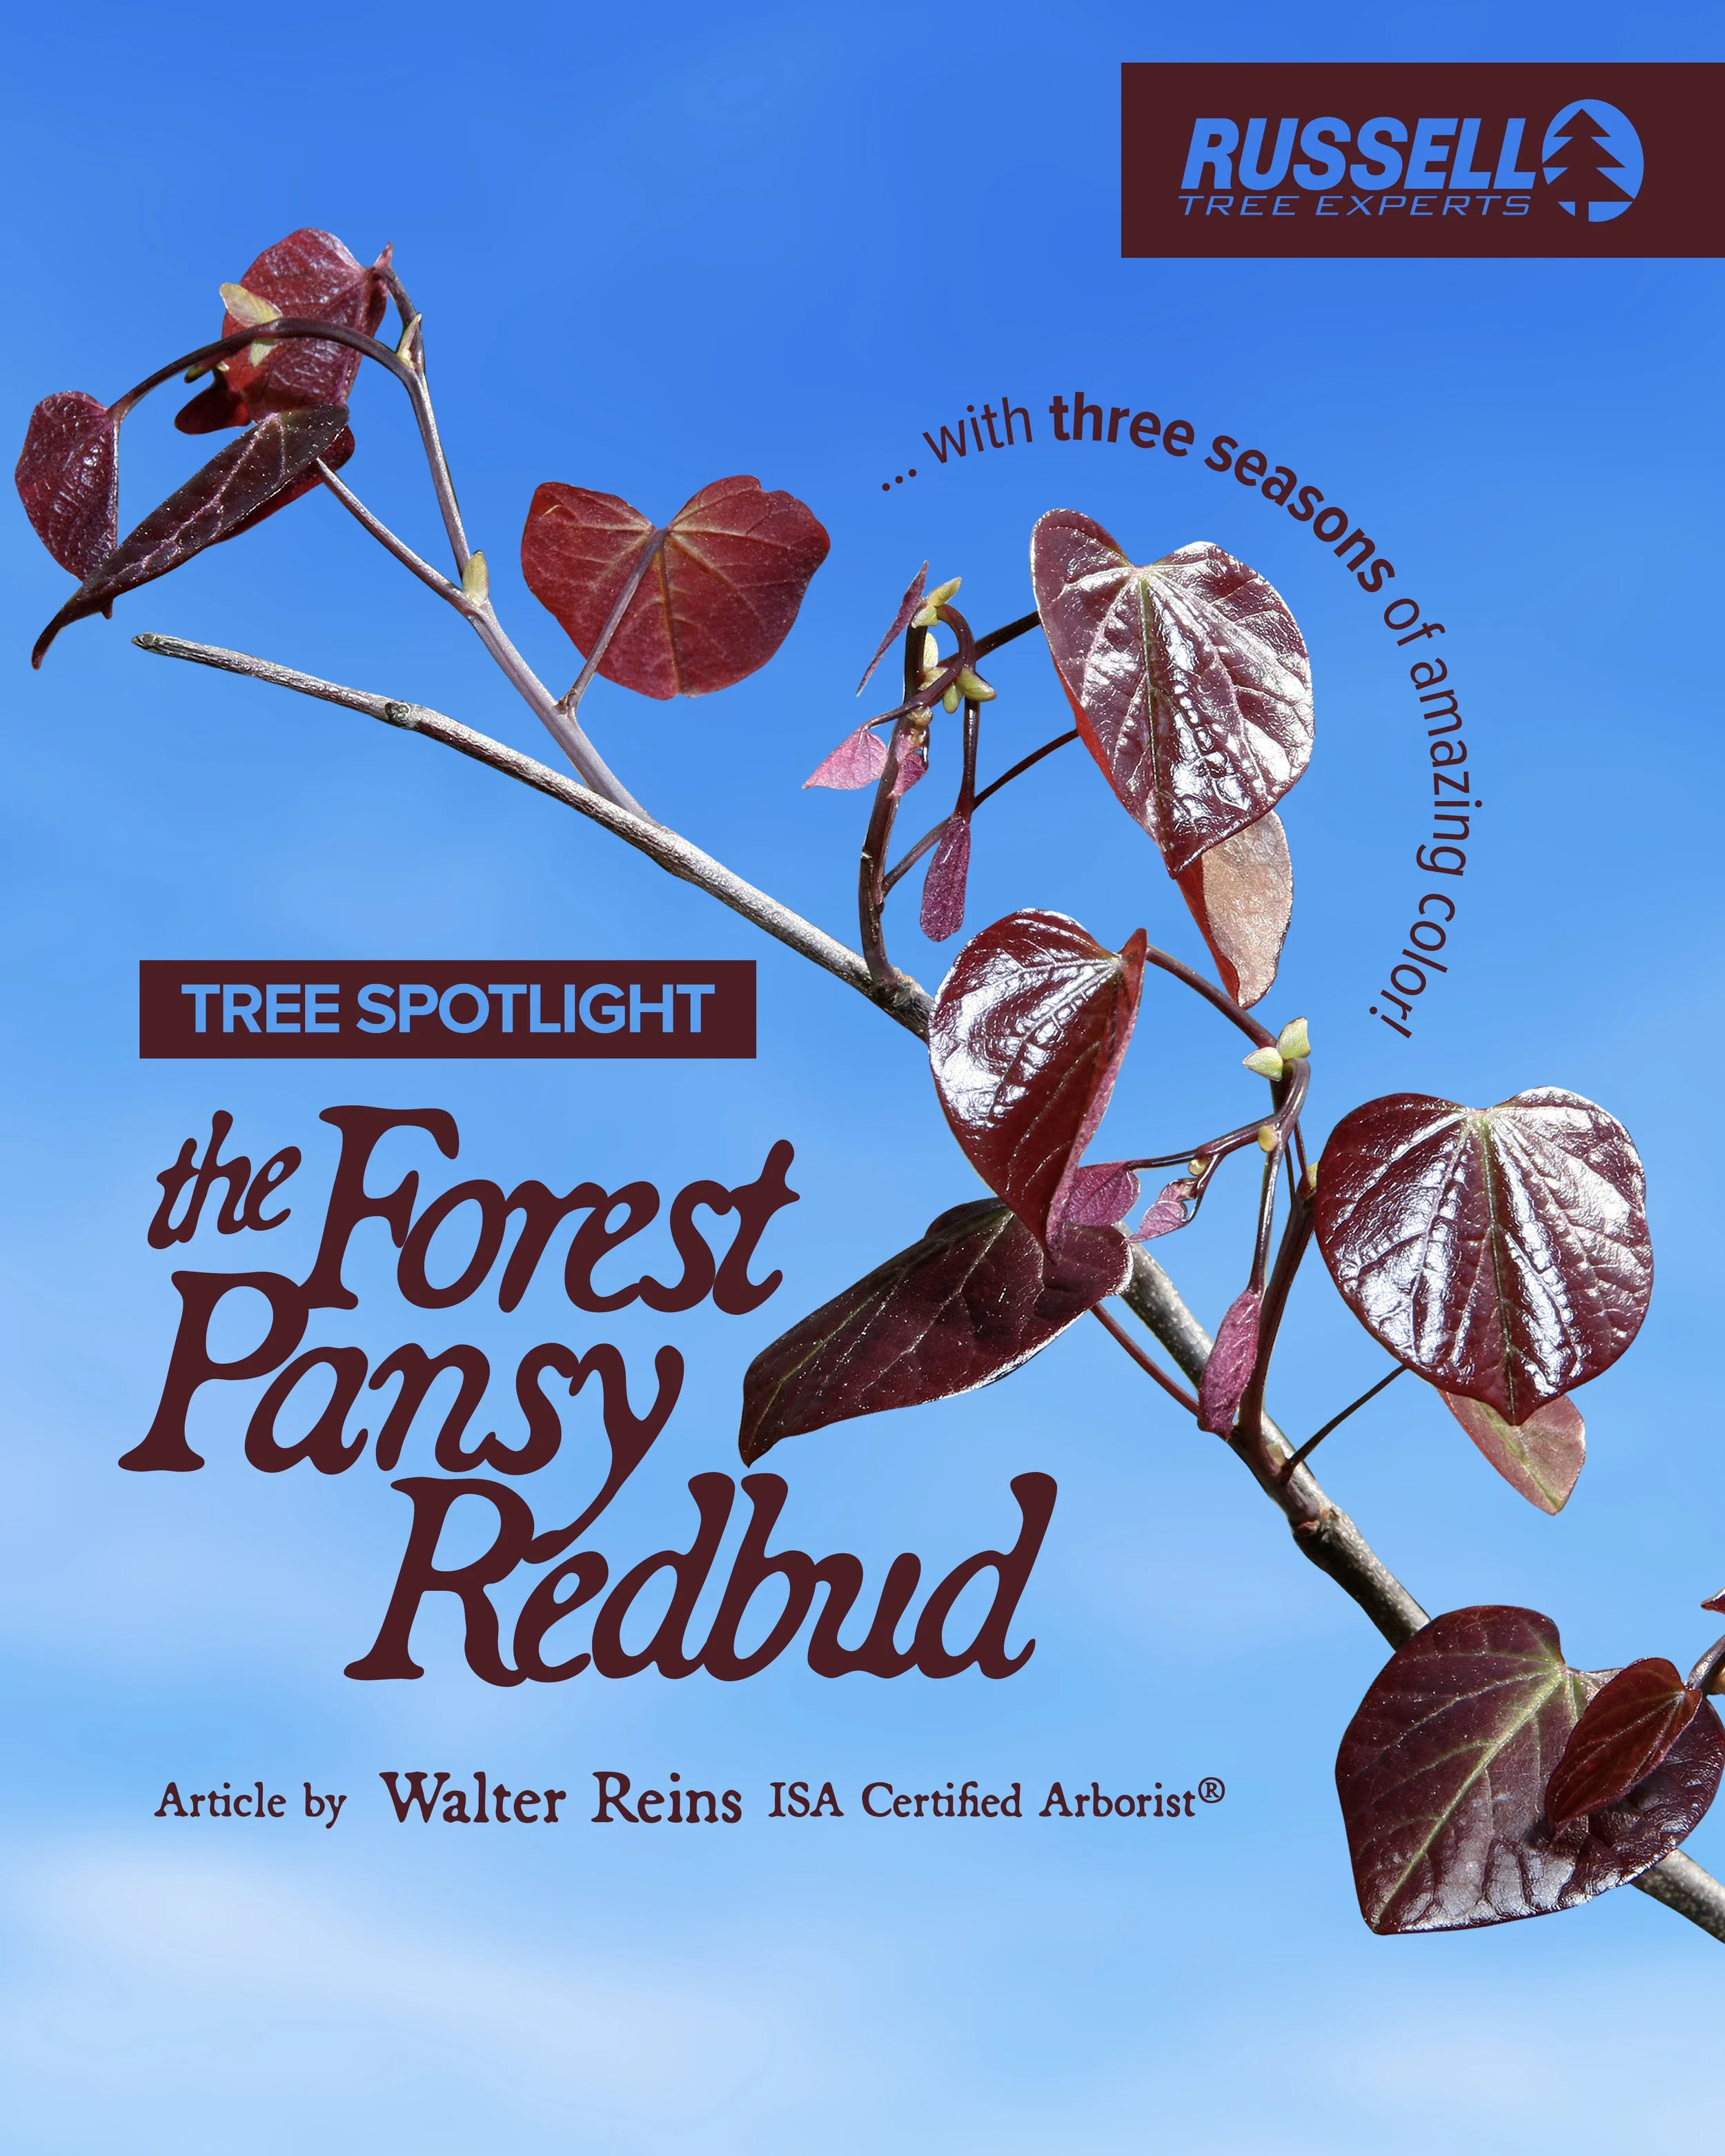
The Forest Pansy Redbud!

By Walter Reins
ISA Certified Arborist® OH-5113A
April 10, 2025
In our Ohio landscapes, we have several common options for planting trees that reach a small-to-medium size in maturity, including magnolias, crabapples, cherries and Japanese maples. Another tree that fits that size category and is commonly found in many landscapes is the eastern redbud (Cercis canadensis). Redbuds are known for their beautiful display of flowers in the early spring, typically before leaves fully emerge. But while the flowers grab our attention, the foliage could be considered fairly typical and undistinguished. One variety of redbud that can stand out for both its flowers and foliage is the forest pansy redbud (Cercis canadensis ‘Forest Pansy’)! Let's take a closer look at this tree and why it might be a great option for your landscape!
The forest pansy redbud is a cultivar (cultivated variety) of eastern redbud. Cultivars, incredibly common among many of our landscape plants from trees to shrubs to perennials, are versions of plants that are not commonly found in nature. This can be a different color of flower, variegated foliage, lack of fruit production, difference in shape or habit, or many other characteristics. In the case of the forest pansy redbud, the striking difference from the normal species is the foliage color. The forest pansy redbud’s leaves emerge in the spring with a purple to burgundy color. As summer approaches and the foliage matures, the color of the leaves can deepen to a dark reddish-purple. In autumn, as the color pigments of the foliage break down, rich yellows and golds appear and contribute to the beauty of the transitioning landscape. As with the normal species of eastern redbud, the forest pansy cultivar also has the much loved clusters of pinkish flowers that emerge directly from the stems prior to the leaves emerging in spring, giving us an early display of color when many other plants still appear to be dormant.
Forest pansy redbuds are hardy in USDA zones 5-9, making them a good choice for Ohio. They are generally tolerant of less than ideal soil conditions, but like most trees, prefer some initial amending of the soil if needed for proper soil pH, nutrients, and drainage, as well as ongoing addition of leaf compost or supplemental fertilization for optimal growth. The red pigments in the leaves will be deeper and richer with ample sunlight, so while the tree can tolerate a semi-wooded or shadier setting, substantial shade can create leaves that take on more of a green appearance (as a fun side note - this correlation between sunlight and richness of color generally applies to most plants with variegated or colored foliage!).

©Russell Tree Experts
Forest pansy redbud info card at Oakland Nursery
The forest pansy redbud is typically free of pests and diseases when properly planted and located in the landscape. It has a mature height of 20 to 25 feet and a mature crown spread of 15 to 20 feet. This makes it a good candidate for planting in front and backyards, where it can grow large enough to provide some shade to a front walkway, south facing window, or backyard patio, but stays small enough to not overtake a home or outcompete adjacent lawn areas or landscape beds for sunlight and water. Because of its striking foliage throughout the growing season, it makes a wonderful specimen tree or focal point in the landscape when planted singly, rather than in groupings.
The forest pansy redbud tree can be a great option for your landscape if you’re looking for a medium sized tree that’s tolerant of a wide range of conditions. As always, proper planting is essential for the long term health and success of any tree. Contact us if you need any guidance, referrals, or recommendations for proper tree planting, including species selection, location, and site requirements. And as always, for a free tree work quote by one of our 20+ ISA Certified Arborists®, visit RussellTreeExperts.com/Quote or speak to our friendly, local office staff at (614) 895-7000!
ADDITIONAL ARBOR ED™ ARTICLES!


Walter Reins I Regional Manager, Russell Tree Experts
Walter became an ISA Certified Arborist® in 2003 and has a degree in landscape horticulture. He has 25 years of experience in the tree and landscape industries and originally began working at Russell Tree Experts in 2011. Walter is also the owner/operator of Iwakura Japanese Gardens, a small design/build/maintenance firm specializing in Japanese-style gardens, and also offers responsible tree planting for all landscapes.
Rhizosphaera Needle Cast: Causes, Symptoms, and Management

By Mike Wilson
ISA Certified Arborist® OH-6806A
April 2, 2026
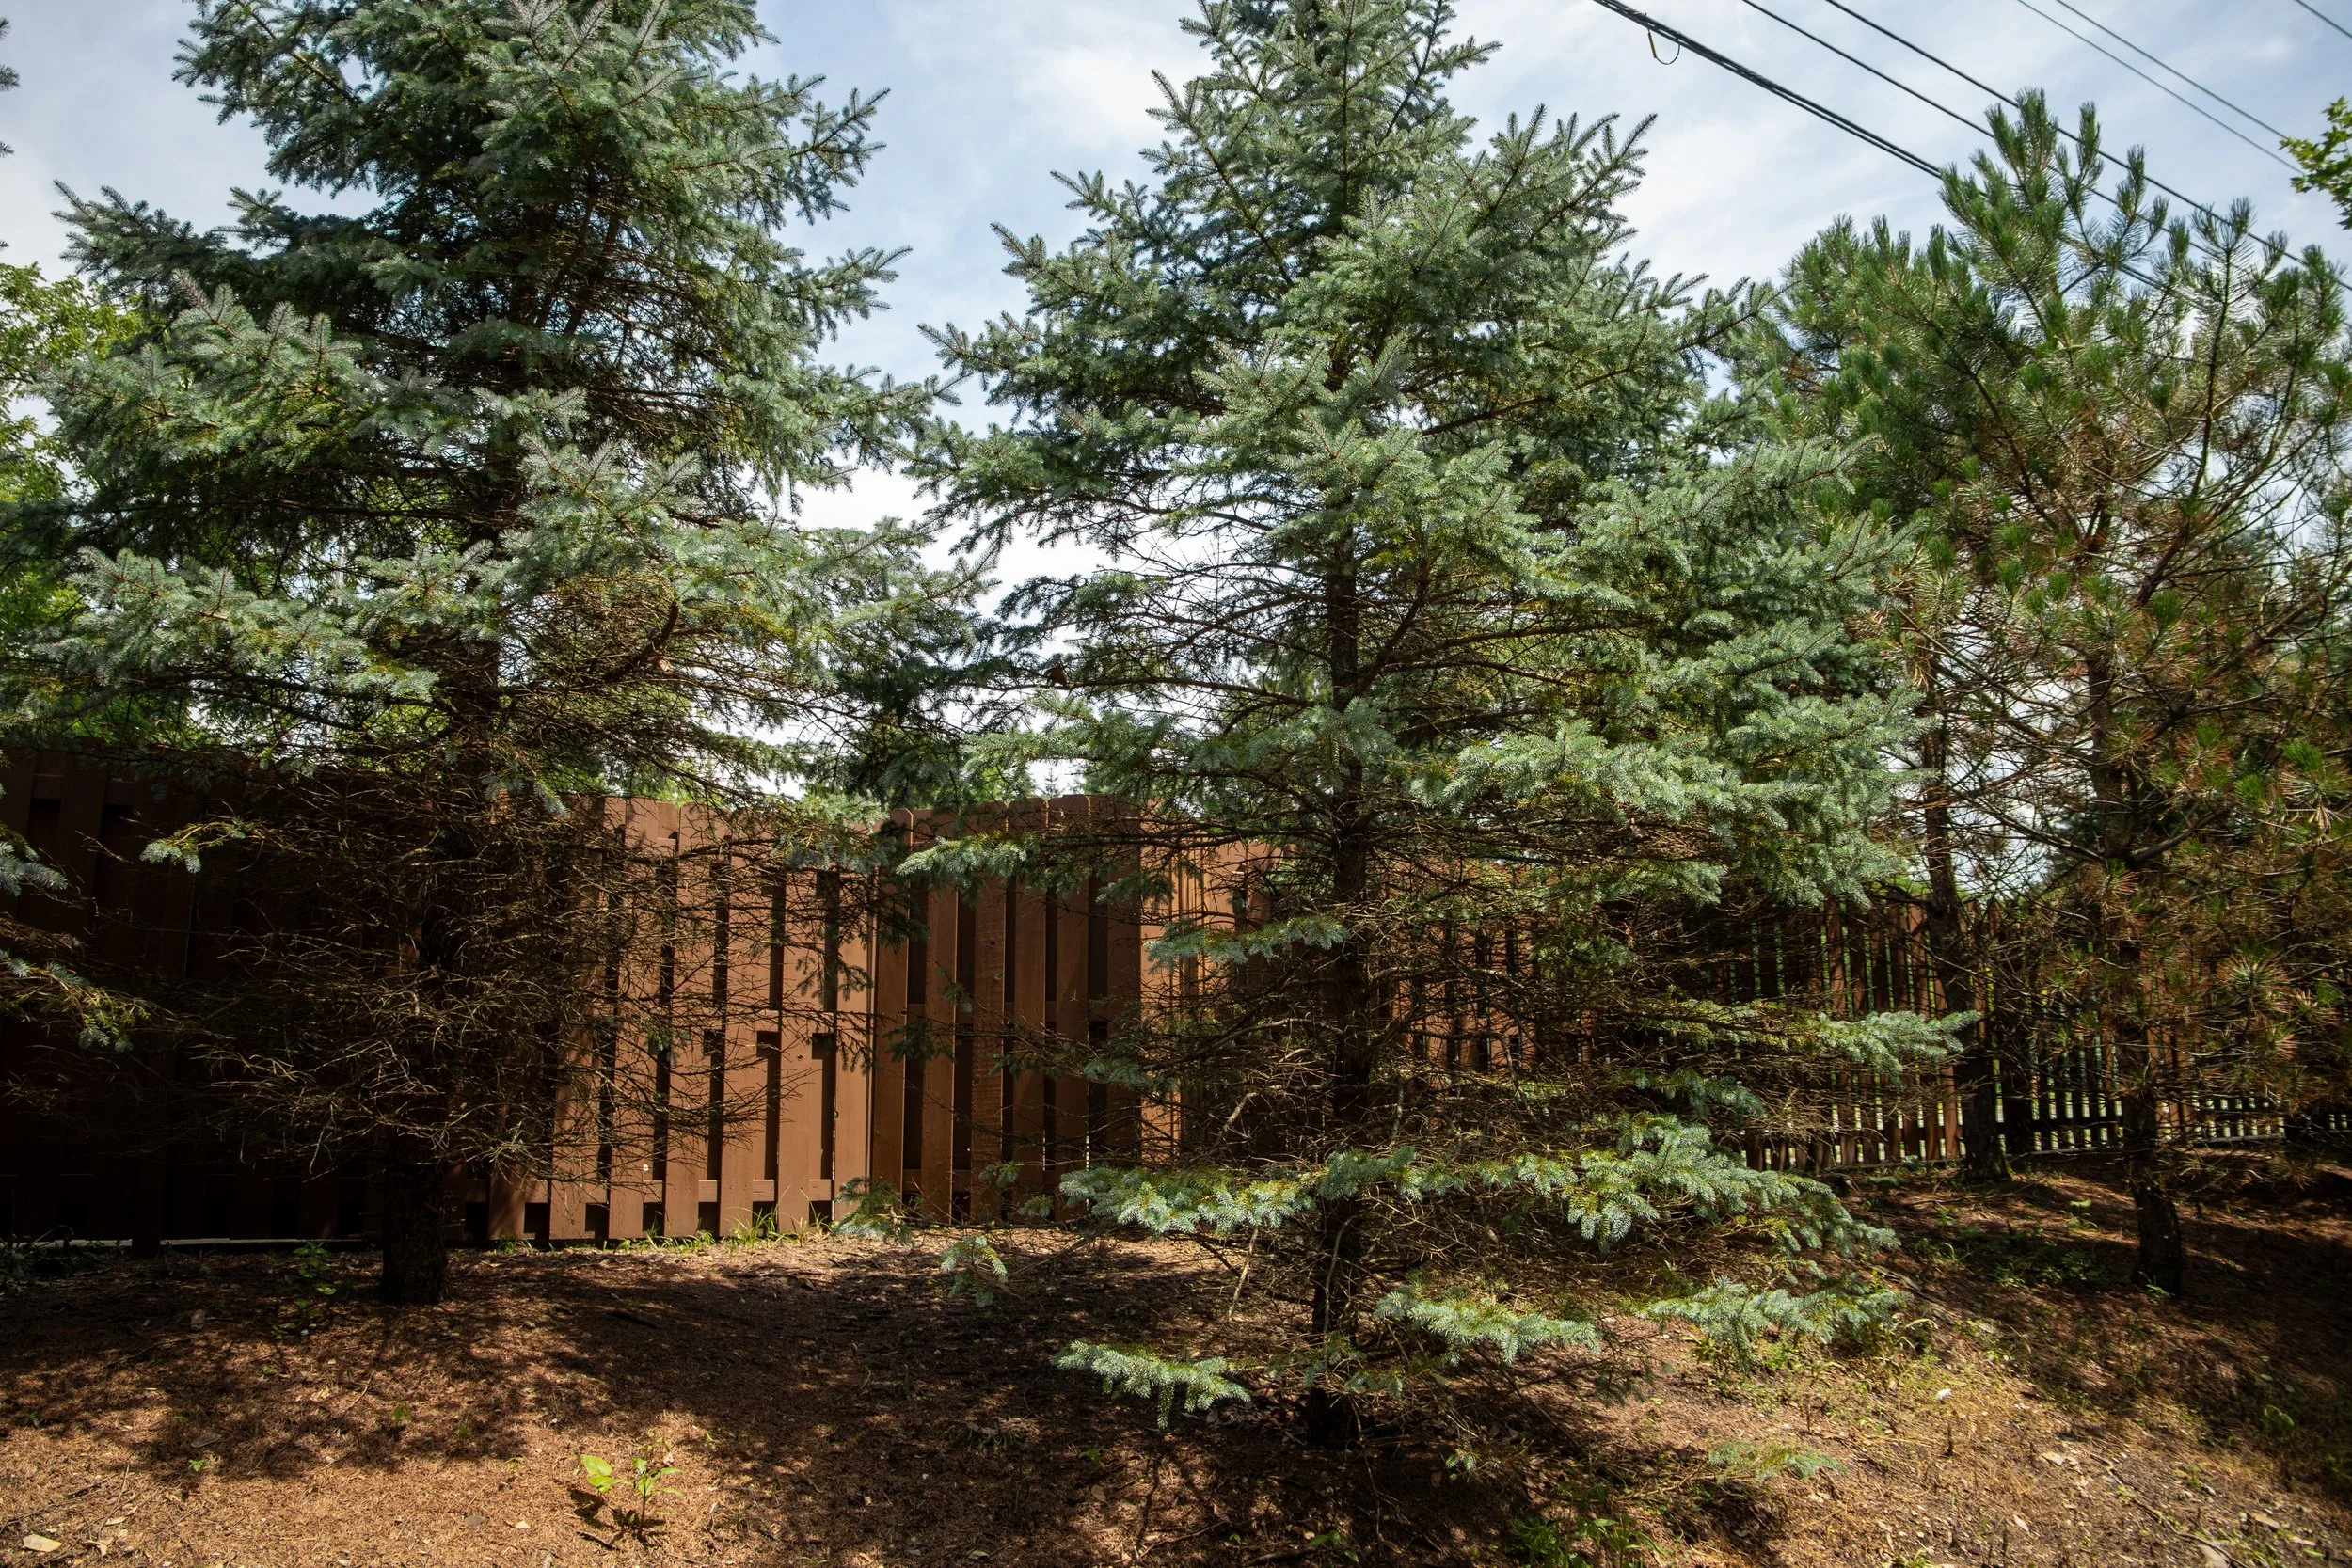
Rhizosphaera needle cast is a fungal disease that affects various species of coniferous trees, particularly spruces throughout central Ohio and the midwest, and has become increasingly common. This disease can cause significant damage to tree health and aesthetics if left untreated. Understanding its causes, symptoms, and management strategies is crucial for preventing its spread and minimizing its impact on host trees in your landscape. Rhizosphaera needle cast, or needle cast for short, is primarily caused by the fungus Rhizosphaera kalkhoffii. This fungus thrives in humid and wet conditions, which Ohio is seeing more and more of now. Spores of the fungus are spread through water splash, wind, and contaminated pruning tools, facilitating its transmission from infected to healthy trees. Colorado blue spruce trees (Picea pungens) is especially vulnerable due to the fact that they much prefer dry, arid environments like in Colorado and Utah.
©Russell Tree Experts
Symptoms
Example of needle dropping
©Russell Tree Experts
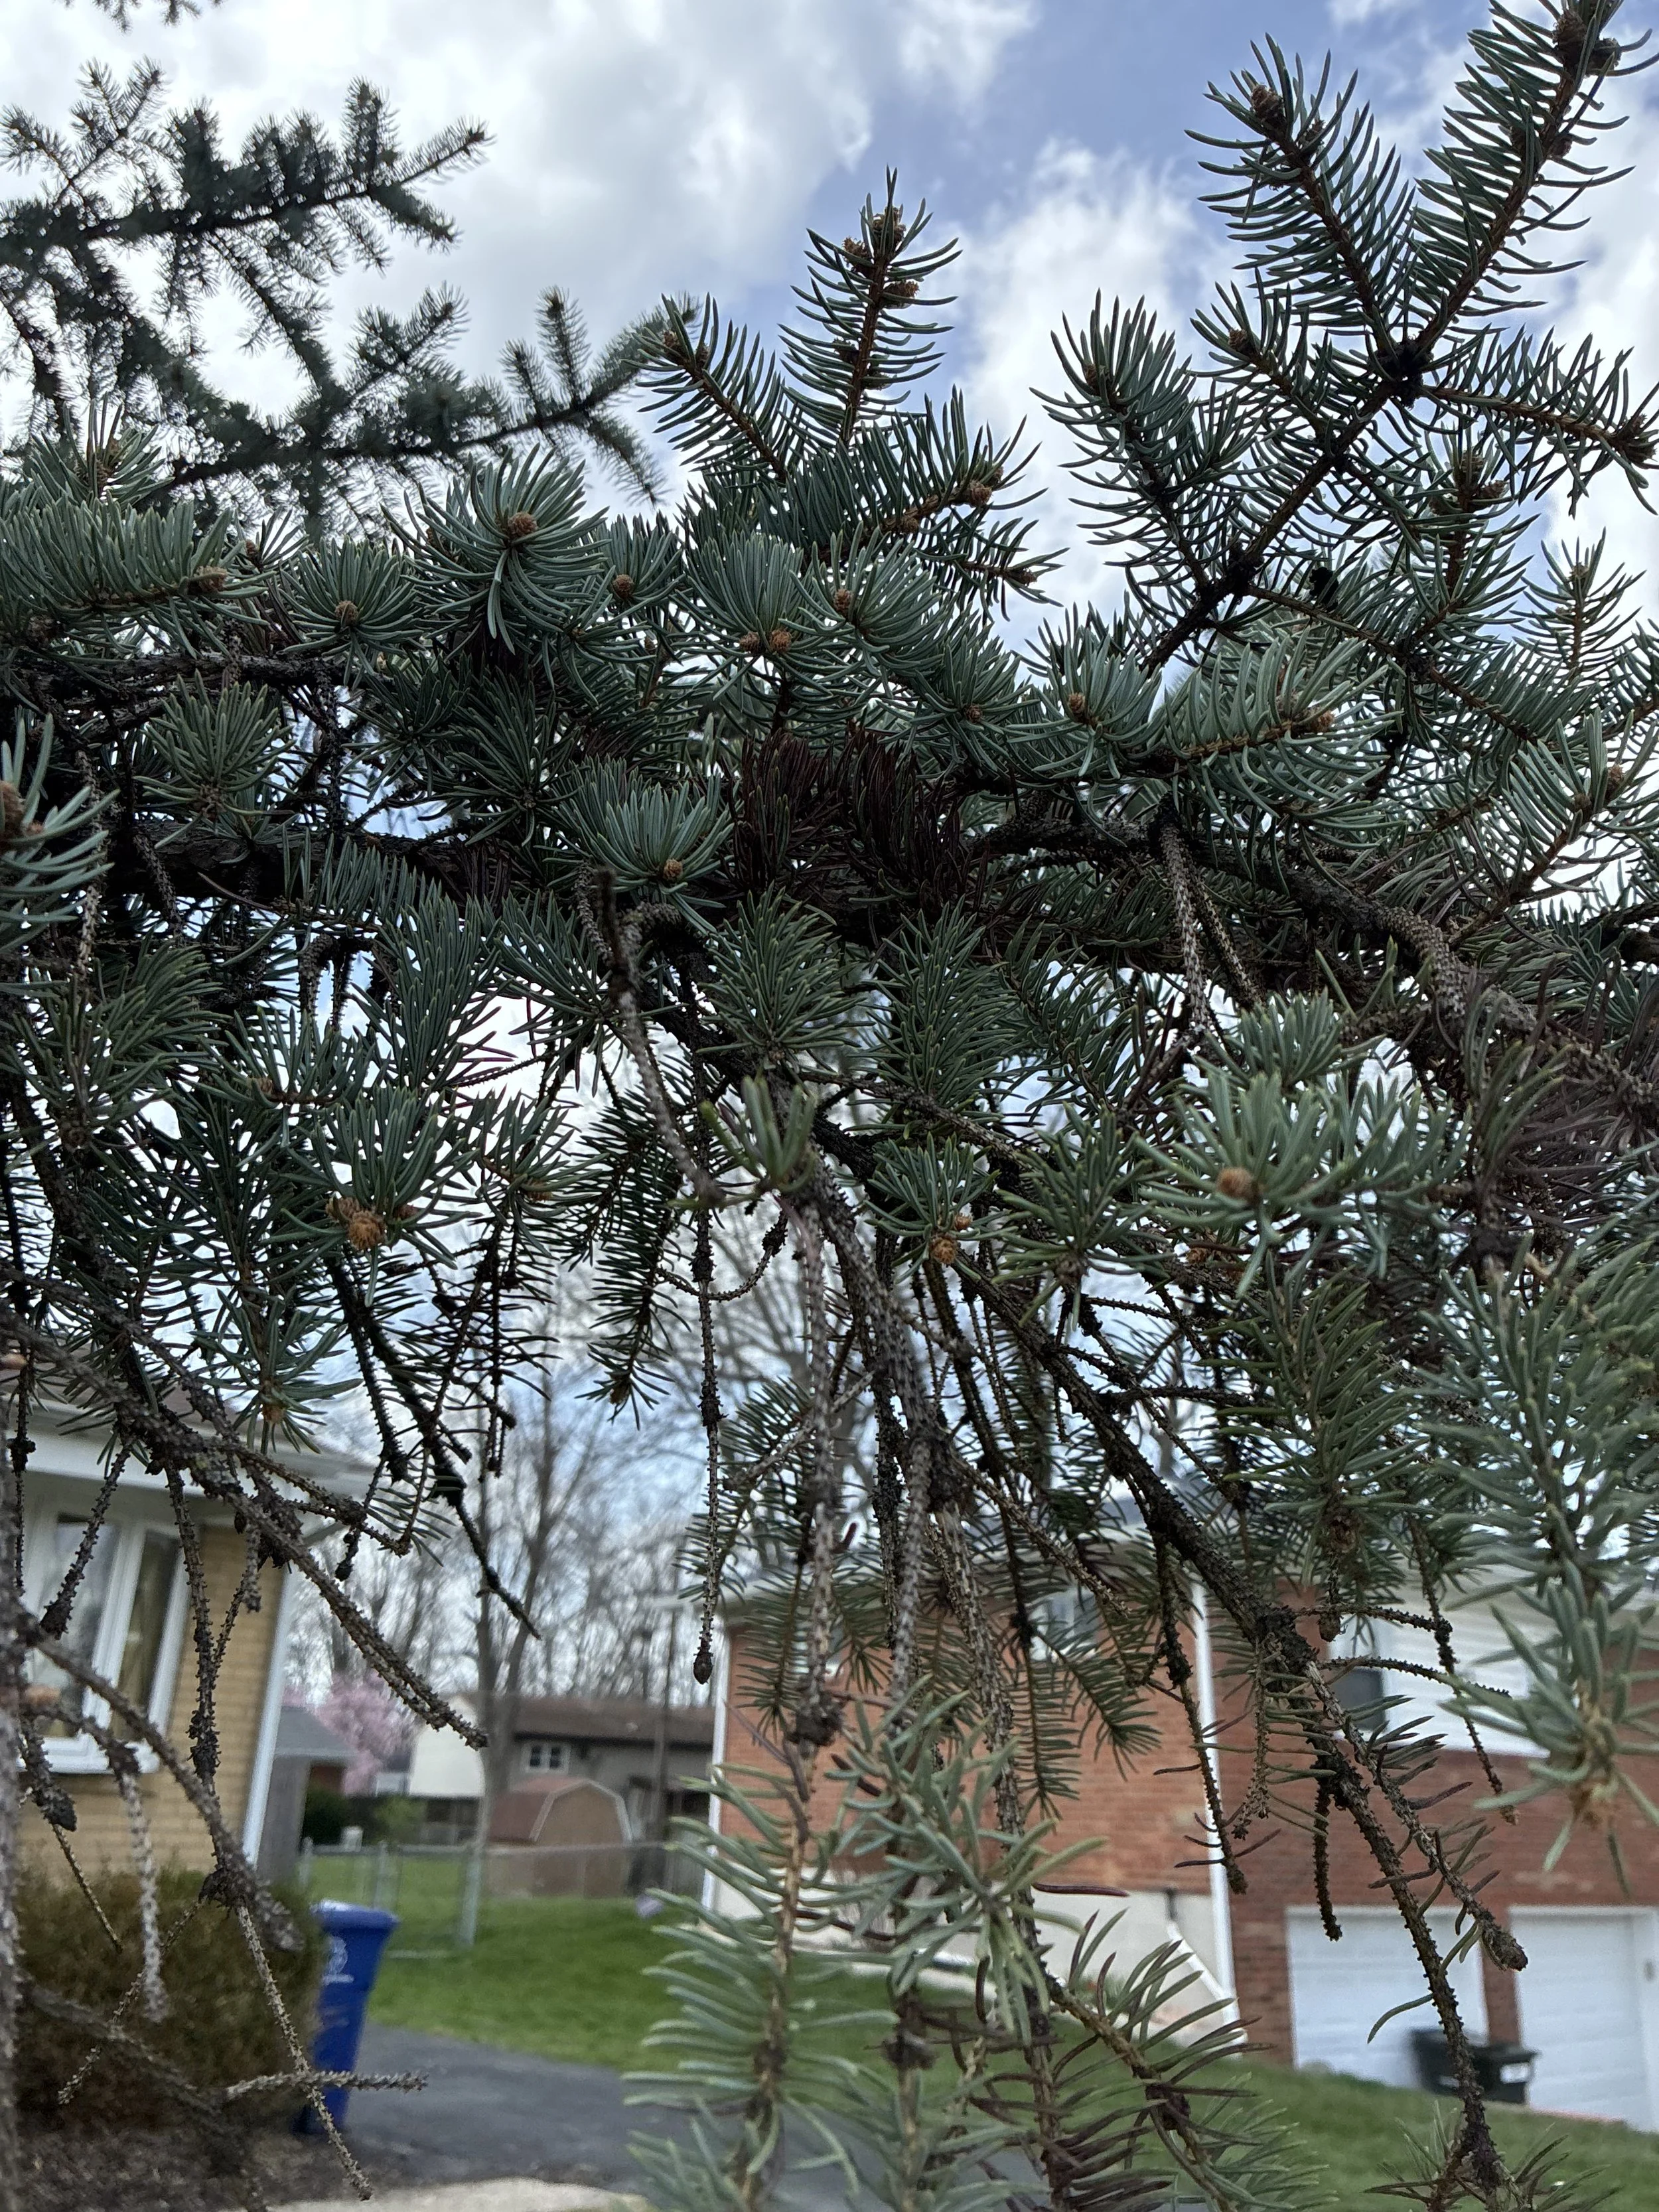
The symptoms of needle cast typically appear on older needles first and progress upwards through the tree. Common symptoms to look out for are:
Needle Discoloration: Infected needles initially develop yellow or light green spots, which gradually turn brown or purple-ish brown as the disease progresses.
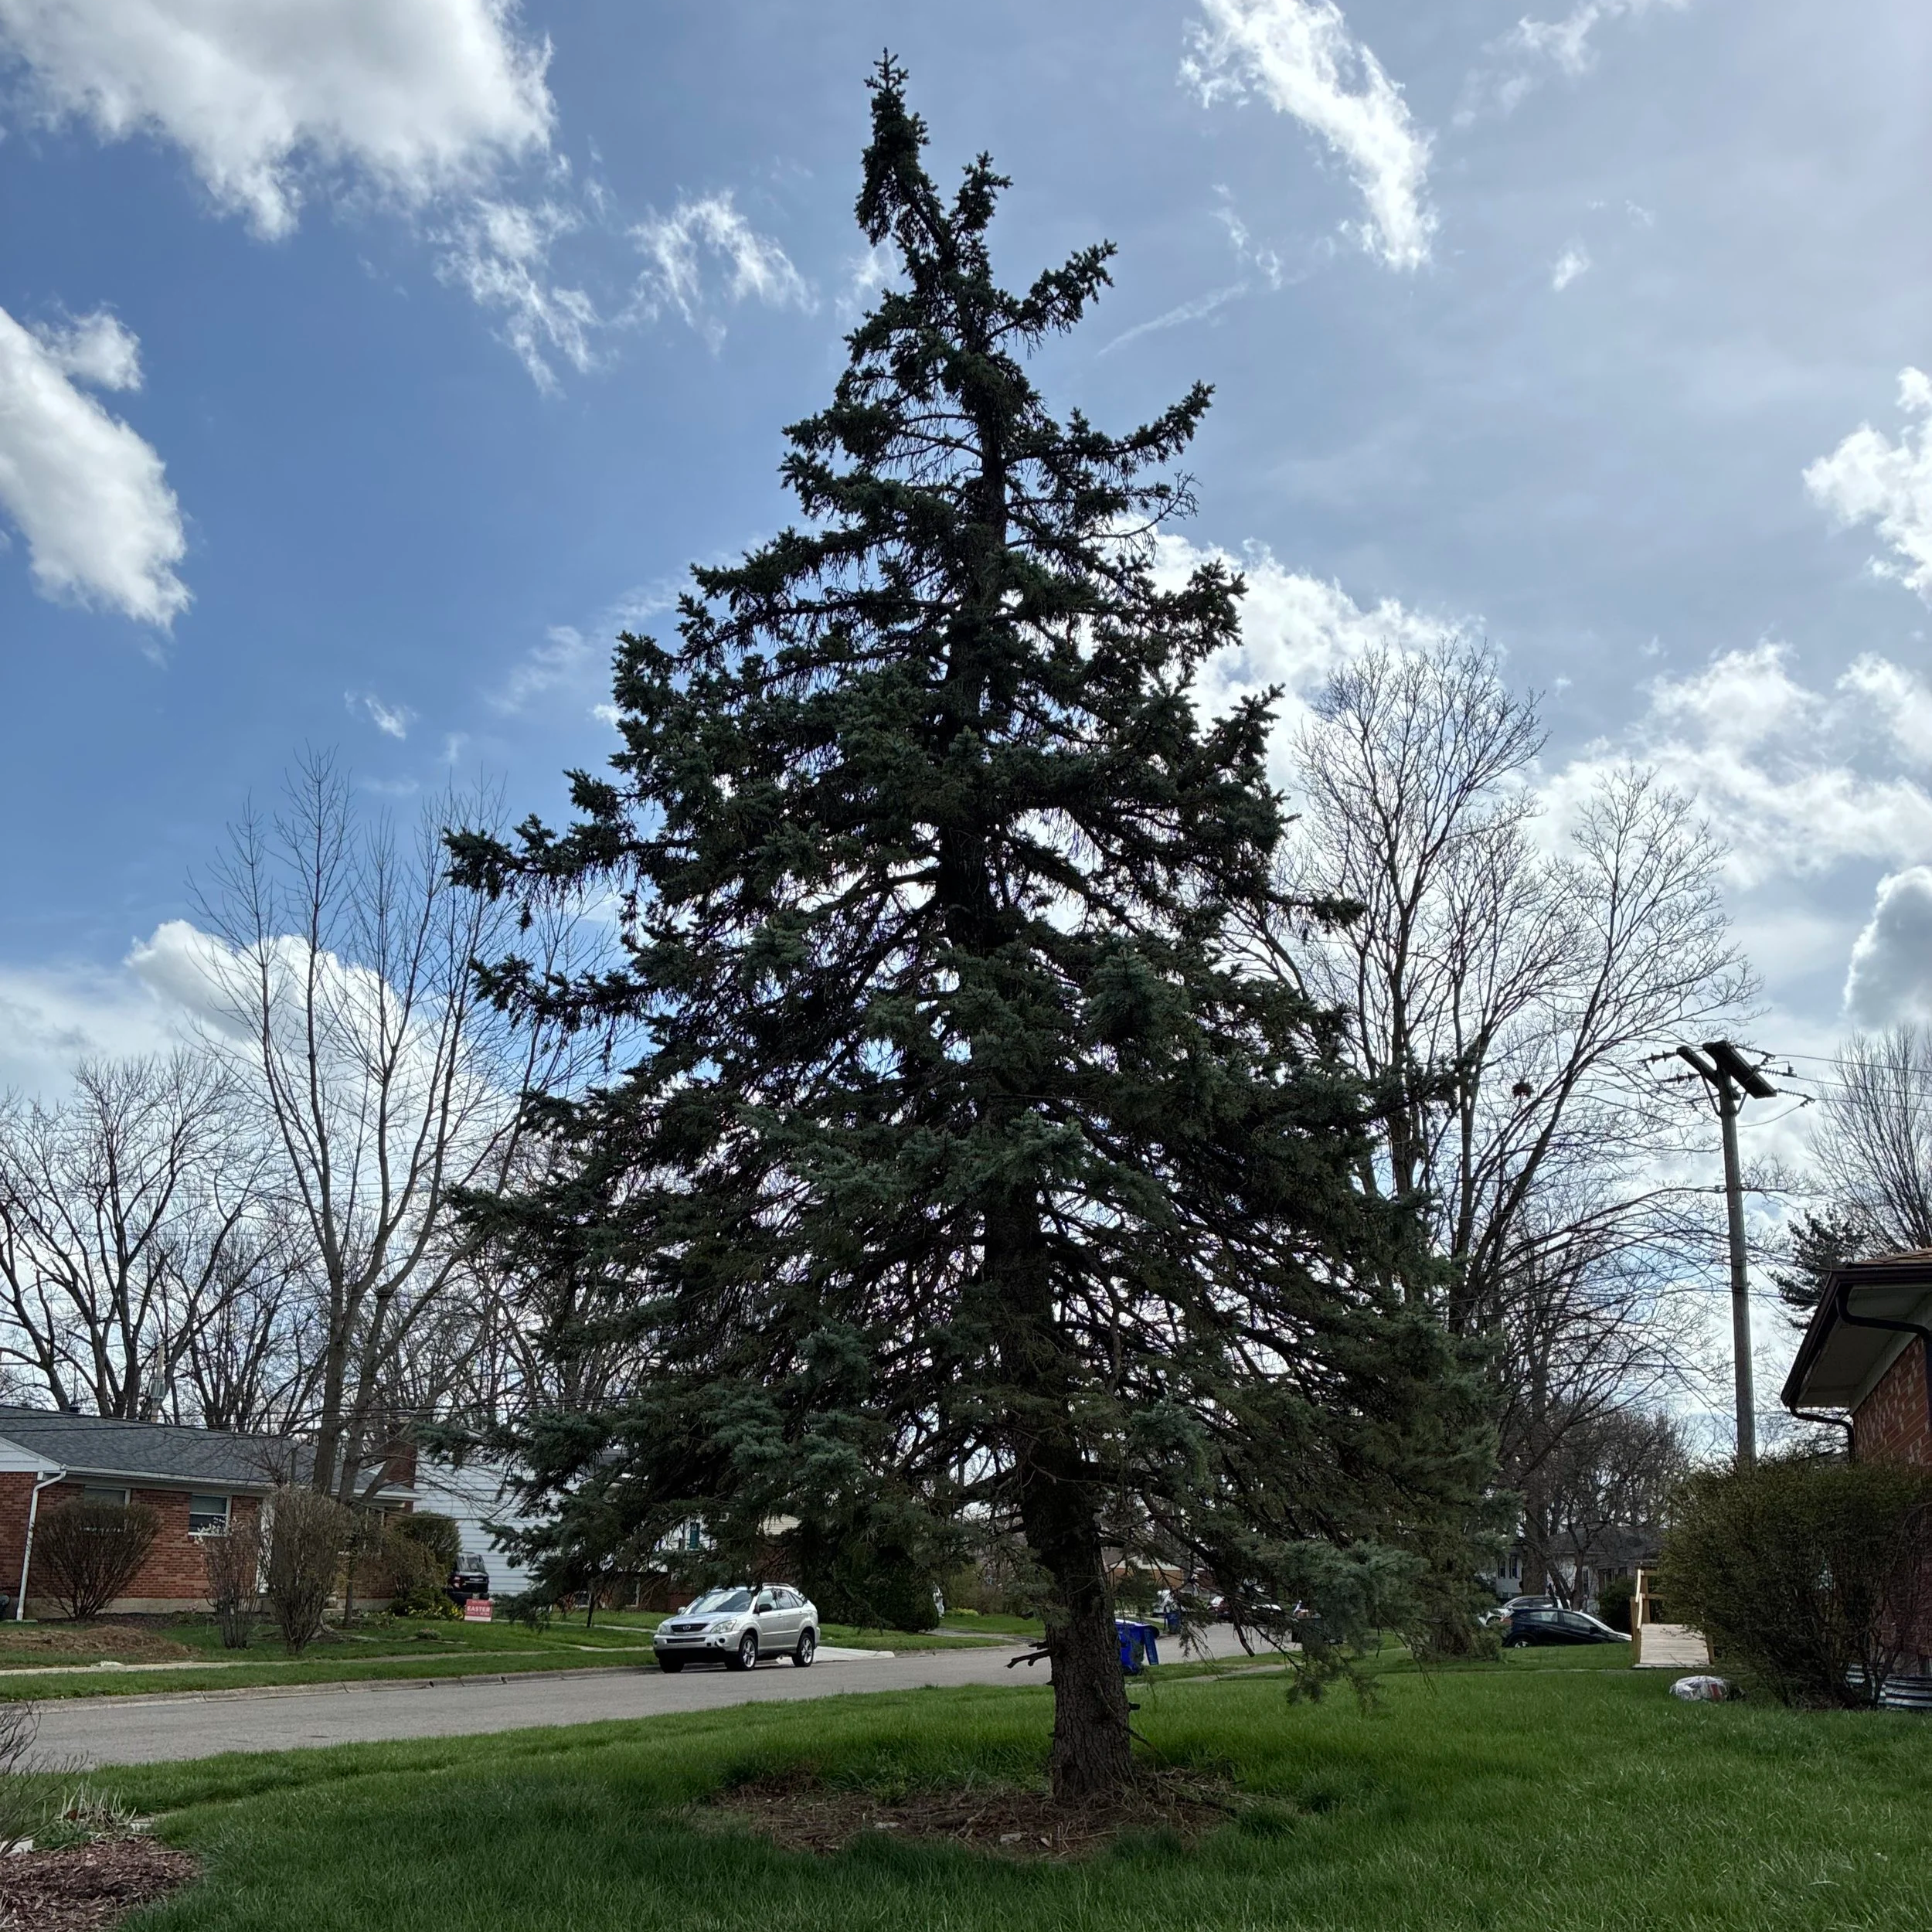
Needle Dropping: Infected needles may prematurely drop from the tree, leading to sparse foliage and an overall thinning of the canopy.
Black Fruiting Bodies: Under close inspection, black fruiting bodies (spores) of the fungus may be visible on the surface of infected needles, particularly during humid conditions. This shows up as very fine black peppering found on the underside of the needles.
Effective management strategies of Rhizosphaera needle cast involves a combination of cultural practices, chemical control, and preventive measures.
Cultural Practices

©Russell Tree Experts
Proper Tree Spacing: Ensuring adequate spacing between trees promotes good air circulation, reducing humidity levels and minimizing fungal growth.
Pruning: Prune infected branches to improve air circulation within the canopy and remove sources of fungal spores. Also, lightly elevating the canopy of a tree above the ground can help increase airflow.
Mulching: Apply a 2 to 4 inch layer of organic mulch around the base of trees to retain soil moisture and reduce stress, which can help trees resist fungal infections.
Chemical Control
Apply fungicidal sprays containing active ingredients such as chlorothalonil or copper hydroxide during the spring months as new growth is emerging. Multiple applications in 10 to 14-day intervals applied annually are most effective, however, there is no end-all cure for this fungal disease.
Preventive Measures
©Russell Tree Experts
Monitoring: Regularly inspect trees for early signs of infection, especially during periods of high humidity.
Water Management: Avoid overhead watering and excessive irrigation, as these practices can create ideal conditions for fungal growth. Water trees in the morning or evening to avoid foliage staying wet overnight. Water the tree’s roots and surrounding soil area directly as opposed to watering the foliage.
Plant Selection: Some other options that may be suitable for your landscape include, but are not limited to: Concolor fir (if you desire the silvery blue color), Norway spruce, green giant arborvitae, and Canadian hemlock.
Rhizosphaera needle cast poses a significant threat to the health and vitality of coniferous trees, particularly Colorado blue spruce. By understanding the causes, symptoms, and management strategies associated with this fungal disease I hope that you will, as a Colorado blue spruce owner, help keep these beautiful trees healthy. Through a combination of cultural practices, chemical controls, and preventive measures, it is possible to mitigate the impact of Rhizosphaera needle cast and preserve the beauty and ecological value of our coniferous forests and landscapes. If you suspect your trees are infected or need advice on proper tree maintenance, request a free tree quote by one of our ISA Certified Arborists® (myself included) at RussellTreeExperts.com/Quote or at (614) 895-7000! Have a happy spring, we’re looking forward to helping you with your trees!
[Please note: This article was revised and republished on 4/2/26 from its original publish date of 5/1/24]
Check Out These Tree Preservation Videos!
Additional ARBOR ED™ Articles!

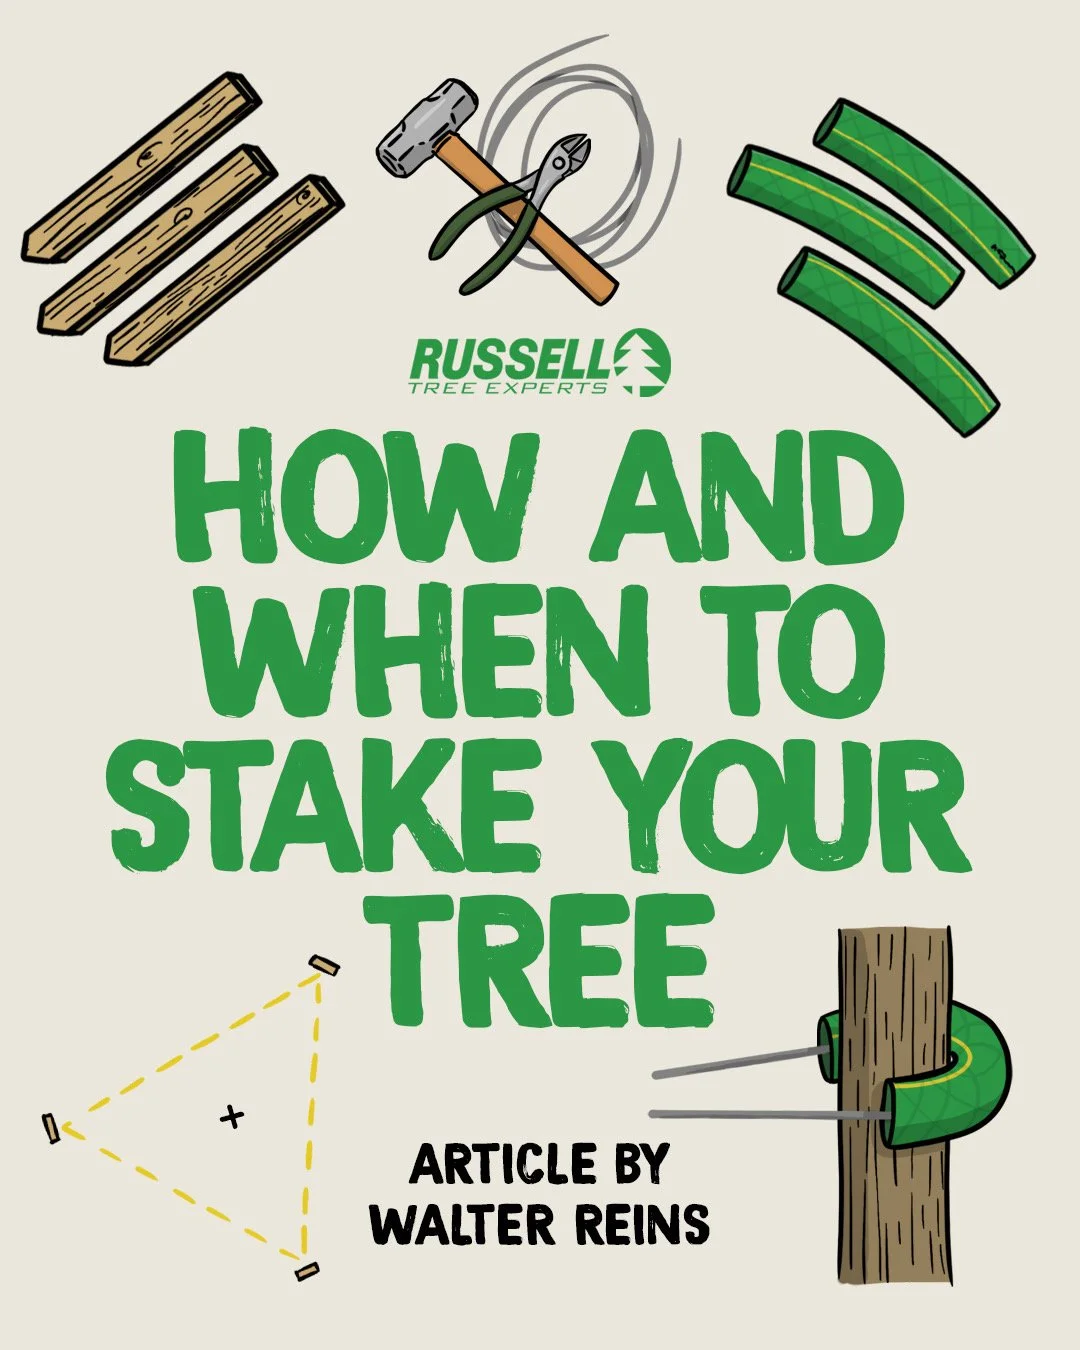
How and When to Stake a Tree

By Walter Reins
ISA Certified Arborist® OH-5113A
June 5, 2025
“Spare the rod, spoil the child” — This is how I like to explain the staking of trees when someone asks about it. Sometimes the quote works, and other times they look at me funny. While it doesn’t do much to explain how to stake a tree, it’s actually a great way to think about why you may or may not want to stake the tree in the first place. Stick with me and I’ll explain.
For starters, I’m not condoning corporal punishment. Maybe you’re familiar with this somewhat outdated expression. To put it in different words, it could mean “Without discipline, a child doesn’t receive the guidance to grow up strong and self-sufficient.” That sounds better, doesn’t it?! Don’t make the mistake of equating the “rod” to the stake, it’s actually the opposite. The rod in this case represents “discipline” or "hard love.” In other words, not staking the tree if you don’t have to. If that doesn’t make sense yet, it will in a couple of paragraphs.
There are a few situations where staking a tree is beneficial or even crucial to its success. But for the majority of newly planted trees, it’s often not necessary. Let’s start with reasons to stake. A tutorial video is available at the end for you to watch and/or follow along to!
When Staking a Tree is a Good Idea
An existing or newly planted tree that is “loose” at its base due to wind or improper handling when planted. Trees with trunks that can move around in the soil, even a little bit, are at a greater risk of further damage, lean, or complete failure (uprooting/falling over). Temporary and sometimes long-term support may be necessary to stabilize the tree for its own health and also safety.
Newly-planted LARGE trees. These trees often have a much larger canopy-to-rootball ratio, and as a result, are at greater risk of shifting or blowing over from high winds after being planted. They also tend to take longer to re-establish a strong, supportive root system.
An existing tree that is exhibiting a lean due to being located in an area with frequent high winds, or a newly planted tree in this same area.
Same as number 3 but substitute high wind with frequently wet soil.
A newly planted tree being placed on a steep grade or significantly sloped terrain.
Note: The above list does NOT say to “stake all newly planted trees, period.” Let’s revisit the expression at the top of the page to understand why.
Why Staking a Tree is Often Not Necessary
Trees respond to their environments in some pretty fascinating ways. One of those is by changing the amount and quality of tissue that is grown in response to physical stressors (wind, gravity, lean, proverbial rods, etc.) We can call this geotropism (change in response to gravity) or thigmomorphogenesis (change in response to any mechanical or environmental stimulus). Jeopardy, here we come! When we plant a new balled and burlapped tree, many of (most of) the tree’s original root system was lost when it was dug out of the ground. In the case of containerized trees that have all of their root system still intact, that root system is concentrated into a very small space (within the container) and isn’t spreading out into the surrounding soil, at least not at first. In either case, research has shown that trees will often develop a stronger root system, in the long run and under normal conditions initially, when left unstaked and made to withstand these forces. The jostling and moving about that occurs with a newly planted tree in light to moderate winds, or the forces of gravity placed on a tree that has to overcome a slightly sloped terrain, will actually stimulate growth of the root system, much the same way our muscles will grow in response to first being stressed in a workout and technically damaged, but then recovering bigger and stronger than before. To further build on that analogy, that same response can be impacted by other factors, just like in people, like overloading (damaging high winds for a tree/a person trying to lift too much in the gym) or lack of proper nutrition (which impedes proper healing and growth, whether you’re a tree or a person). Under normal conditions, a tree will strengthen its root system and eventually be able to withstand greater forces exerted on its ever-growing canopy.
We’ve discussed when a tree should be staked, and when it shouldn’t. Now let’s talk about how to properly stake a tree when it’s deemed necessary. For the purpose of this article, I’m going to refer to two different types of support as “staking”. This includes actual staking, but also guying. When staking a tree, the materials used and where/how they are installed are very important.
The Stake

For smaller applications, wooden stakes or metal posts may be driven into the ground around the tree, just outside of the root ball (1-2’ form the trunk) or up to a few feet away if conditions require it (space restrictions can sometimes dictate stake placement). Stakes can commonly be 5-6’ in length and driven 1-2’ into the soil, depending on the structure of the soil and how easily it may loosen over time. They can be driven into the ground upright or at a slight angle away from the tree to compensate for the slight pulling forces, towards the tree, that they’ll be subjected to. Use a pole/stake pounder or a sledge hammer to drive the stakes into the ground. It might help to employ a second person for this - best to let them hold the stake. Like trying to swat a fly on someone’s head, it is always better to be the one swinging and not the one being swung at! The number of stakes or posts around a tree can vary, depending on the environment and reasons for staking. A tree subjected to frequent winds always coming from the same direction may simply need one stake upwind from the tree to prevent it from leaning or blowing over in the direction of the wind. A tree in the center of an open backyard, subject to wind from all directions, would do better with 3 stakes, placed in a triangle pattern, to support in all directions.
For larger applications, guying a tree with metal ground anchors may be a better option. A guy wire typically runs from a strong anchor point on the tree down to an anchor inserted in the ground. These are augur-type anchors that turn into the ground and provide an attachment point for wire running from the anchor to the tree. Turnbuckles can be used in these situations to achieve the proper tension on the wires if they’re supporting a tree of significant height and/or spread. This application is rarely something to be undertaken by a homeowner, and is usually performed by a landscape company as part of the initial installation of the trees. However, a homeowner may choose to implement this setup if adding support to an existing established tree that is starting to exhibit a lean due to winds, a damaged root system, or saturated ground (Caution: If you have any doubt as to the stability of a substantially sized tree that appears unstable, do not attempt to remedy it yourself. Call a professional tree care company and have the tree assessed immediately).
The Wire or Strap

There are a number of materials that can be used to connect the tree to the stakes, but no matter what it is, one rule should always be followed - it shouldn’t damage, cut into, or compromise the tree’s branches or bark in any way. Wire remains a cheap and effective material to use, but it’s crucial that it not be directly wrapped around the tree. This will cut into the bark and possibly girdle the stem where it makes contact. Instead, short sections of old garden hose can be cut and used, with the wire running through them, to provide a soft and wide surface to make contact with the trunk of the tree. Straps or rope, if used instead, should be wide enough that they do not cut into the bark. Thin-barked trees such as Red Maples are extremely easy to damage if improperly staked. There are of course many store-bought, application-specific options to choose from that can work wonderfully and provide the right support. Whatever material you are using, the tension between stake and tree does NOT need to be extreme, and should instead be appropriate for the environment. Just enough to prevent excessive movement is usually appropriate. Strong winds or a tree with a larger canopy will call for more tension. Imagine Hippocrates planting this tree and, “First, do no harm.”

Illustration of a recently planted tree with three stakes secured with wire [click to enlarge]
A few more points
There are a few more points worthy of mention. If you determined that a tree needed staking, and after having successfully staked said tree, consider the following:
Check the tree regularly. Every couple of weeks, check to see if the stakes have shifted or loosened in the ground. Check the portion of the support wire or straps that wrap around the tree for any signs of rubbing or wear that could potentially compromise the bark if left as is. Adjustments in tension or placement of support may be necessary.
Remove the stakes after a year. Generally, one full year of root growth and settling of the soil is sufficient to anchor the tree in place and provide adequate support, under normal conditions. Leaving stakes for longer than this can adversely affect the tree’s ability to adapt to its environment.
Fertilize the tree for the first several growing seasons. A growing tree will use all the nutrition you can throw at it (responsibly, left-over Timbits don’t count!). Fertilizing a new tree encourages root and shoot development by providing essential nutrients often lacking in our urban landscape soils. A properly planted, staked as-needed, and well-fed tree is on its way to providing many years of benefit to the landscape.

HOW-TO GUIDE
Click below to download the step-by-step guide!
A Note about Evergreens…
There’s one more application of staking that you’re perhaps wondering about, and curious why I have mentioned it or discussed how to do it - the staking of evergreens with a diagonal wooden stake strapped against the trunk. I’m mentioning it, but not recommending it. This is a very common way for evergreens to be staked, typically when installed by a landscape company, and a very common way to cause long term problems if forgotten about. In the 25 years I’ve been working in the green industries, I’ve seen countless examples of these stakes having been left in place, forgotten about as the tree put on new growth and concealed the stake and support materials. Out of sight, out of mind. This often leads to a girdling of the main stem (trunk) at the location where the strap or wire was placed, years after planting, and only discovered when the top half of the tree suddenly and “mysteriously” starts to die. If you absolutely must stake a tree in this manner, use natural twine, not any synthetic material to attach the wooden stake to the tree. This will break down after 1-2 years and is much less likely to girdle the main stem of the tree if forgotten about.
Remember, the staking of a tree is unnecessary more often than not. When you or a professional deem it a good idea, proper stake installation with appropriate materials will ensure that the stake benefits the tree and causes no long term harm. Please note that Russell Tree Experts does not offer tree planting or tree staking services, but we are always happy to provide professional advice for all things tree and shrub related! For a free tree work quote by one of our 20+ ISA Certified Arborists®, visit RussellTreeExperts.com/Quote or speak with our friendly, local office at (614) 895-7000!
TUTORIAL VIDEO
Please note: This article was originally published on 3/20/2024 and was revised on 6/5/2025.
ADDITIONAL ARBOR ED™ ARTICLES!


Walter Reins I Regional Manager, Russell Tree Experts
Walter became an ISA Certified Arborist® in 2003 and has a degree in landscape horticulture. He has 25 years of experience in the tree and landscape industries and originally began working at Russell Tree Experts in 2011. Walter is also the owner/operator of Iwakura Japanese Gardens, a small design/build/maintenance firm specializing in Japanese-style gardens, and also offers responsible tree planting for all landscapes.