DID YOU KNOW? Winter Tree Care!
In some cases, pruning trees in winter is actually more beneficial than during other times of the year due to increased canopy visibility and lower risk of disease. Check out the video above to learn more!
DID YOU KNOW?
In some cases, pruning trees in the winter is actually more beneficial than during other times of the year due to increased canopy visibility and lower risk of disease. Check out the video above to learn more!
Certain trees are more vulnerable to pathogens that are more active during the growing season. For example, during the winter months, the insects that carry oak wilt and dutch elm disease are not present and the pathogen in the environment that causes fire blight is not active. For this reason, oak trees, elm trees, and trees in the rosaceae family such as apple, pear, and serviceberry, are best pruned during this time.
From another perspective, frozen ground conditions allow the use of heavier equipment, thus increasing efficiency, potentially reducing costs, and minimizing concerns of turf impact on your property, especially during tree removals.
Russell Tree Experts offers winter tree care services such as pruning, removal, and more. To find out if your tree work is best performed this winter, give us a call or request a quote online!
Why is Tree Pruning Important?

By Enrique Arayata
ISA Certified Arborist® OH-7252A
June 26, 2025
Tree care comes in many forms: insect and disease management, fertilization, cabling, lightning protection, removal, and last but not least, pruning! Today, let’s talk about the importance of tree pruning and the various reasons why a tree may need pruned.
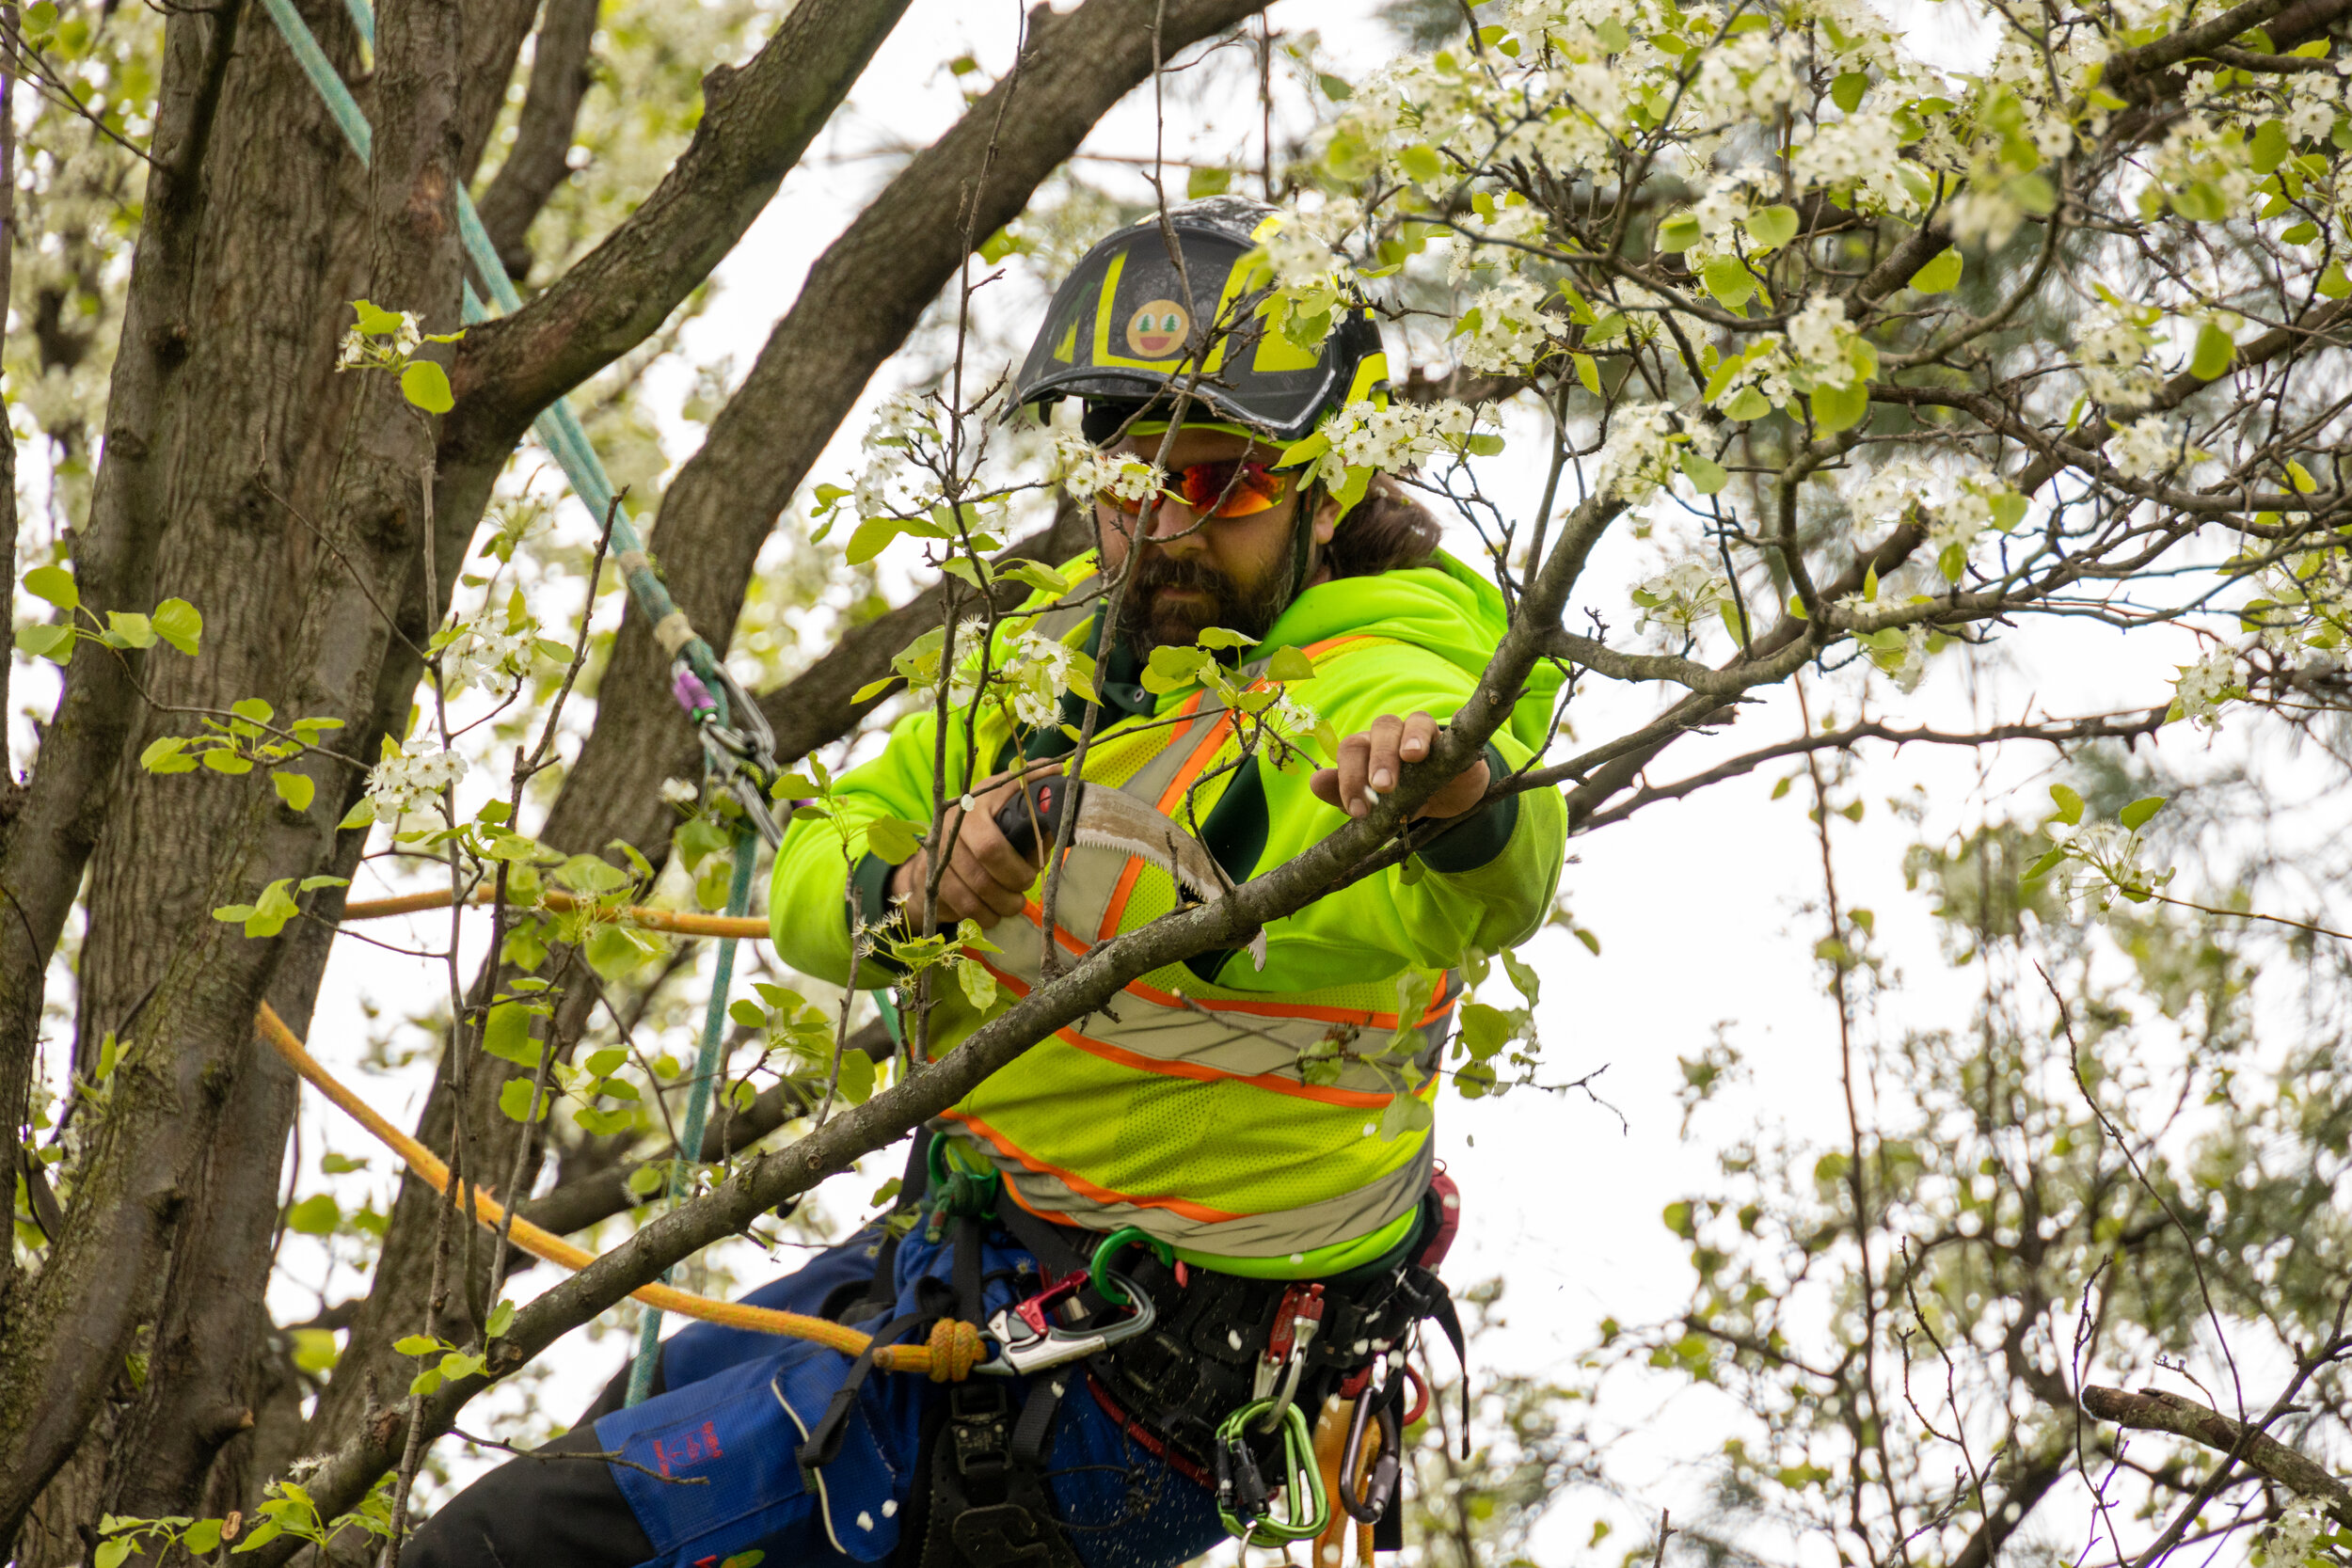
ISA Certified Arborist Andy Bartram making a tree pruning cut!
Tree pruning is the selective removal of branches from a tree with the general goal of improving the overall quality of the tree, whether it be for safety, health, structure, fruit and flower production, aesthetic appearance, and more. Some may view pruning as unnecessary as there are hundreds of thousands of beautiful, healthy, and unpruned trees out in the world that have grown successfully without human intervention. Although this is true, there are also many trees out in nature that are dead, dying, or unpleasant to look at. A native volunteer tree out in nature grew naturally from one of hundreds of seeds and competed with all the surrounding trees for resources. They are tough and independent and do not need any human assistance. However, the same cannot be said for a single tree or sapling planted by a human in a site where that tree might not have ever grown there naturally. These human planted trees often need extra care like watering, mulching, and fertilization in order for them to be vigorous, healthy, or aesthetically appealing.
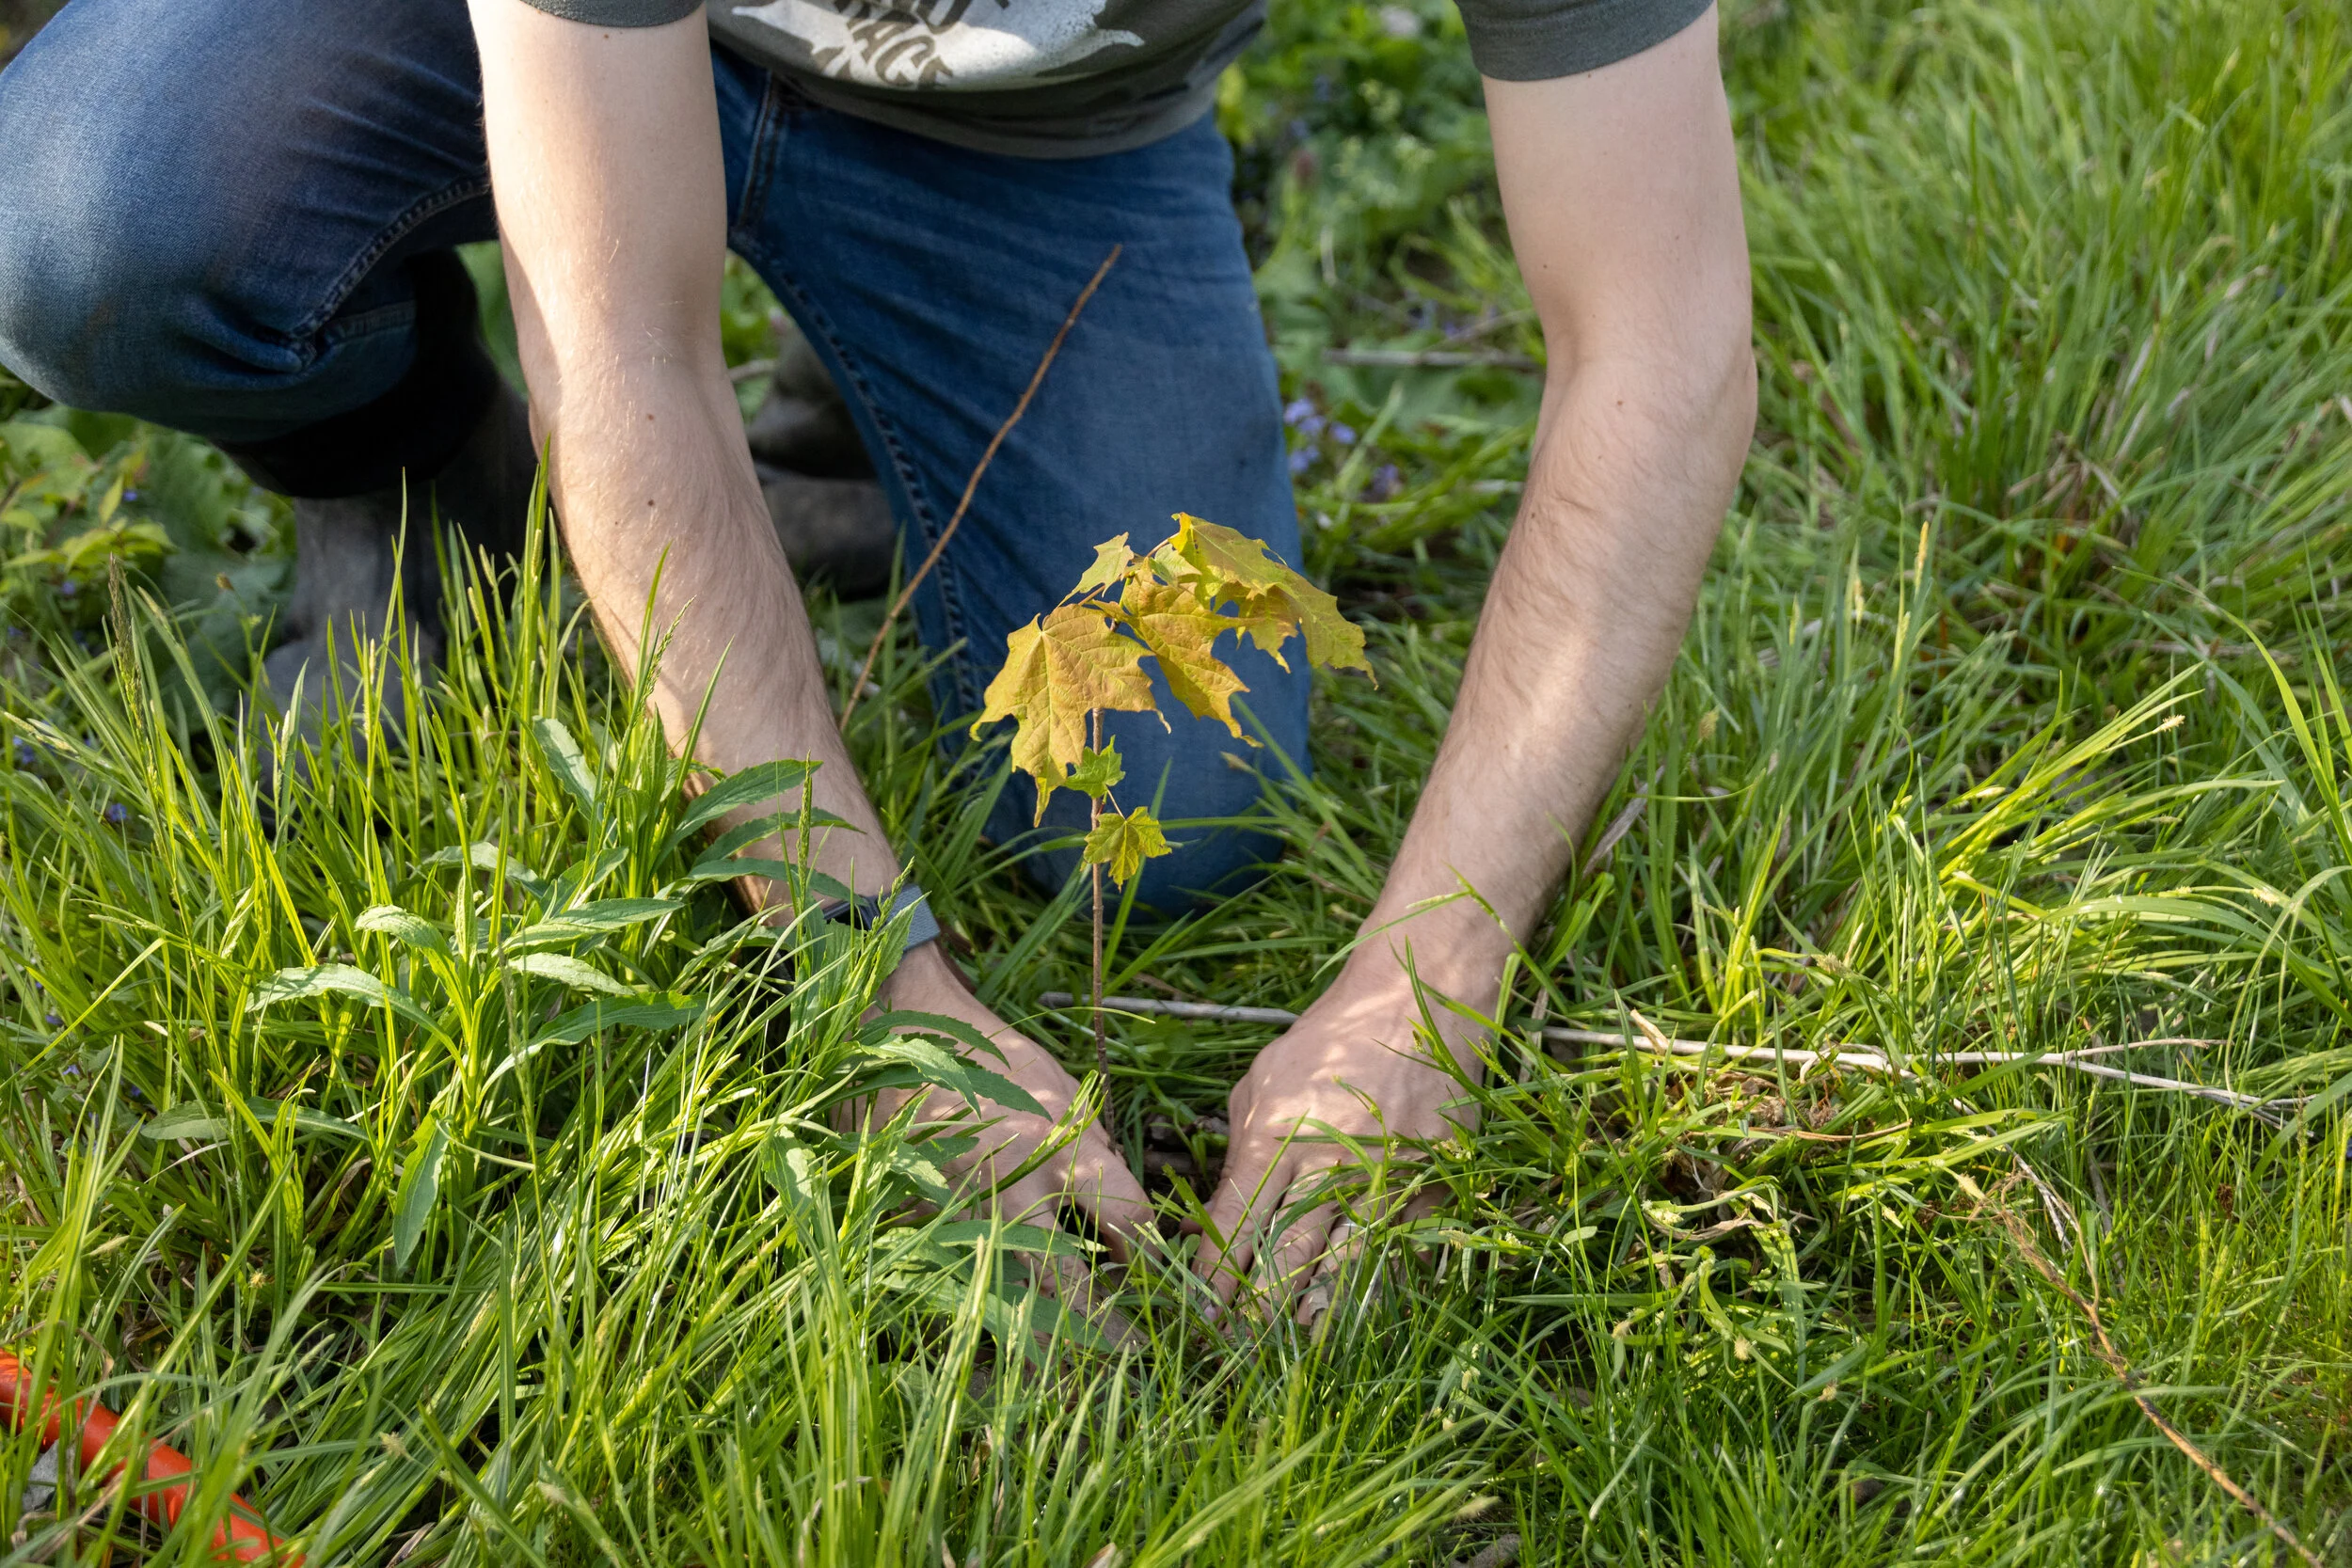
A tree sapling planted during one of our TREE FOR A TREE® tree planting community events!
“Pruning” differs from “trimming” as pruning prioritizes a tree’s health and structure. Only the necessary limbs are removed and aesthetic appearance is a byproduct. With “trimming”, plants, shrubs, hedges, and trees are trimmed with the goal of improving their appearance. Depending on the individual trimmer, health and structure may be sacrificed in order to attain a certain look. Trimming can also cause problems as limbs might not be cut back to a spot conducive for compartmentalization and may invite pests or diseases to invade the tree.

Our team member Andrew making a tree pruning cut!
A tree may need to be immediately pruned if it poses a safety concern, such as in the event of storm damage. If there’s a large or dead limb overhanging something significant such as a house, car, sidewalk, or valuable lawn ornament, that limb may need to be preemptively removed as it could be hazardous during a storm. Additionally, codominant stems, two stems with a tight V-shaped attachment at the union, are an example of limbs with safety concerns as this can lead to included bark, lead to uneven growth in a tree, and also be a structurally weak point in a tree that may fail in high wind, snow, or ice events.
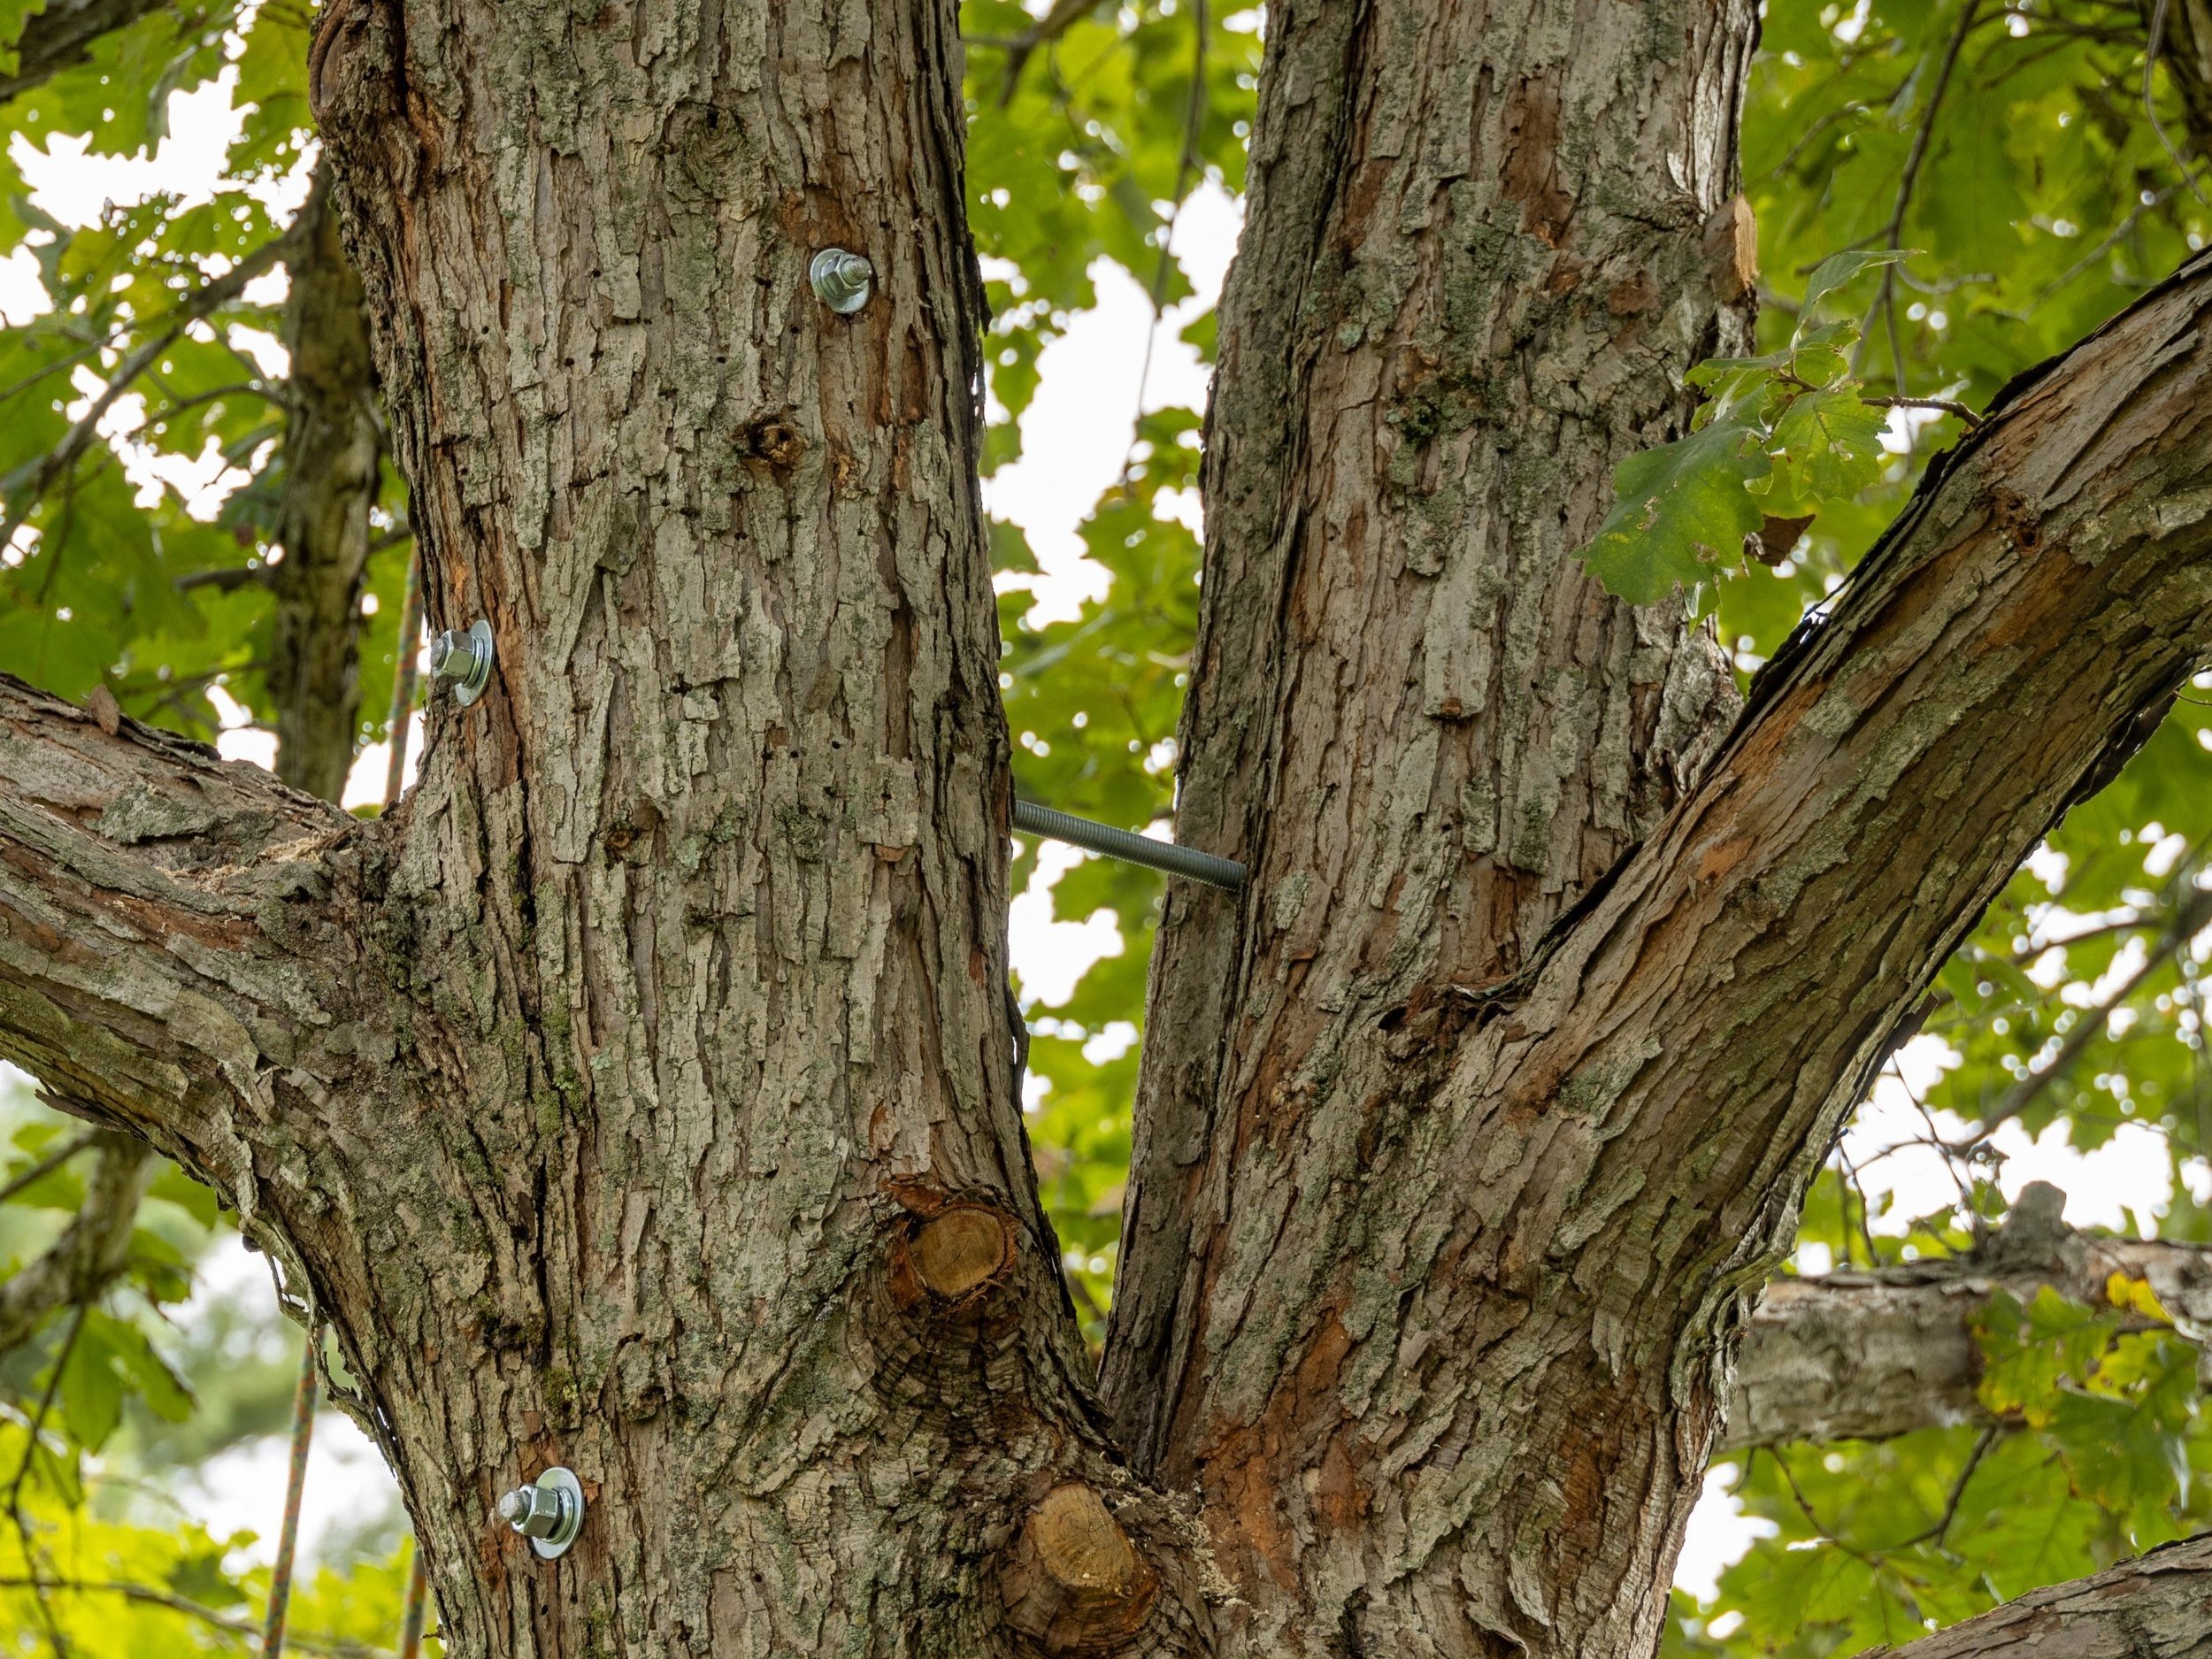
An example of a mature codominant limb. Instead of pruning it at this stage of the tree’s life, the owner decided to have brace rods installed to add additional support to this union.
Our team member Mac pruning a dead limb overhanging a busy road.
If there are any limbs with clearance issues, it may also need to be removed. This applies to limbs that are touching any house siding or utility lines or any low hanging limbs that impede lawn activities or pulling into a driveway.
Another important aspect of tree pruning is for health and structural reasons. A tree’s overall health and structure will increase by removing any dead, dying, damaged, disease-infected, codominant, or crossing limbs. Removal of these limbs promotes new growth and increased flower and fruit production. When a tree is pruned, nearby trees, shrubs, plants, and grass can also benefit by receiving more resources like sun, water, and air. These additional resources can improve aesthetic appearance and promote new growth. If the pruned tree was also close to a window you may even have a better view from inside your house or more sunlight coming in during the day!

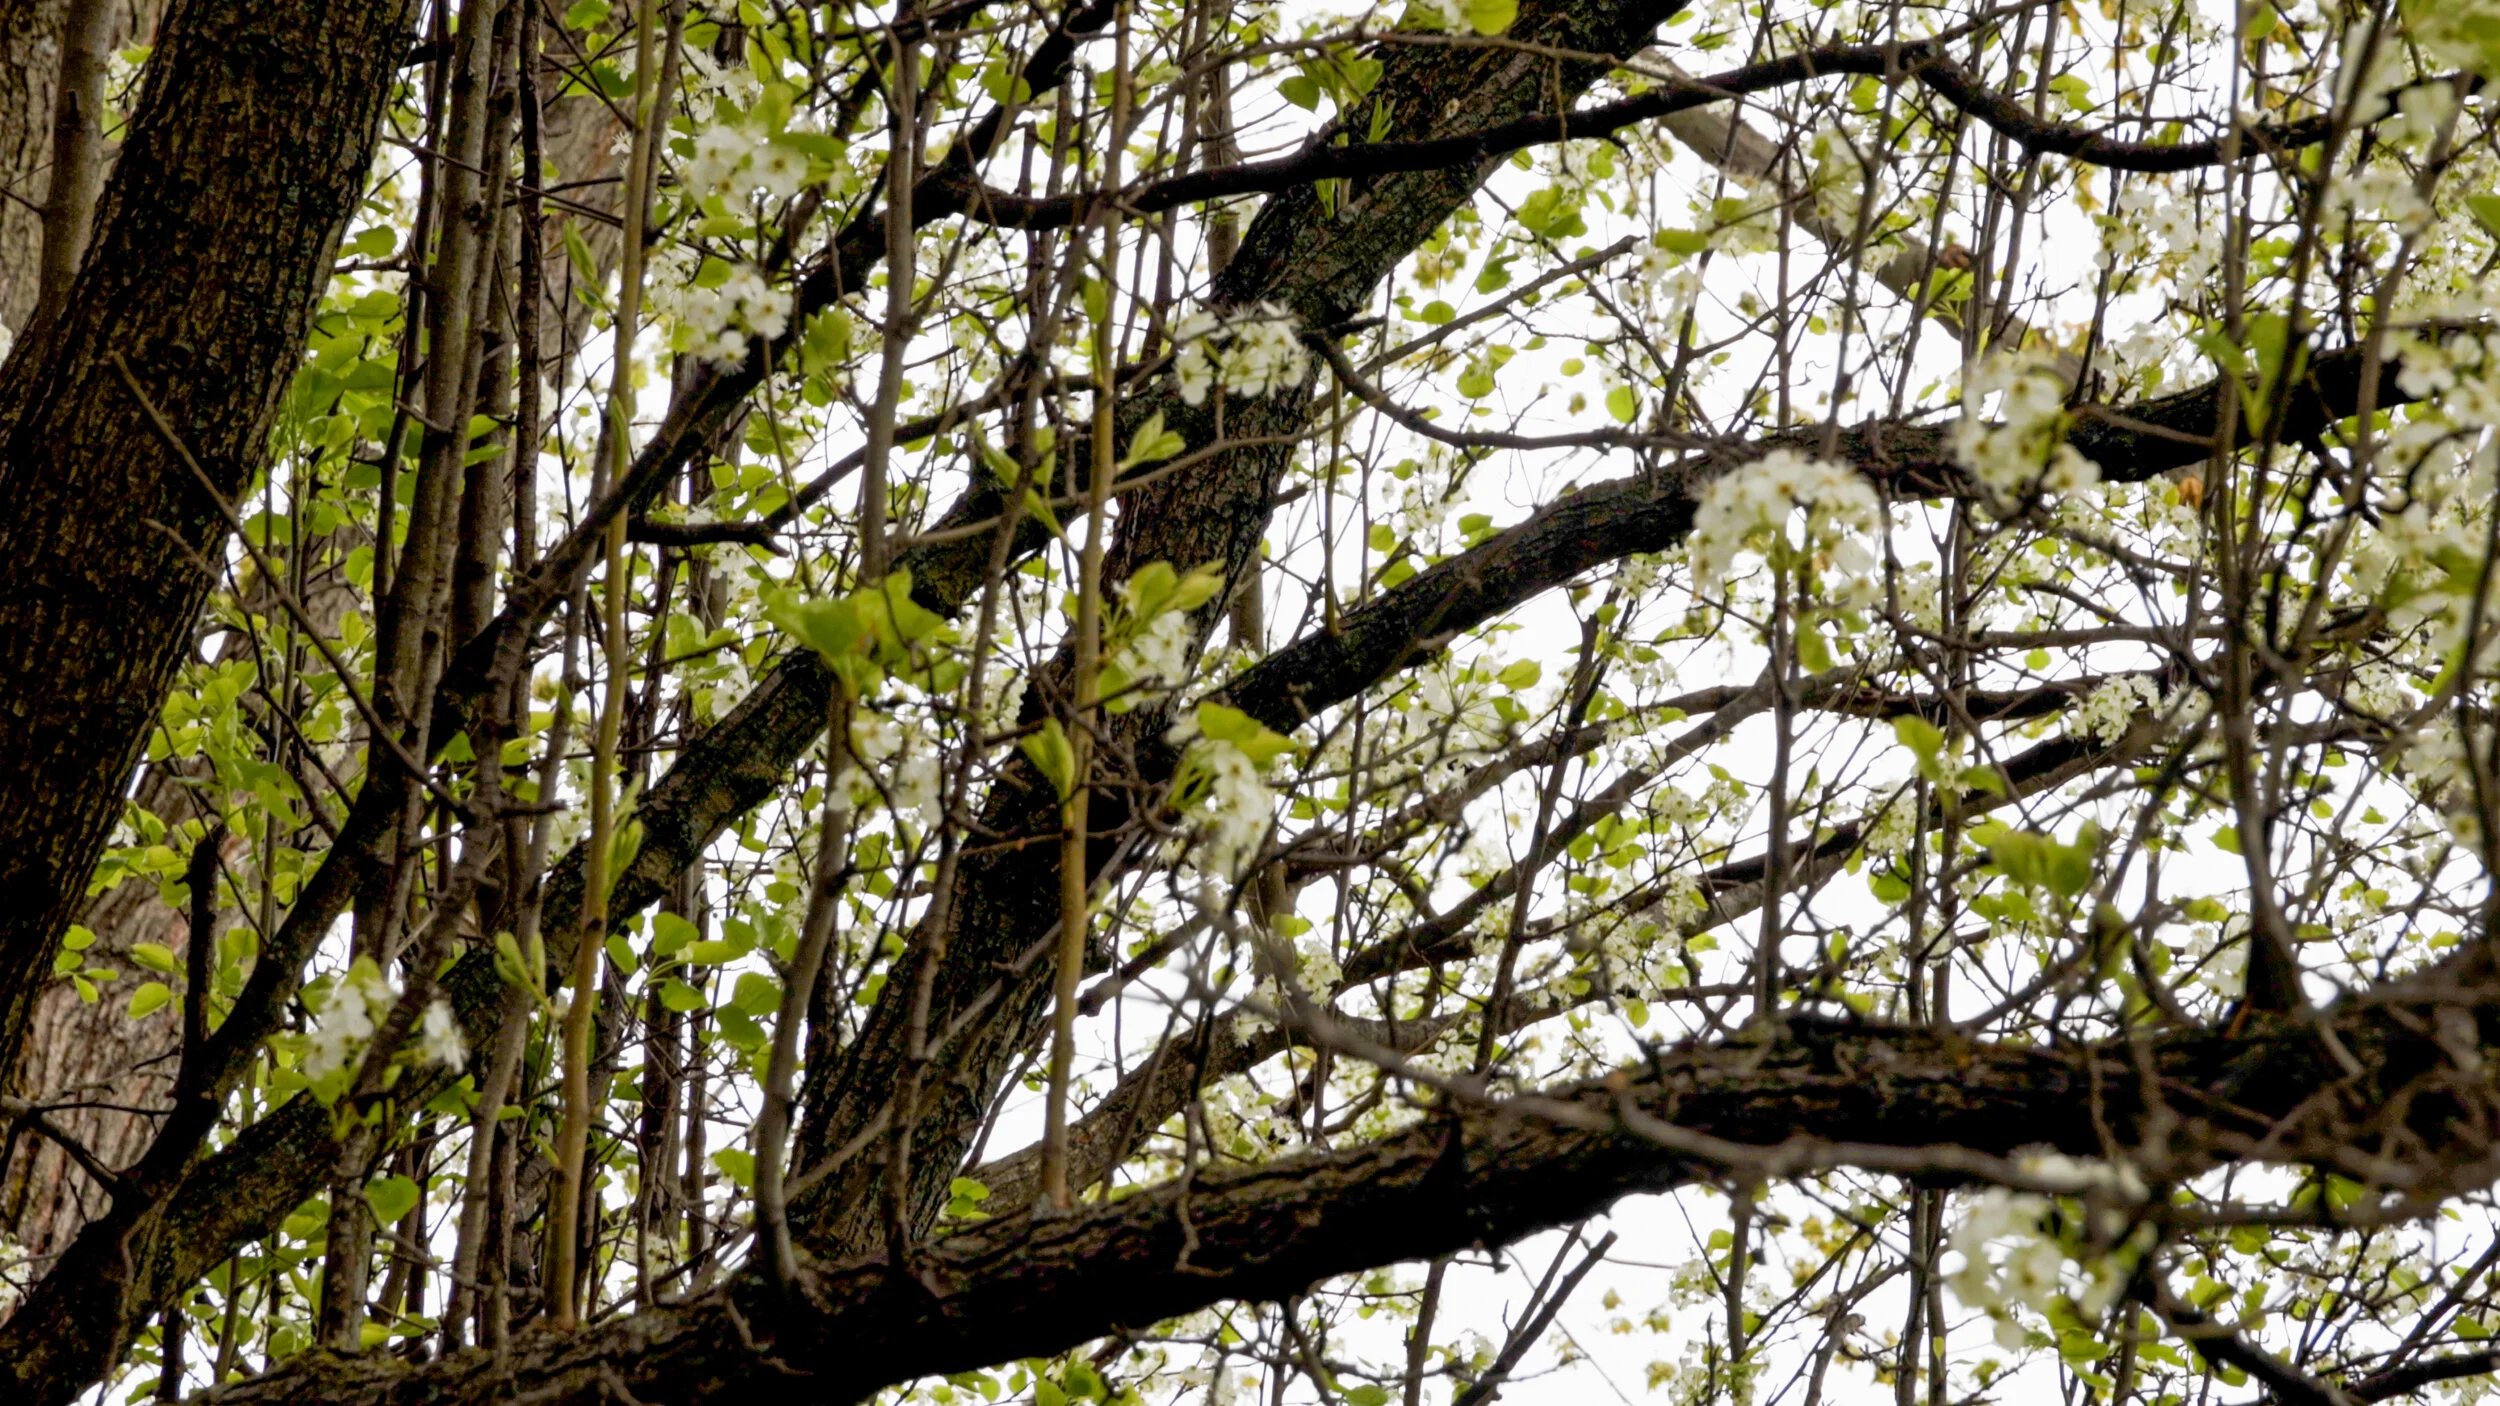
Unruly lilacs in need of pruning.
As mentioned earlier, tree pruning can improve aesthetic appearance. Pruning does not focus on looks but removing dead, dying, broken, weak in structure, or clearance-issue limbs generally makes trees look neater, cleaner, and overall better. The pruned tree may not have a specific shape desired by an individual, but it will be healthier and safer. Another factor to consider is property value. An unmaintained tree can look unpleasant, unruly, and unsafe which can hurt the curb appeal and value of a property. When it comes time to sell, having a beautiful, healthy, and pruned tree can potentially increase property value, making it an easy worthwhile investment!
So now that you have read about the various reasons for tree pruning, you may be wondering when a tree should be pruned, how often should a tree be pruned, or how much of a tree should be pruned? The short answer is… it depends! Some trees are best pruned during a specific season and some may have no preference. For example, oak trees are not recommended for pruning from roughly April to October due to the risk of oak wilt. A sugar maple can generally be pruned any time of the year, but it is recommended to prune a sugar maple tree during the summer rather than winter to avoid sap leakage from pruning wounds, which does not pose any significant problem to the tree’s health.
Multiple water sprouts shooting straight up from a larger branch due to stress.
In terms of frequency, younger trees may need to be pruned every two to three years while more mature trees may need to be pruned every three to five years. The specific timing can fluctuate and vary based on planting site, climate conditions, potential insect and disease issues, and more. In terms of how much to prune, there should be no specific goal. Only remove the necessary branches. However, a general guideline is that no more than 25% of a canopy should be removed at one time as the tree may “go into shock” and grow watersprouts in an attempt to replace the stored energy lost from the removed branches.
If you decide to have your tree pruned, two common, incorrect methods of pruning that Russell Tree Experts strongly advise against and do not perform are tree topping and lion’s tailing. Tree topping is pruning to create a rounded canopy that often requires cutting through a stem at an improper location. Lion’s tailing is the removal of many, if not all, secondary or tertiary branches from the interior of the crown, leaving most of the foliage at the edge or top of a canopy. Although the look of both of these tree pruning methods may be desired by a specific individual, they do not improve the overall health or quality of a tree and can actually shorten its lifespan and promote decay.
Examples of improper tree pruning: Tree topping (left) and lion’s tailing (right)
Tree pruning is a very large and vast subject with much to cover. Someone could write a novel about tree pruning and still not cover every single detail. The goal of this article was to discuss the many reasons for tree pruning, not necessarily to teach someone how to become a tree pruning expert. However, we do have an article and a video on the 3 cut method that will be linked down below for anyone interested in learning how to safely and effectively remove a limb! Additionally, more tree pruning-related articles are also down below including 6 harmful tree pruning methods! (You already know 2 of them from reading this article!) As always, if you’re interested in a free tree work quote by one of our 20+ ISA Certified Arborists®, visit RussellTreeExperts.com/Quote or speak to our friendly, local office at (614) 895-7000!
Please note: This article was originally published on 1/12/2023 and was revised on 6/26/2025.
Interested in Pruning Your Own Tree?
ADDITIONAL ARBOR ED™ ARTICLES!


Enrique Arayata I Media Production Manager, Russell Tree Experts
Enrique is an ISA Certified Arborist® and FAA Certified Remote Pilot. In his free time, he enjoys working out, hanging out with his family and girlfriend, video production, photography, cars, technology, and cooking. Enrique has a BA in moving image production with a double minor in film studies and studio art specializing in photography from The Ohio State University, and an AA in web graphic design from DeVry University. His favorite tree is the Kwanzan cherry tree.
The 3 Cut Method
There are times when the professionals at Russell Tree Experts should be utilized, although I realize there may be situations when removing a single branch is something very achievable by you, the homeowner.

By Mike Wilson
ISA Certified Arborist® OH-6806A
February 13, 2025
[Please note: This article was revised and republished on 2/13/25 from its original publish date of 6/30/21]
There are times when the professionals at Russell Tree Experts should be utilized, although I realize there may be situations when removing a single branch is something very achievable by you, the homeowner. I feel it's safe to assume if you're reading this article, you have a bit of a green thumb and you like to get your hands dirty by maintaining as much of your landscape as possible. This article isn't to dive deep into the various pruning techniques or strategies we use in the field, rather, it's to help homeowners make proper pruning cuts on trees throughout their property. Keep in mind, even though you may have seen us swinging about your trees like monkeys, we're trained to do so in the safest manner possible and I discourage you from putting yourself in harm’s way pruning your tree(s).
The reasons for pruning a branch or limb from a tree are vast. Whether it's removing a pesky branch that keeps slapping you in the face during weekly lawn maintenance to getting rid of that one dead branch that you see every time you look out your window, I'm here to help you make a cut that will ultimately compartmentalize naturally.
Trees have a natural response known as CODIT (Compartmentalization of Decay in Trees) which allows them to wall-off or seal wounds to help prevent decay or entry of harmful diseases. Cuts that are too flush with the parent stem (or left too long) are unlikely to seal properly and could potentially degrade the health of your tree.
key branch landmarks

So, now, let's get into the nitty-gritty of proper pruning cuts. It's critical to be able to identify key branch landmarks that help guide where your final cut will be: the 'Branch Bark Ridge' and the 'Branch Collar'. The branch bark ridge can be seen as the raised strip of bark on top of the branch where it joins with the main parent stem or trunk of the tree. The branch collar is the slightly raised or swollen portion around the sides and bottom of the branch, this portion may or may not be distinguishable. The imaginary line connecting these two landmarks determines where the final cut should be made.
Step by step: The 3 Cut Method
To begin, whether using a handsaw/polesaw/chainsaw, I'll teach you how to remove a branch using the 3 cut method:

1st Cut / Bottom cut
Create a cut on the underside (undercut) of the branch roughly 1/3 of the way through. This is a crucial step in the branch removal process as it eliminates the risk of the branch peeling down and further harming the tree.

2nd Cut / Top Cut
Next is a second distal cut on top of the limb (further from the trunk) to remove the limb (topcut).

3rd Cut / Final cut
Now, with only a stub remaining, is when you should identify that imaginary line I described above. This will be the site for your final cut that will eventually seal properly as long as the tree is healthy and capable.
How-to Video: The 3 Cut Method
I’m not the biggest fan of being on camera so I’ve asked Kenny Greer (Our marketing guy at Russell Tree Experts) to demonstrate the 3 Cut Method in the below video! Check it out!
proper pruning results
A proper final cut will become a minor blemish guarding your tree against decay and harmful organisms. Here are some beautiful examples:


Please Note — In the past, it was believed that paint would help seal fresh wounds, although this has since been proven to only slow down the natural CODIT process. Can any of you guess when we would apply this "wound paint?" If you'd like to find out, I encourage you to read Lindsey Rice’s ARBOR ED™ article on oak wilt and dutch elm disease, my fellow coworker and ISA Certified Arborist®!
Questions? Comments? Leave them below and we will get back to you as soon as possible! Thanks for reading and watching! As always, if you’re interested in a free tree work quote from one of our 20+ ISA Certified Arborists®, give us a call at (614) 895-7000 or visit RussellTreeExperts.com/Quote!
ADDITIONAL ARBOR ED ARTICLES!


Mike Wilson | Regional Manager, Russell Tree Experts
Mike joined RTE in 2013 and has been in the green industry for over 12 years! He is an ISA Certified Arborist® and a graduate of Oregon State University. Mike is an outdoor enthusiast and a US Army Medic Veteran!
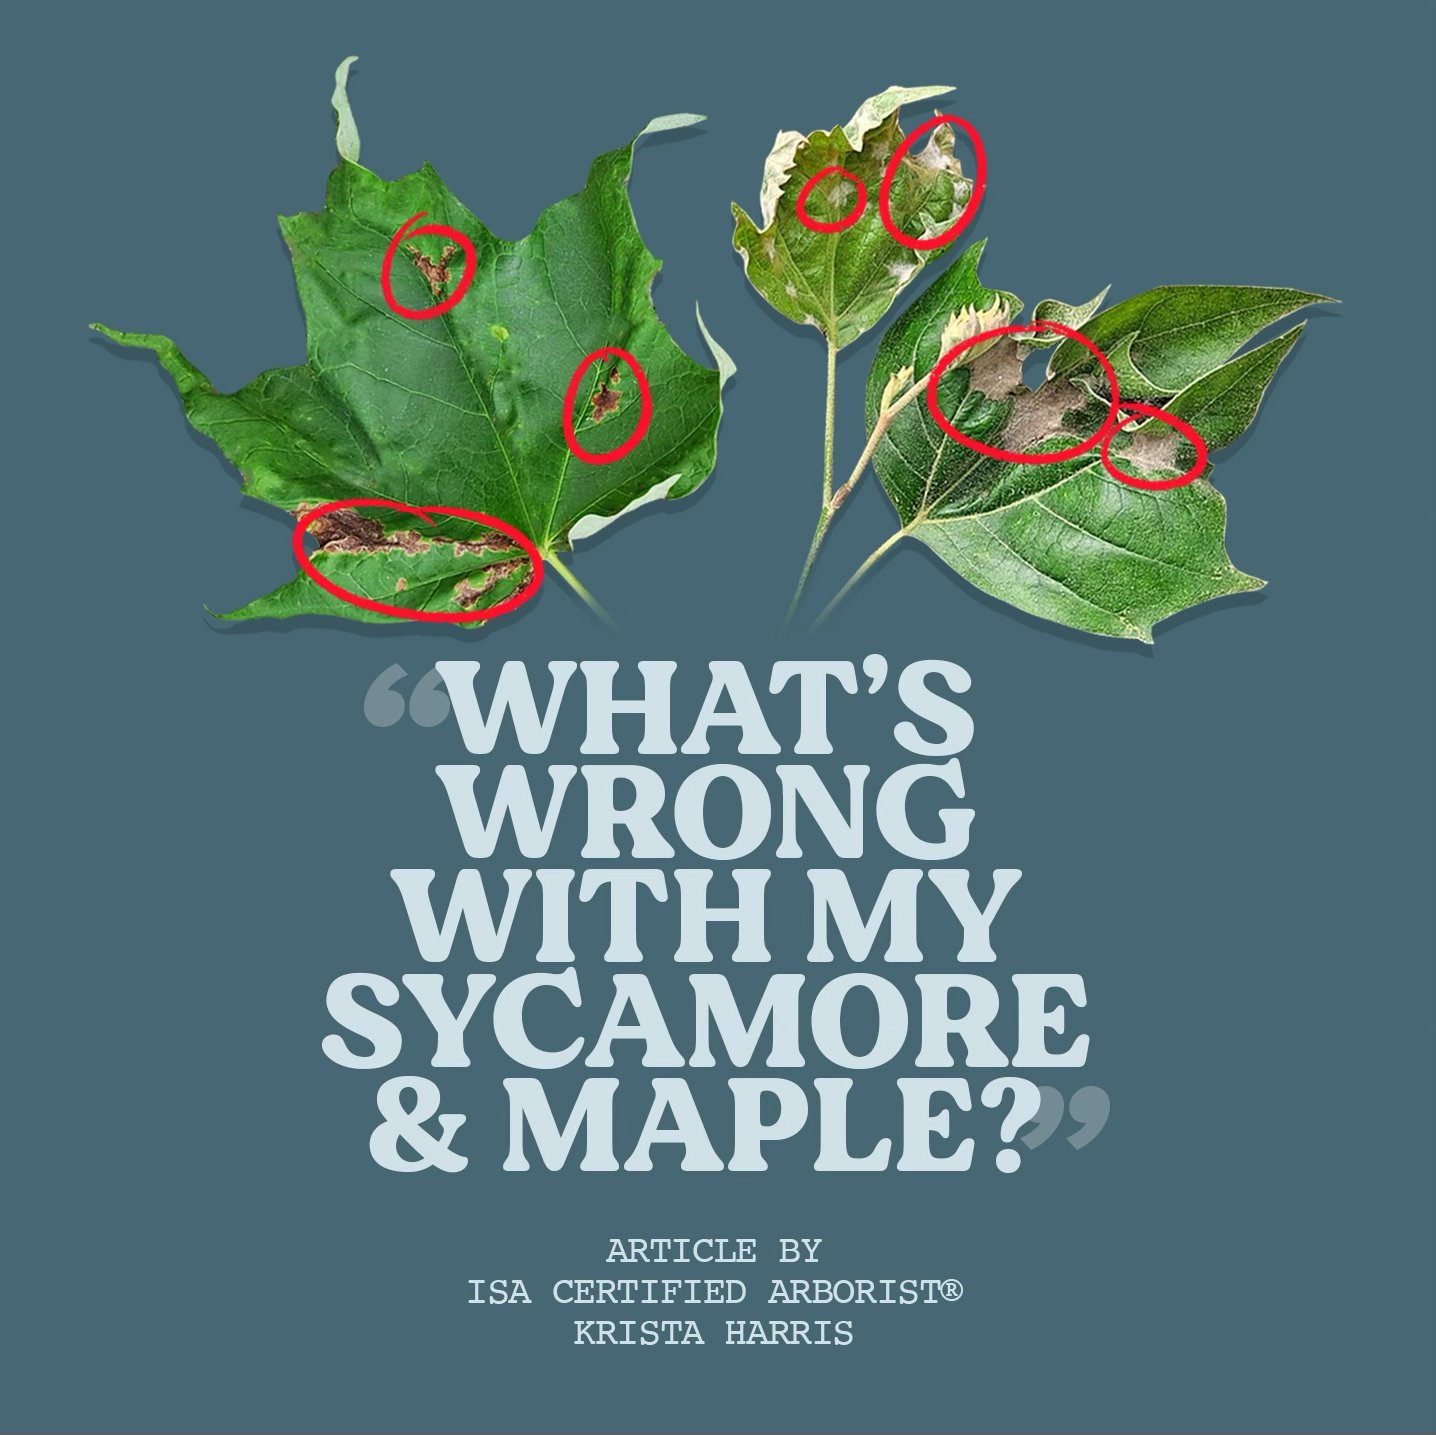
What's Wrong with my Sycamore & Maple?
"Why does my beautiful maple have ugly black spots on its leaves?" "Why is my American sycamore bare this year” …To answer these questions, we need to go back to a chilly, wet evening 5 weeks ago. On May 5th, the temperature dropped overnight to 41 degrees just after an early morning shower that day. We continued this cool, wet trend for 10 lousy days, and…
"Why does my beautiful maple have ugly black spots on its leaves?""Why is my American sycamore bare this year?"By Krista Harris
ISA Certified Arborist® OH-6699A
May 22, 2025
Anthracnose fungus attacks newly emerging leaves in the spring when the weather is just right for disease development. The symptoms vary from host to host, but typically infected leaves will have irregular dark spots along veins. Eventually, the leaf will curl, die, and fall. In the case of the sycamore, often the leaf buds are killed before they have even had a chance to emerge.
[Sugar Maple leaf before and after anthracnose fungus]
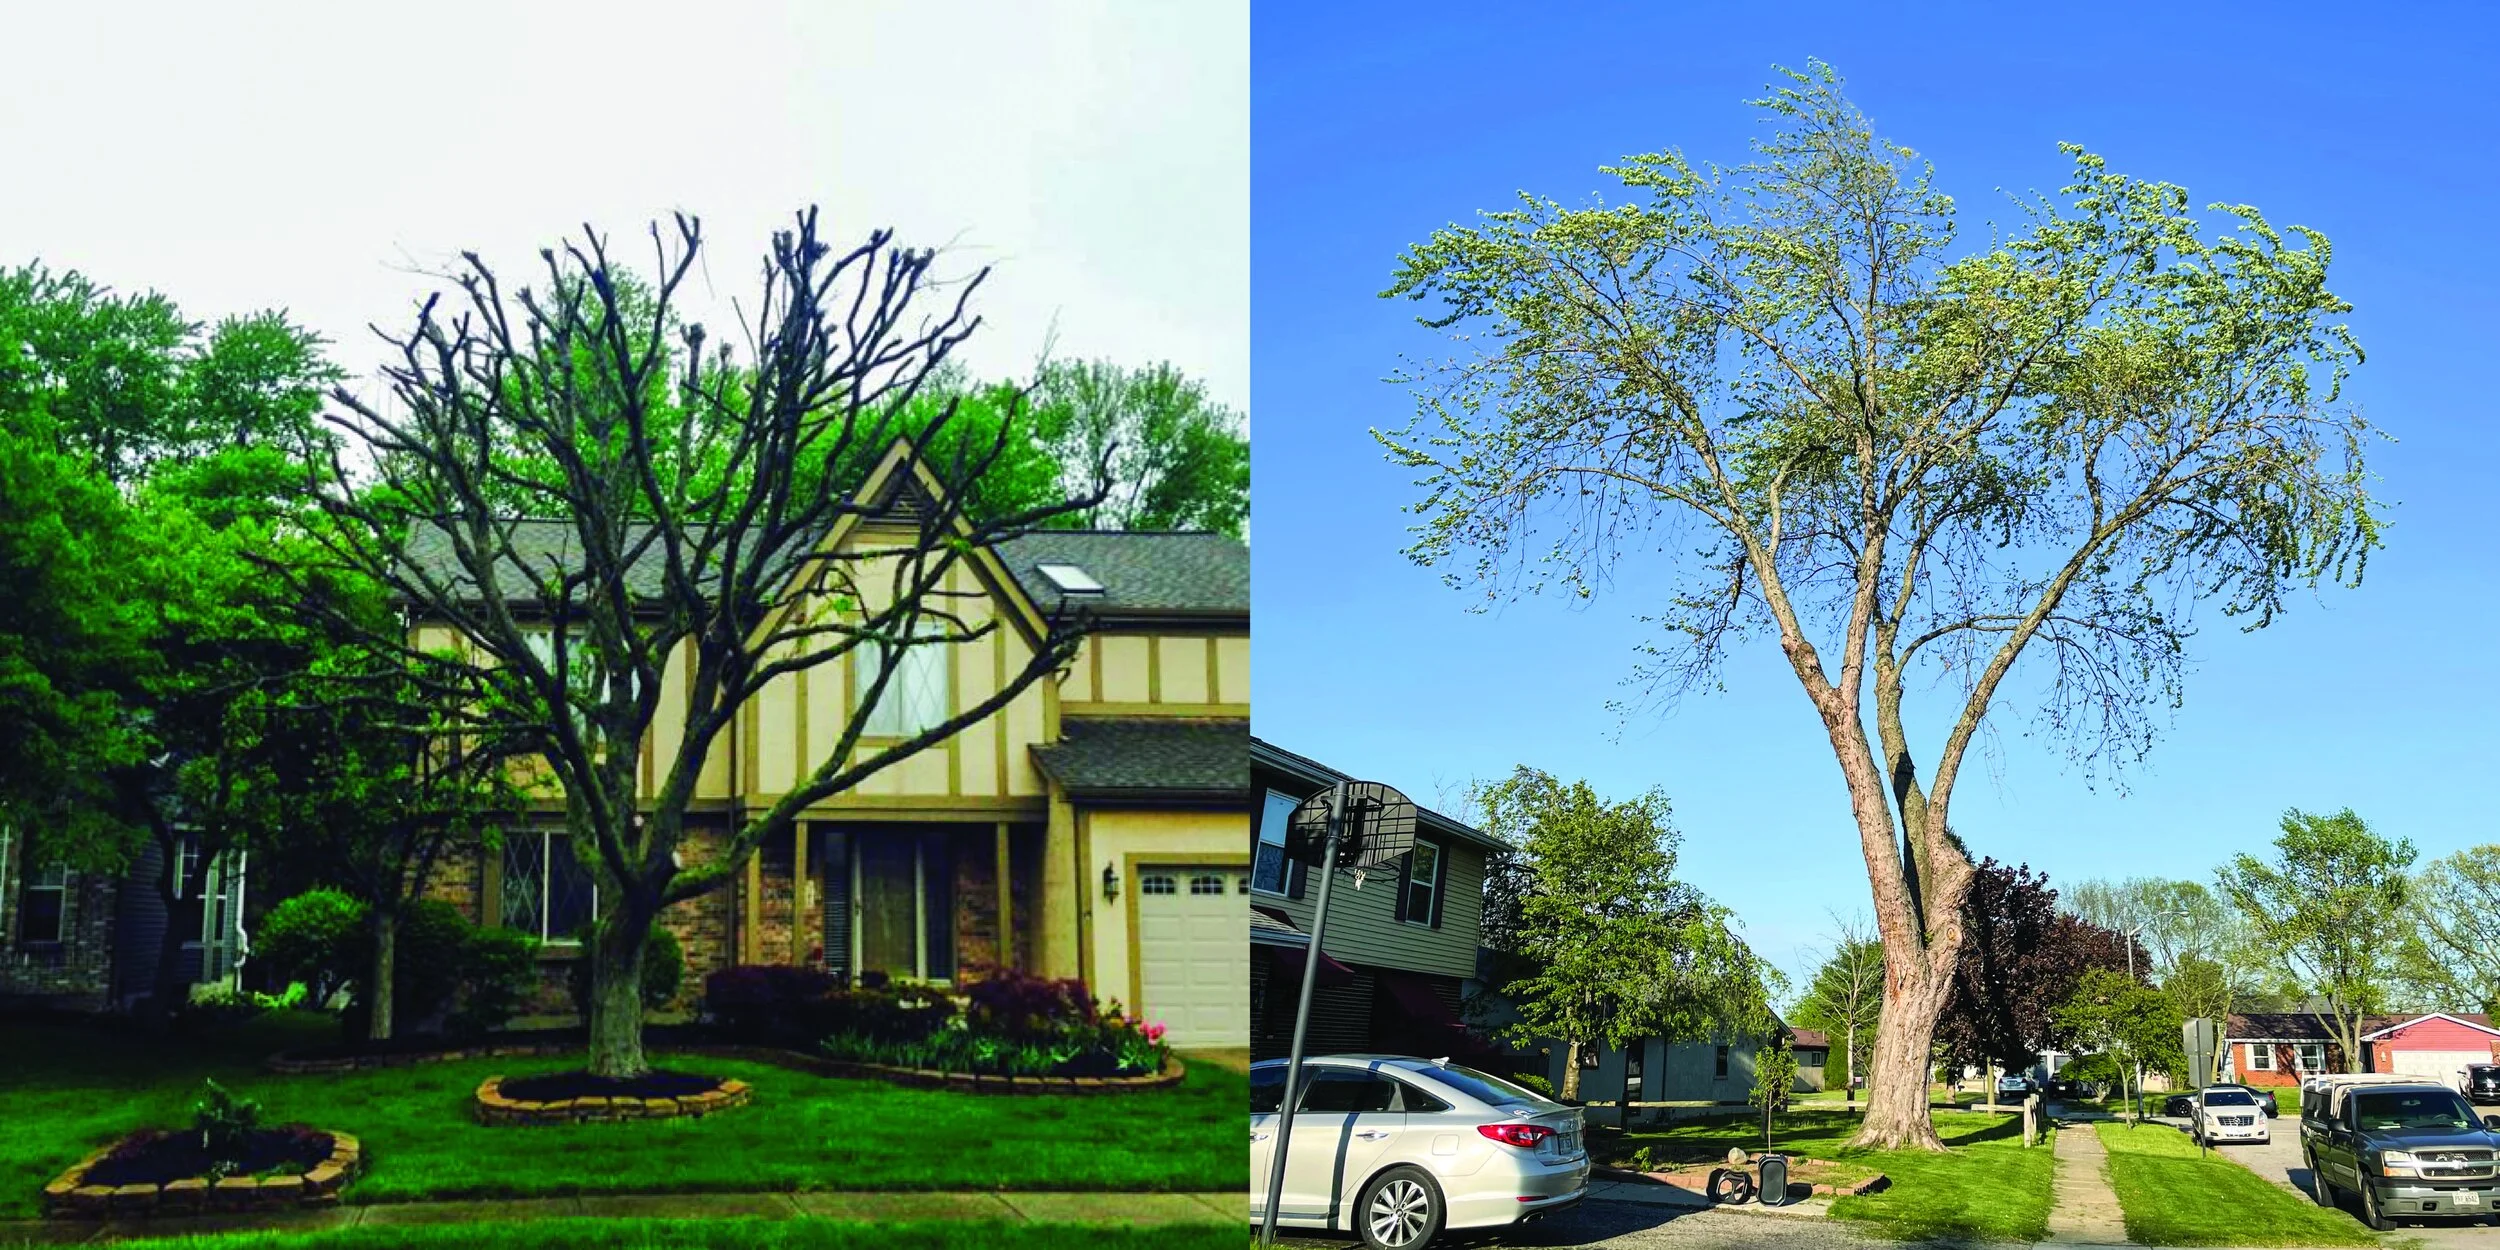
Anthracnose fungus affects many deciduous trees and seems to be most noticeable this year on sycamore and maple in our area. I have had at least 10 customers per week concerned that their beloved trees were dying due to this fungus. I have also been driving by my favorite American sycamores around my home, only to find them very sparsely leafed and struggling. This includes Upper Arlington's oldest tree, an amazing 3 stemmed beauty that our team pruned a few months ago.

[American Sycamore leaves with anthracnose fungus]Thankfully, I have wonderful news for the stewards of these afflicted trees. Anthracnose is a cosmetic disease for the majority of trees! If the tree is otherwise healthy and well established, it will be just fine. It will replace those lost leaves in July when conditions no longer favor anthracnose development.
How can you help trees with this seasonal infection?
Water your trees during our hot, dry summers! Concentrate the water at the ground level only, do not splash the leaves. All trees will appreciate the extra water, but those that have lost their leaves and are attempting to replace them will relish it! ARTICLE: HOW TO WATER YOUR TREES
Prune your trees for better air circulation and light penetration. This will help the leaves dry faster and it will be harder for the fungus to spread.
Dispose of affected leaves so that the spores are not hanging around next year to re-infect your tree.
Consider fertilizing your trees in the spring so that they have the needed nutrients to stay healthy (and possibly put on 2 sets of leaves if it is another good year for anthracnose infection).
Above all, do not panic! We cannot control the weather or the fungus. Just concentrate on overall tree health and by mid-summer, the trees will have recovered and this disease will be just a bad memory. For a free tree quote by one of our 20+ ISA Certified Arborists®, visit RussellTreeExperts.com/Quote or speaker to our friendly, local office staff at (614) 895-7000!
Please note: This article was originally published on 6/14/2021 and was revised on 5/22/2025.
ADDITIONAL ARBOR ED™ ARTICLES!


Krista Harris | Journeyperson, Russell Tree Experts
Krista grew up in the central Ohio area and became an ISA Certified Arborist® in 2017. She graduated from The Ohio State University with a Bachelor of Science in Crop Science and a minor in Plant Pathology in 2000 and has been in the green industry ever since. Her favorite trees are the American sycamore, American beech, and giant sequoia. [BS in Horticulture Crop Science, The Ohio State University / ISA Certified Arborist® OH-6699A / ODA Comm. Pesticide Lic. #148078]
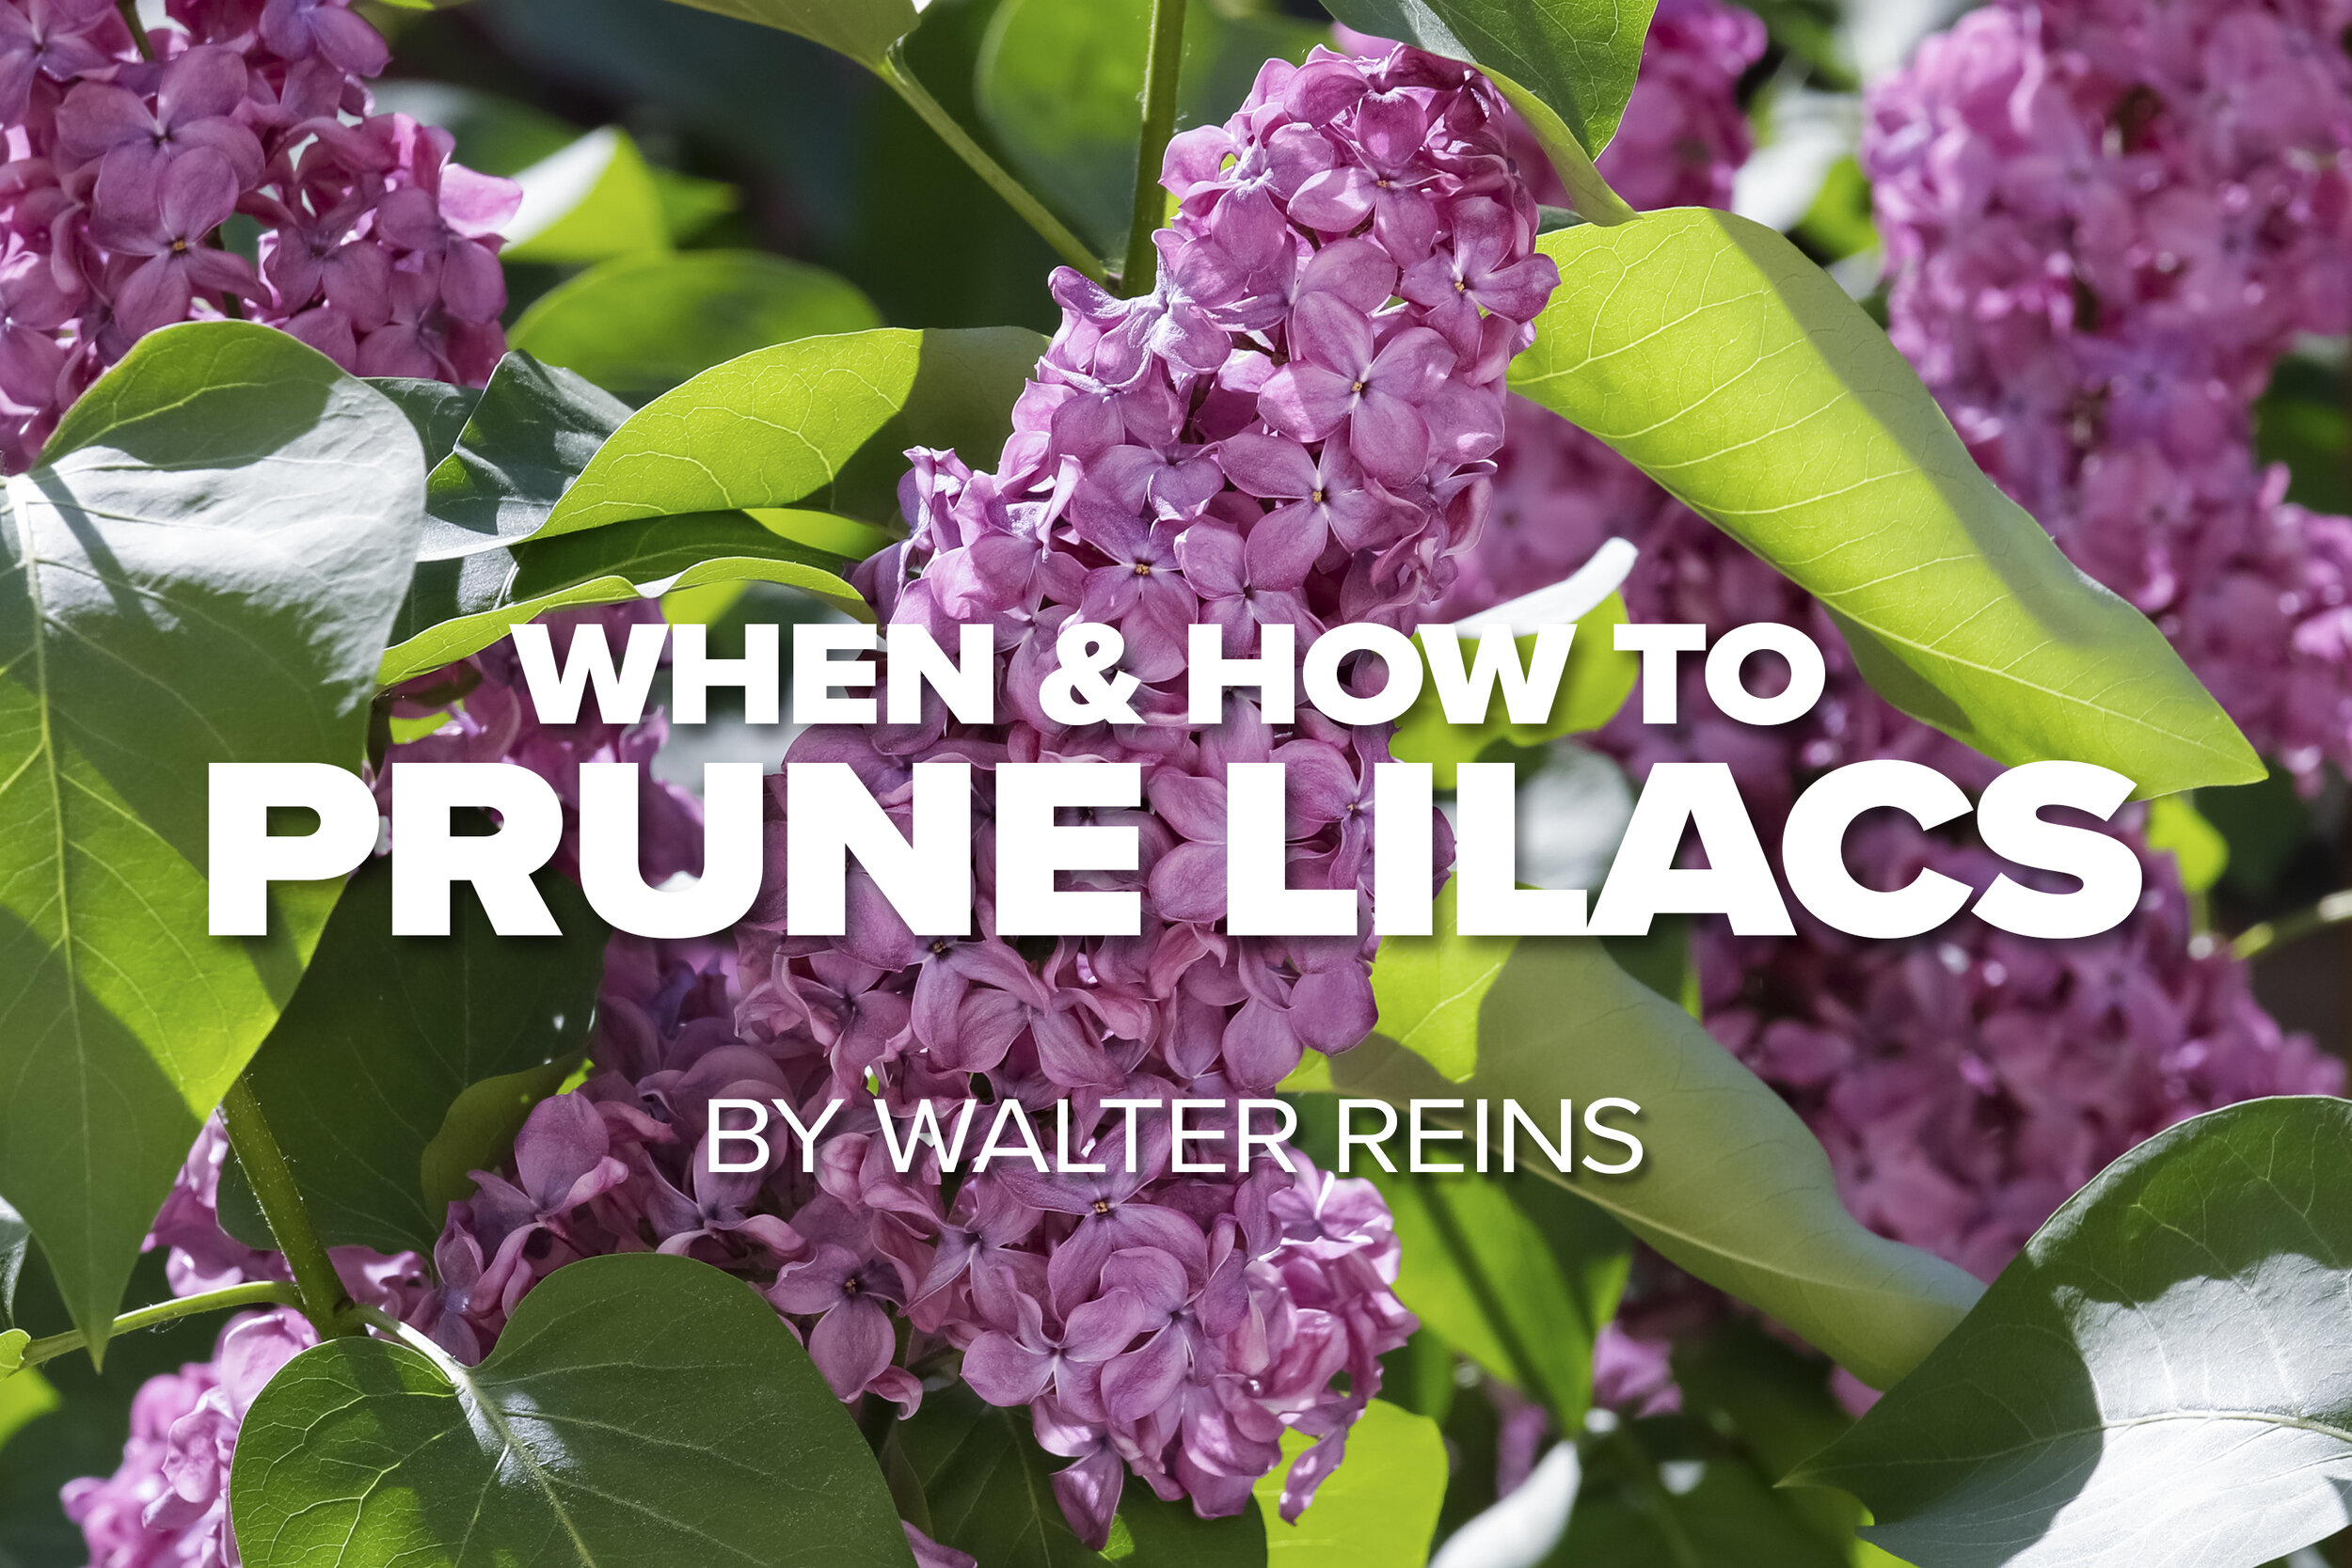
When and How to Prune Lilacs
Common lilacs (Syringa vulgaris) are a favorite landscape shrub here in Ohio and beyond, with flowers that provide beauty and an unmistakable fragrance every spring. Other cultivars of lilacs offer different habits and uses in the landscape, but provide the same display of flowers that we all love. In order to ensure you get the most flowers on your lilac year after year, it’s important to know when and how to prune them.
By Walter Reins
ISA Certified Arborist® OH-5113A
March 6, 2025
Common lilacs (Syringa vulgaris) are a favorite landscape shrub here in Ohio and beyond, with flowers that provide beauty and an unmistakable fragrance every spring. Other cultivars of lilacs offer different habits and uses in the landscape, but provide the same display of flowers that we all love. In order to ensure you get the most flowers on your lilac year after year, it’s important to know when and how to prune them.
When To Prune
As a general rule for all lilacs, they should be pruned immediately after they’re done flowering in the spring. Since lilacs set next year’s flower buds right after the current year’s flowers have faded, pruning later in the summer or fall will result in cutting off many or all of next year’s flowers. This rule of timing applies to the larger common lilacs as well as the cultivars that are shorter or more “shrub” like. While the “when” of pruning lilacs is fairly straightforward, the “how” gets a little trickier. To keep things simple for now, we’ll think of lilac pruning as either maintenance pruning or rejuvenation pruning.
How To: Maintenance Pruning
For any lilac shrubs that have not outgrown their space or are still producing vibrant flowers each year, regular pruning can simply consist of any shaping that you choose to do along with removal of dead, diseased, or broken stems. You can also remove spent flowers from your lilacs to help encourage a cleaner growth habit and appearance. It’s always better to do this type of pruning by hand, rather than shearing. When making cuts, try to cut back to an outward facing bud. A good pair of hand pruners is the perfect tool for this and makes for much better pruning cuts than hedge shears.
How To: Rejuvenation Pruning
If you’ve ever had an older common lilac in your landscape that went unpruned for many years, you’re probably familiar with their overgrown, unruly habit when left alone. Many people mistakenly believe that these shrubs have stopped flowering at this point. Oftentimes what’s actually happening is the flowers are being produced on just the upper portions of the shrub where the plant has reached a taller height and is exposed to sunlight. Once they’ve reached this stage, we’re often left to stare at bare, woody branches at eye level and below. For these overgrown shrubs, we can remove entire older canes or stems that are 2” in diameter or larger to encourage a rejuvenation of the shrub. We want to apply the rule of thirds when doing this type of pruning - Remove approximately one third of the older canes or stems each year for 3 years. This gives the shrub a chance to slowly transition back to a fuller, shorter shrub with more new growth filling in from the bottom. If you decide to drastically prune the entire shrub this way all at once rather than just a third of it, a little extra care like fertilization and watering will be important to encourage new growth. Note that this “all at once” approach is generally not recommended for the health of the shrub.
Your lilac flowers can be influenced by many things, including the temperature, soil conditions, even disease and insect problems, but proper pruning goes a long way to ensuring they put on a great show every spring. And remember, if you have specific questions about pruning or anything tree and shrub related, your dedicated Russell Tree Experts arborist is only an email or phone call away.
*New* Video!
To accompany the above article, Walter Reins demos how to prune lilac trees in this new video! Click below!
Please note: This article was originally published on 4/6/2020 and was republished on 3/6/2025.
ADDITIONAL ARBOR ED ARTICLES!


Walter Reins | Regional Manager, Russell Tree Experts
Walter became an ISA Certified Arborist® in 2003 and has a degree in landscape horticulture. He has 25 years of experience in the tree and landscape industries and originally began working at Russell Tree Experts in 2011. Walter is also the owner/operator of Iwakura Japanese Gardens, a small design/build/maintenance firm specializing in Japanese-style gardens, and also offers responsible tree planting for all landscapes.
DID YOU KNOW? Tree Care In the Winter
In some cases, pruning trees in winter is actually more beneficial than during other times of the year due to increased canopy visibility and lower risk of disease. Check out the video above to learn more!
DID YOU KNOW?
In some cases, pruning trees in the winter is actually more beneficial than during other times of the year due to increased canopy visibility and lower risk of disease. Check out the video above to learn more!
Don’t Get Fooled by the Fall Color of Conifers!
Every fall I get calls from folks concerned about yellow needles on their evergreen trees. Often times I’m told that the trees are sick or that they appear to be dying from the inside out. There are some disease and insect problems that can cause yellowing and premature loss of needles in conifers but most often what people are reporting is just normal fall color.

By TJ Nagel
ISA Board Certified Master Arborist® OH-6298B
November 13, 2025
Every fall I get calls from folks concerned about yellow needles on their evergreen trees. Often times I’m told that the trees are sick or that they appear to be dying from the inside out. There are some disease and insect problems that can cause yellowing and premature loss of needles in conifers but most often what people are reporting is just normal fall color.
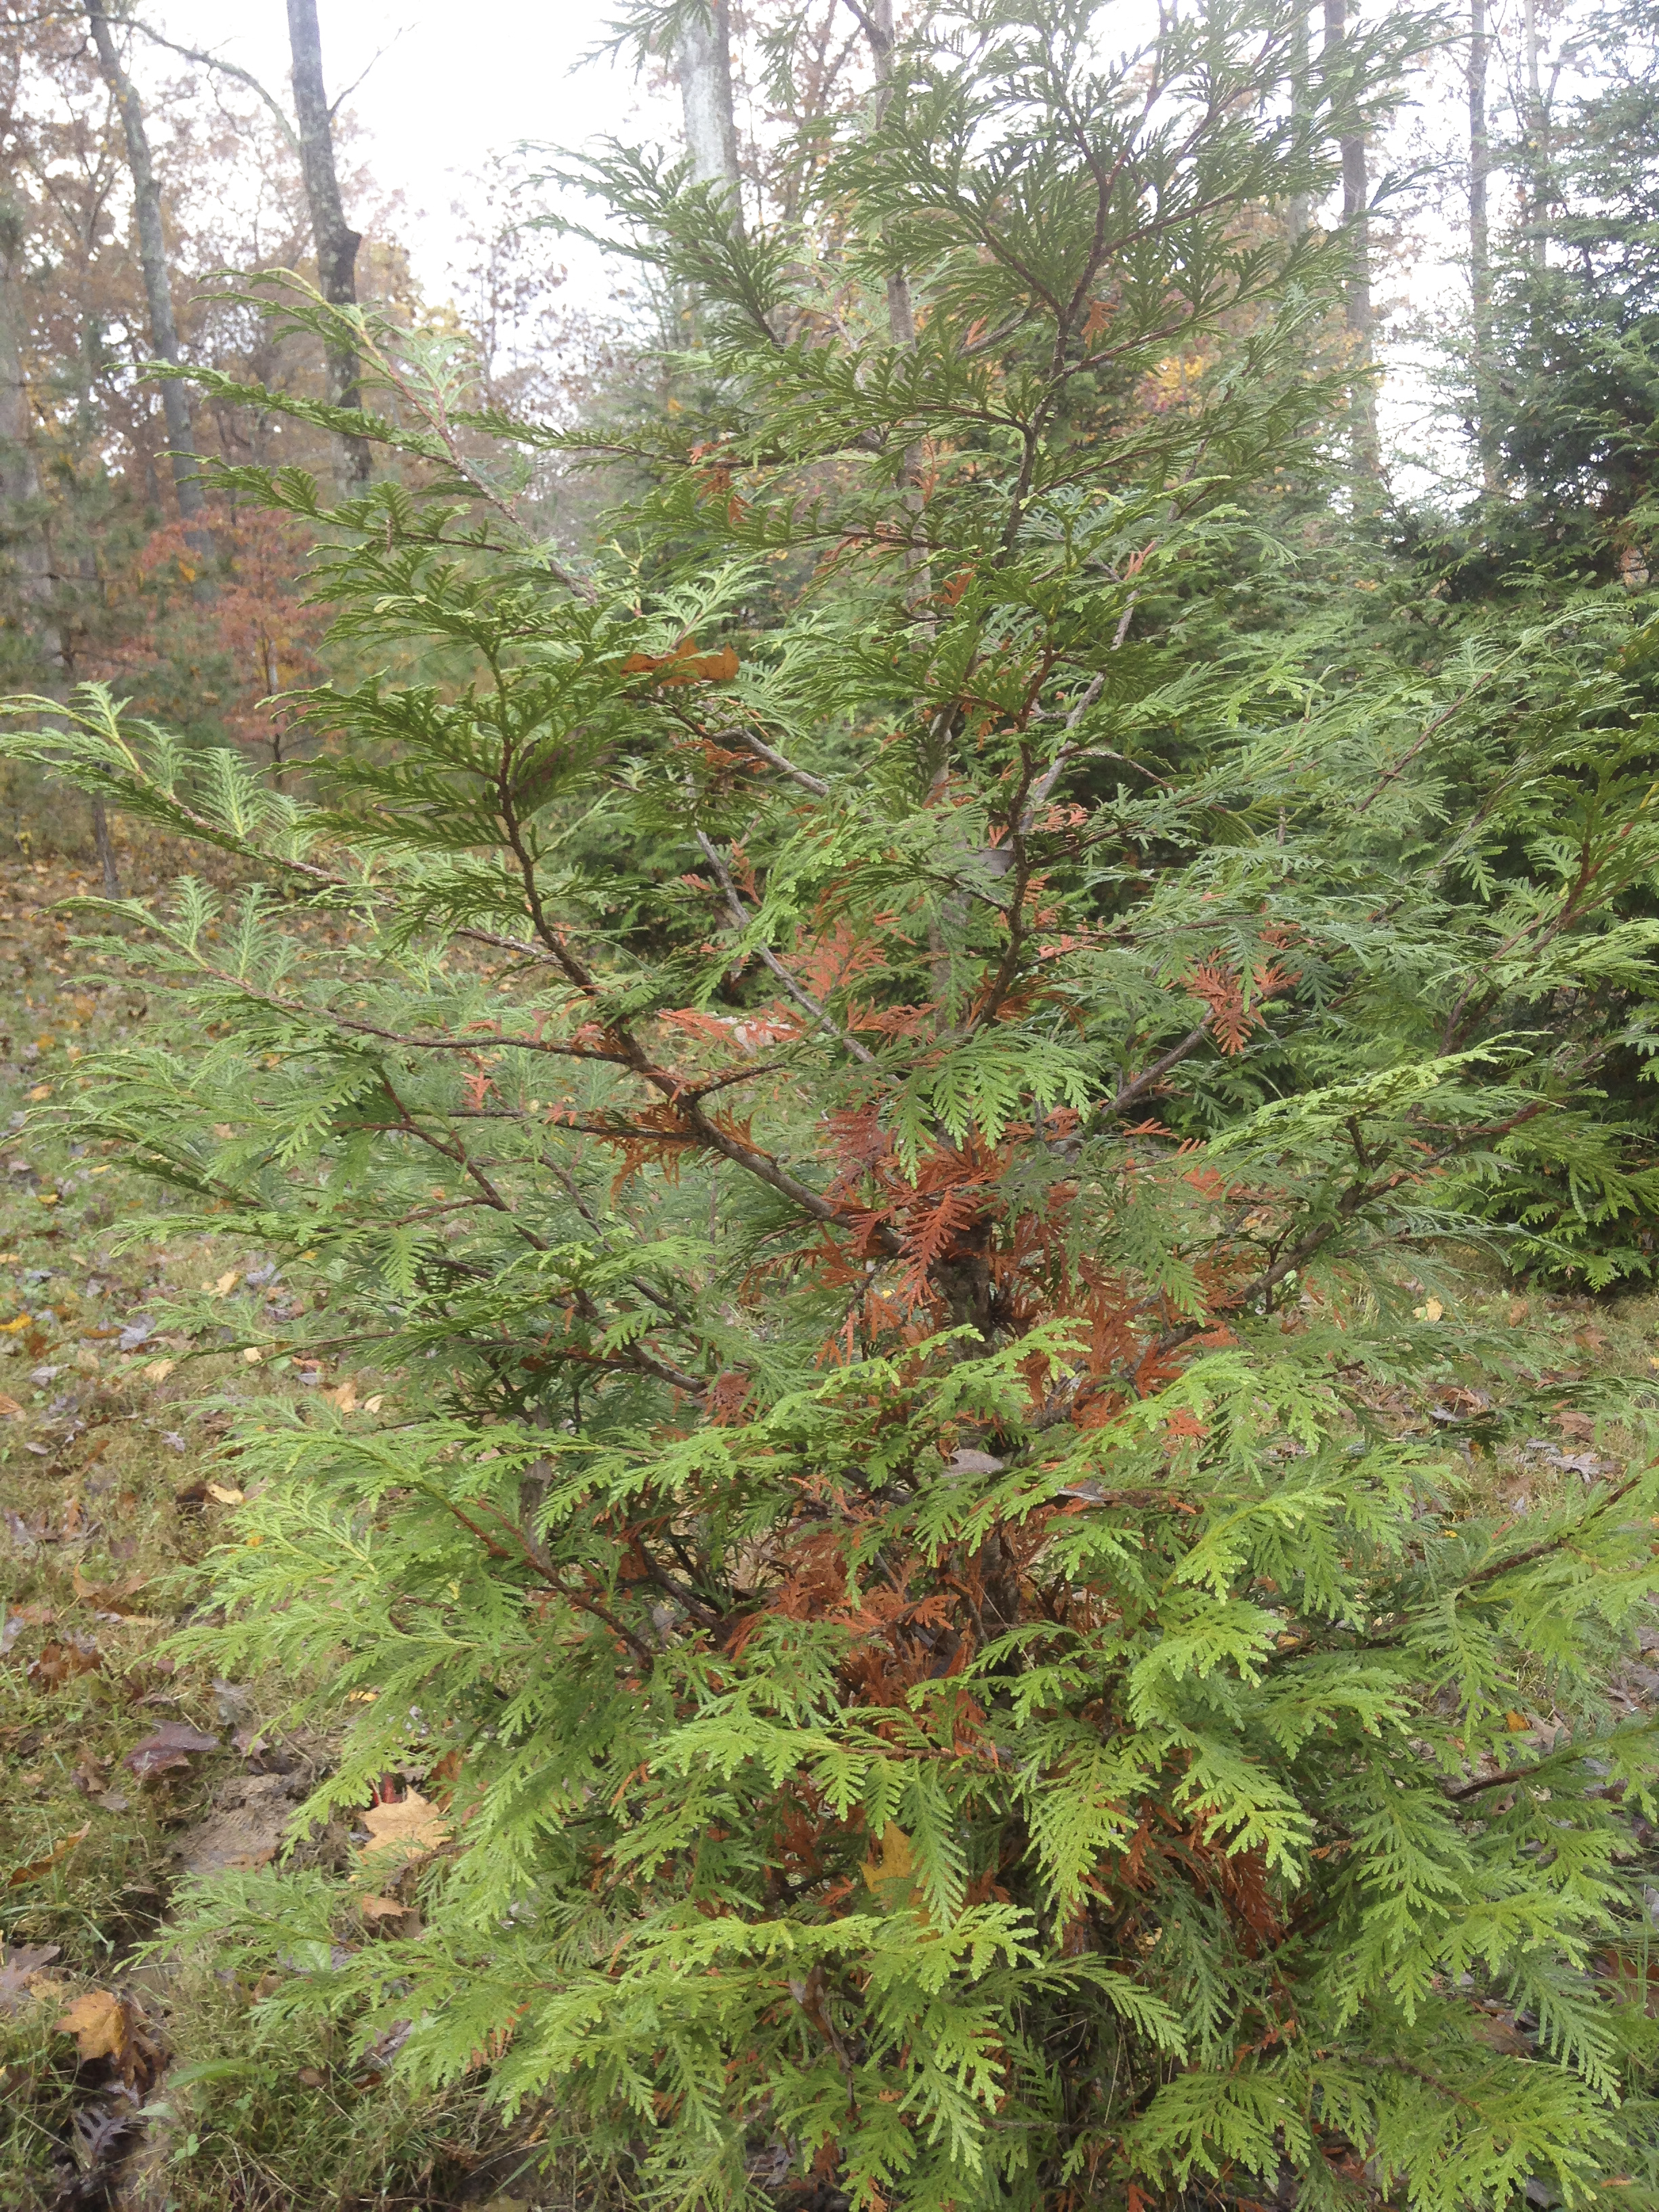
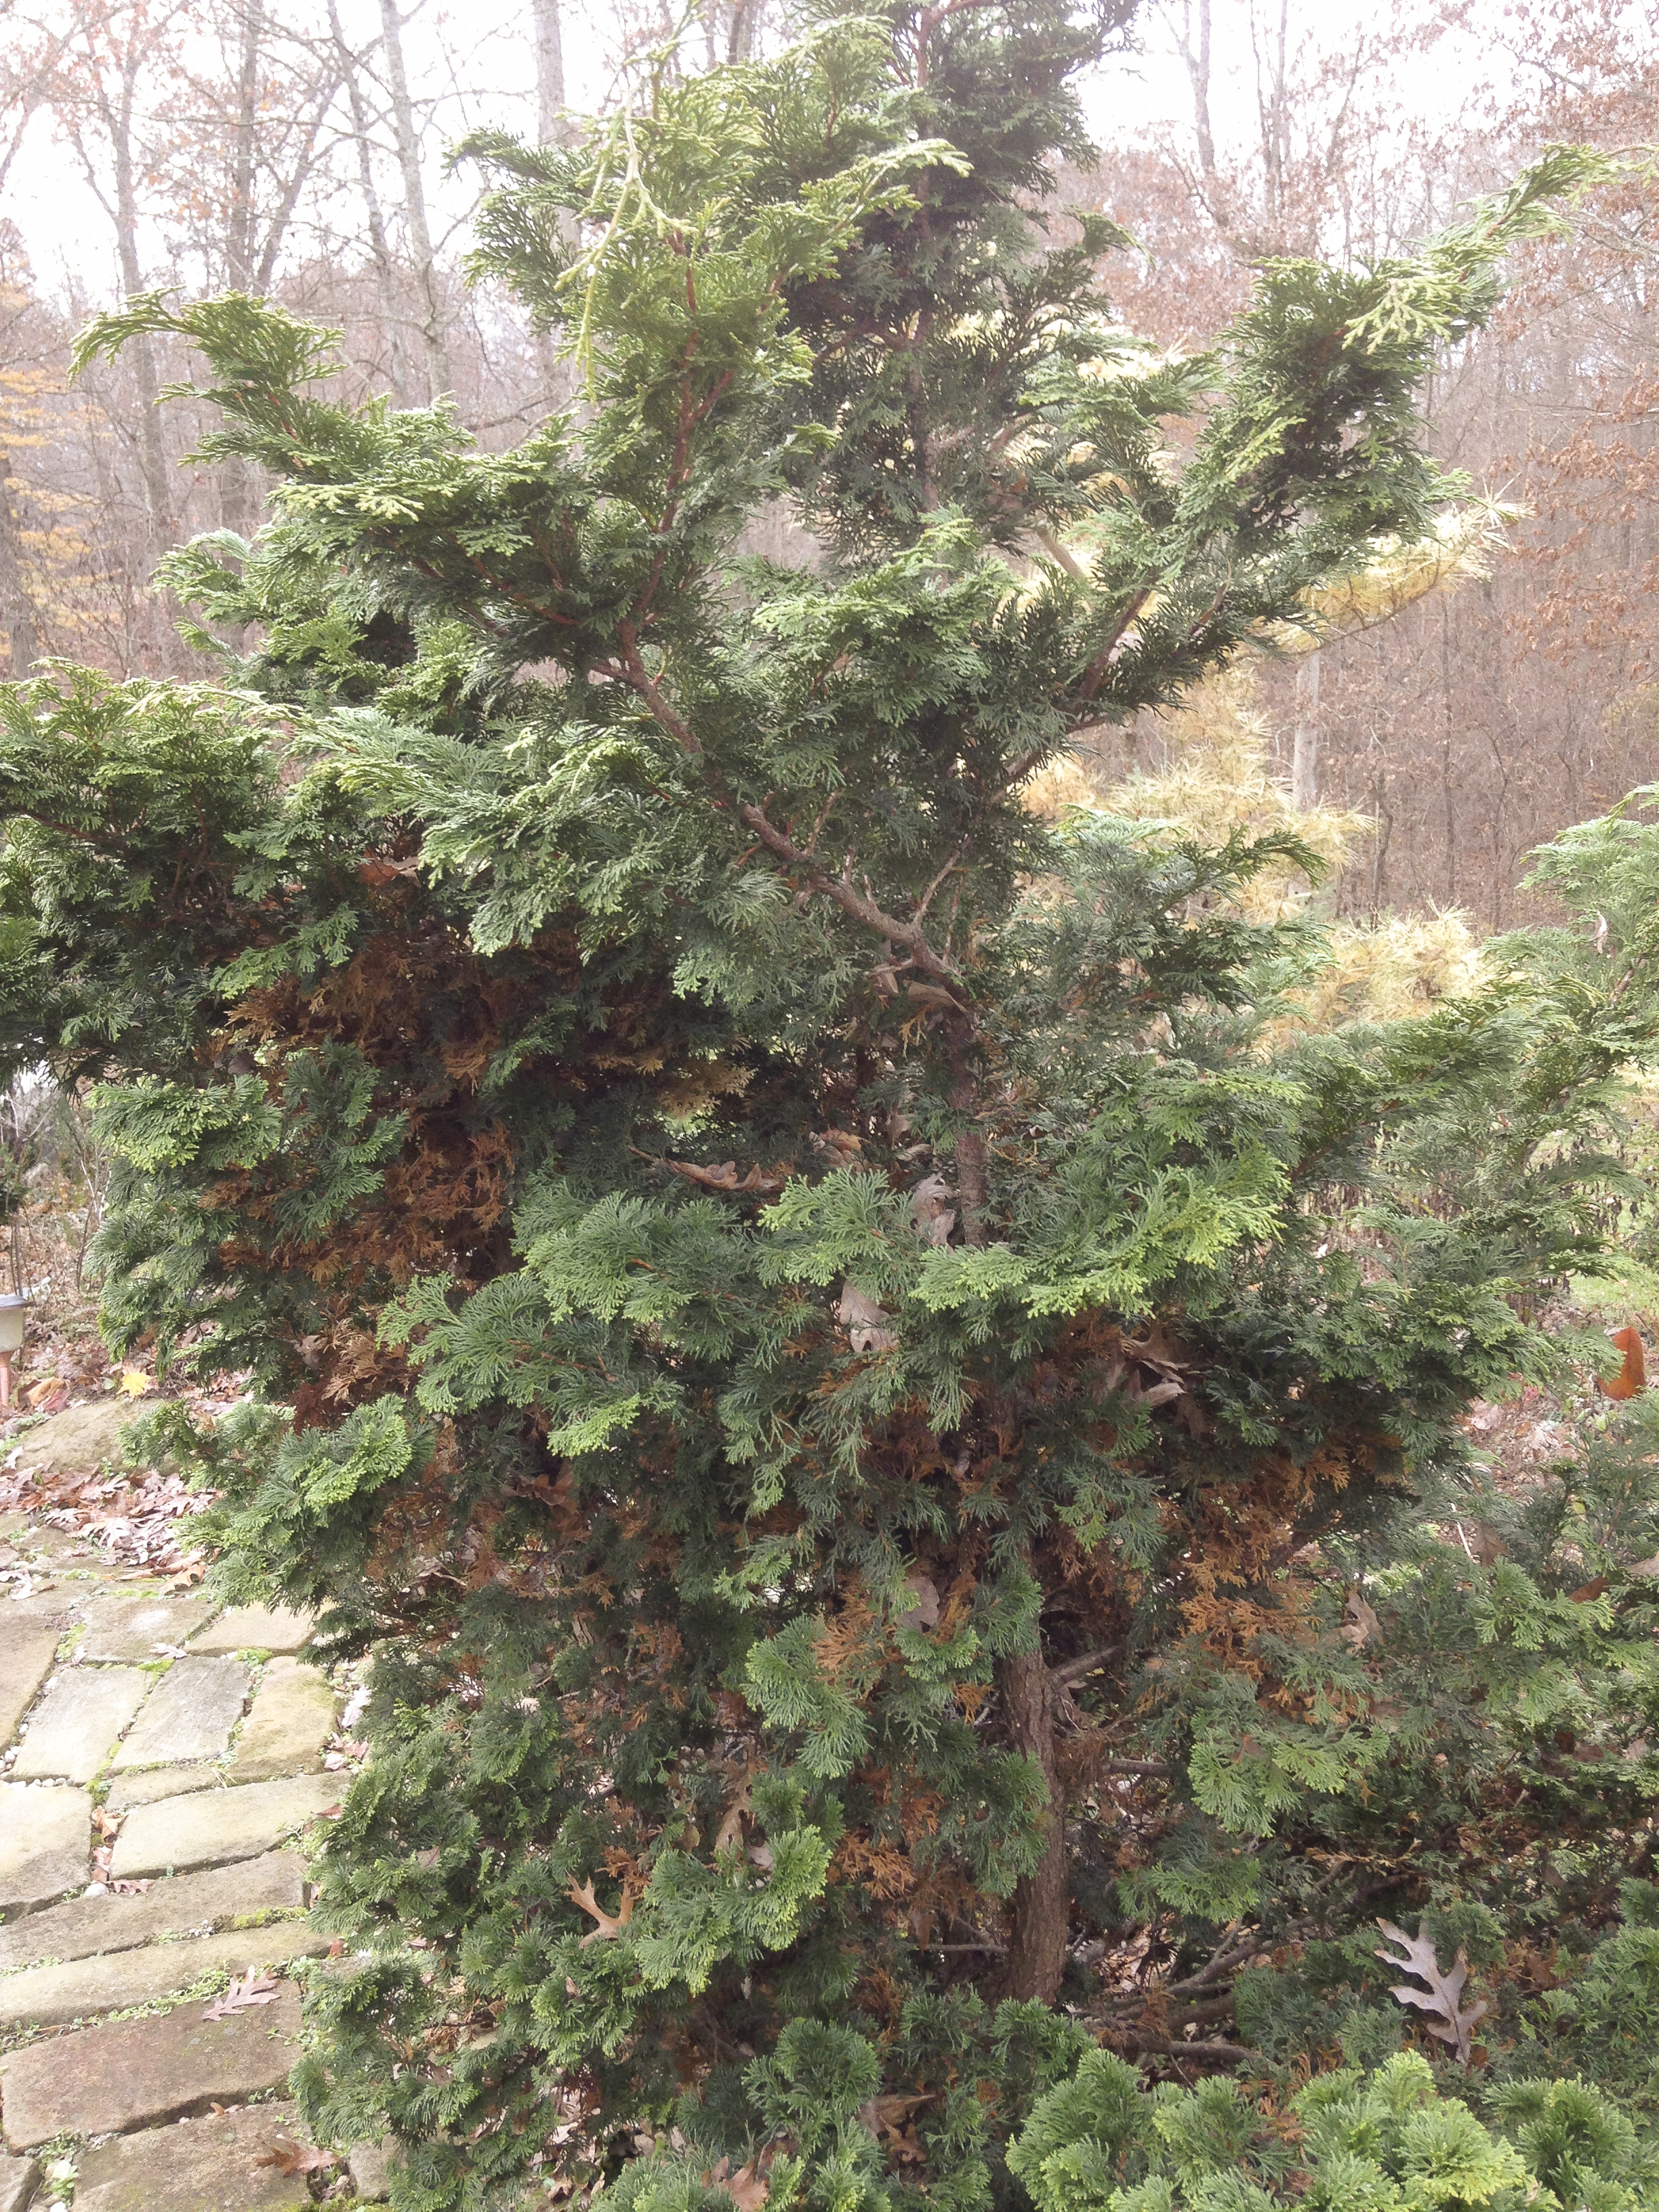
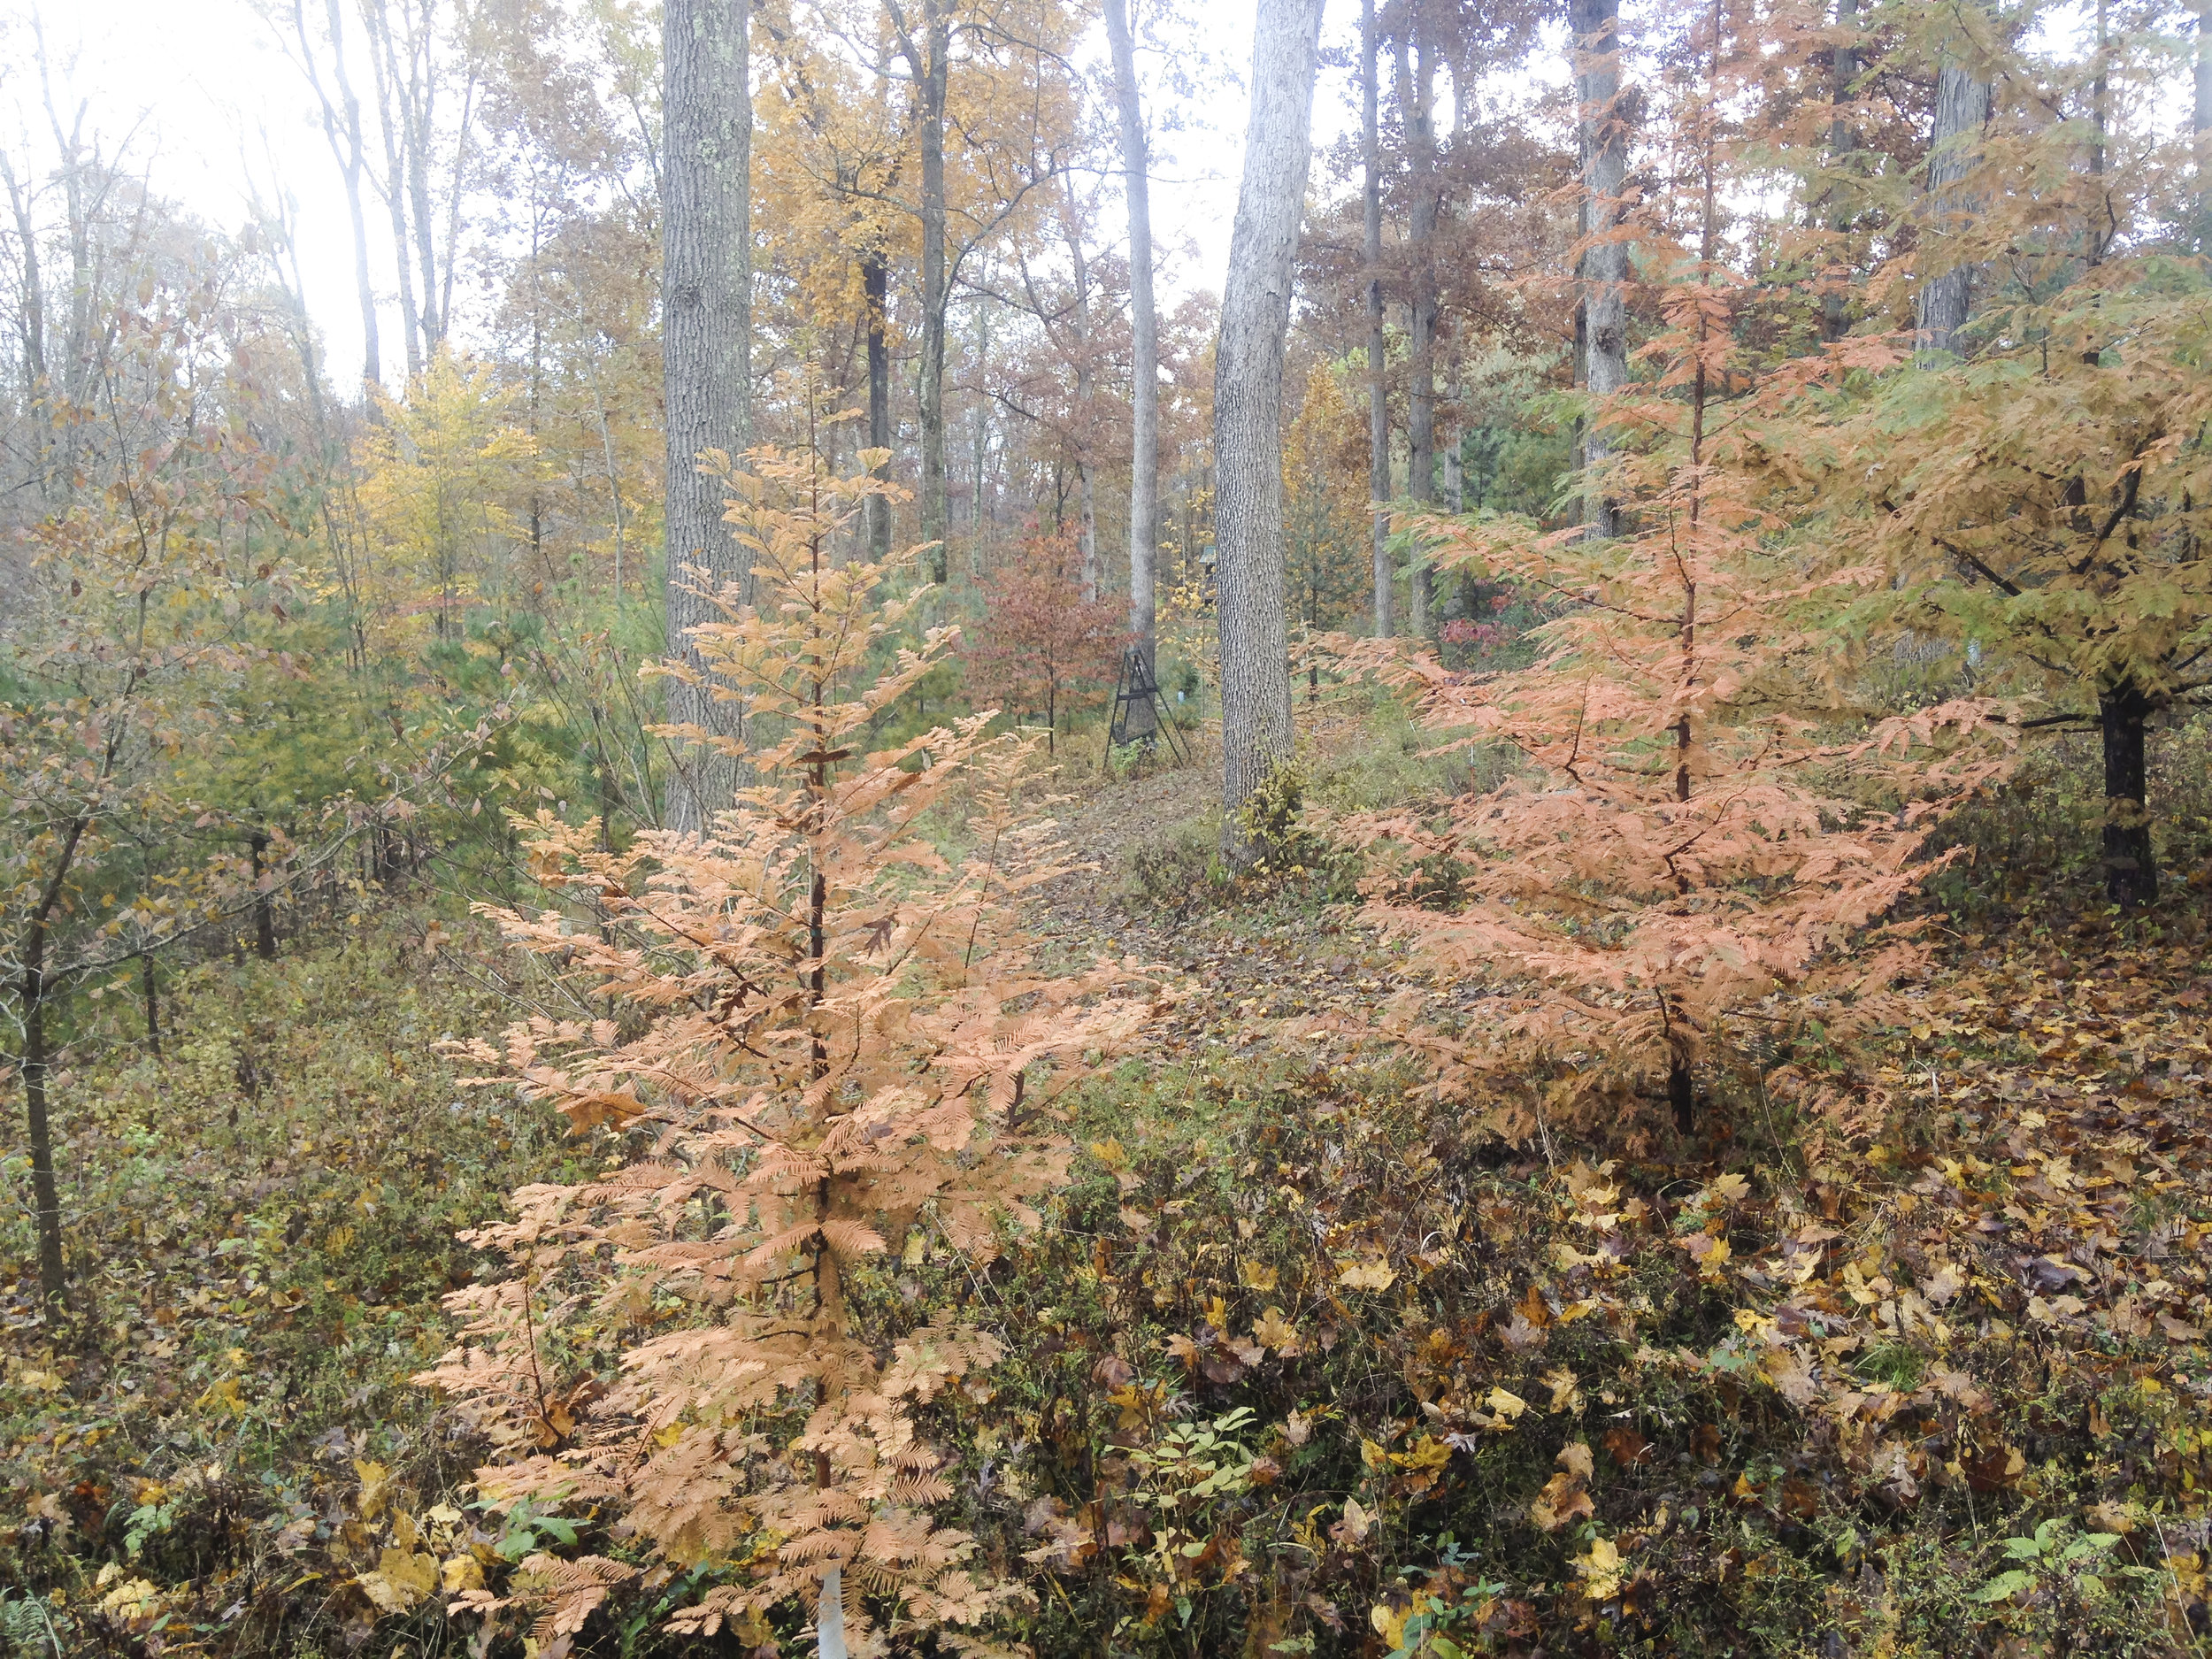
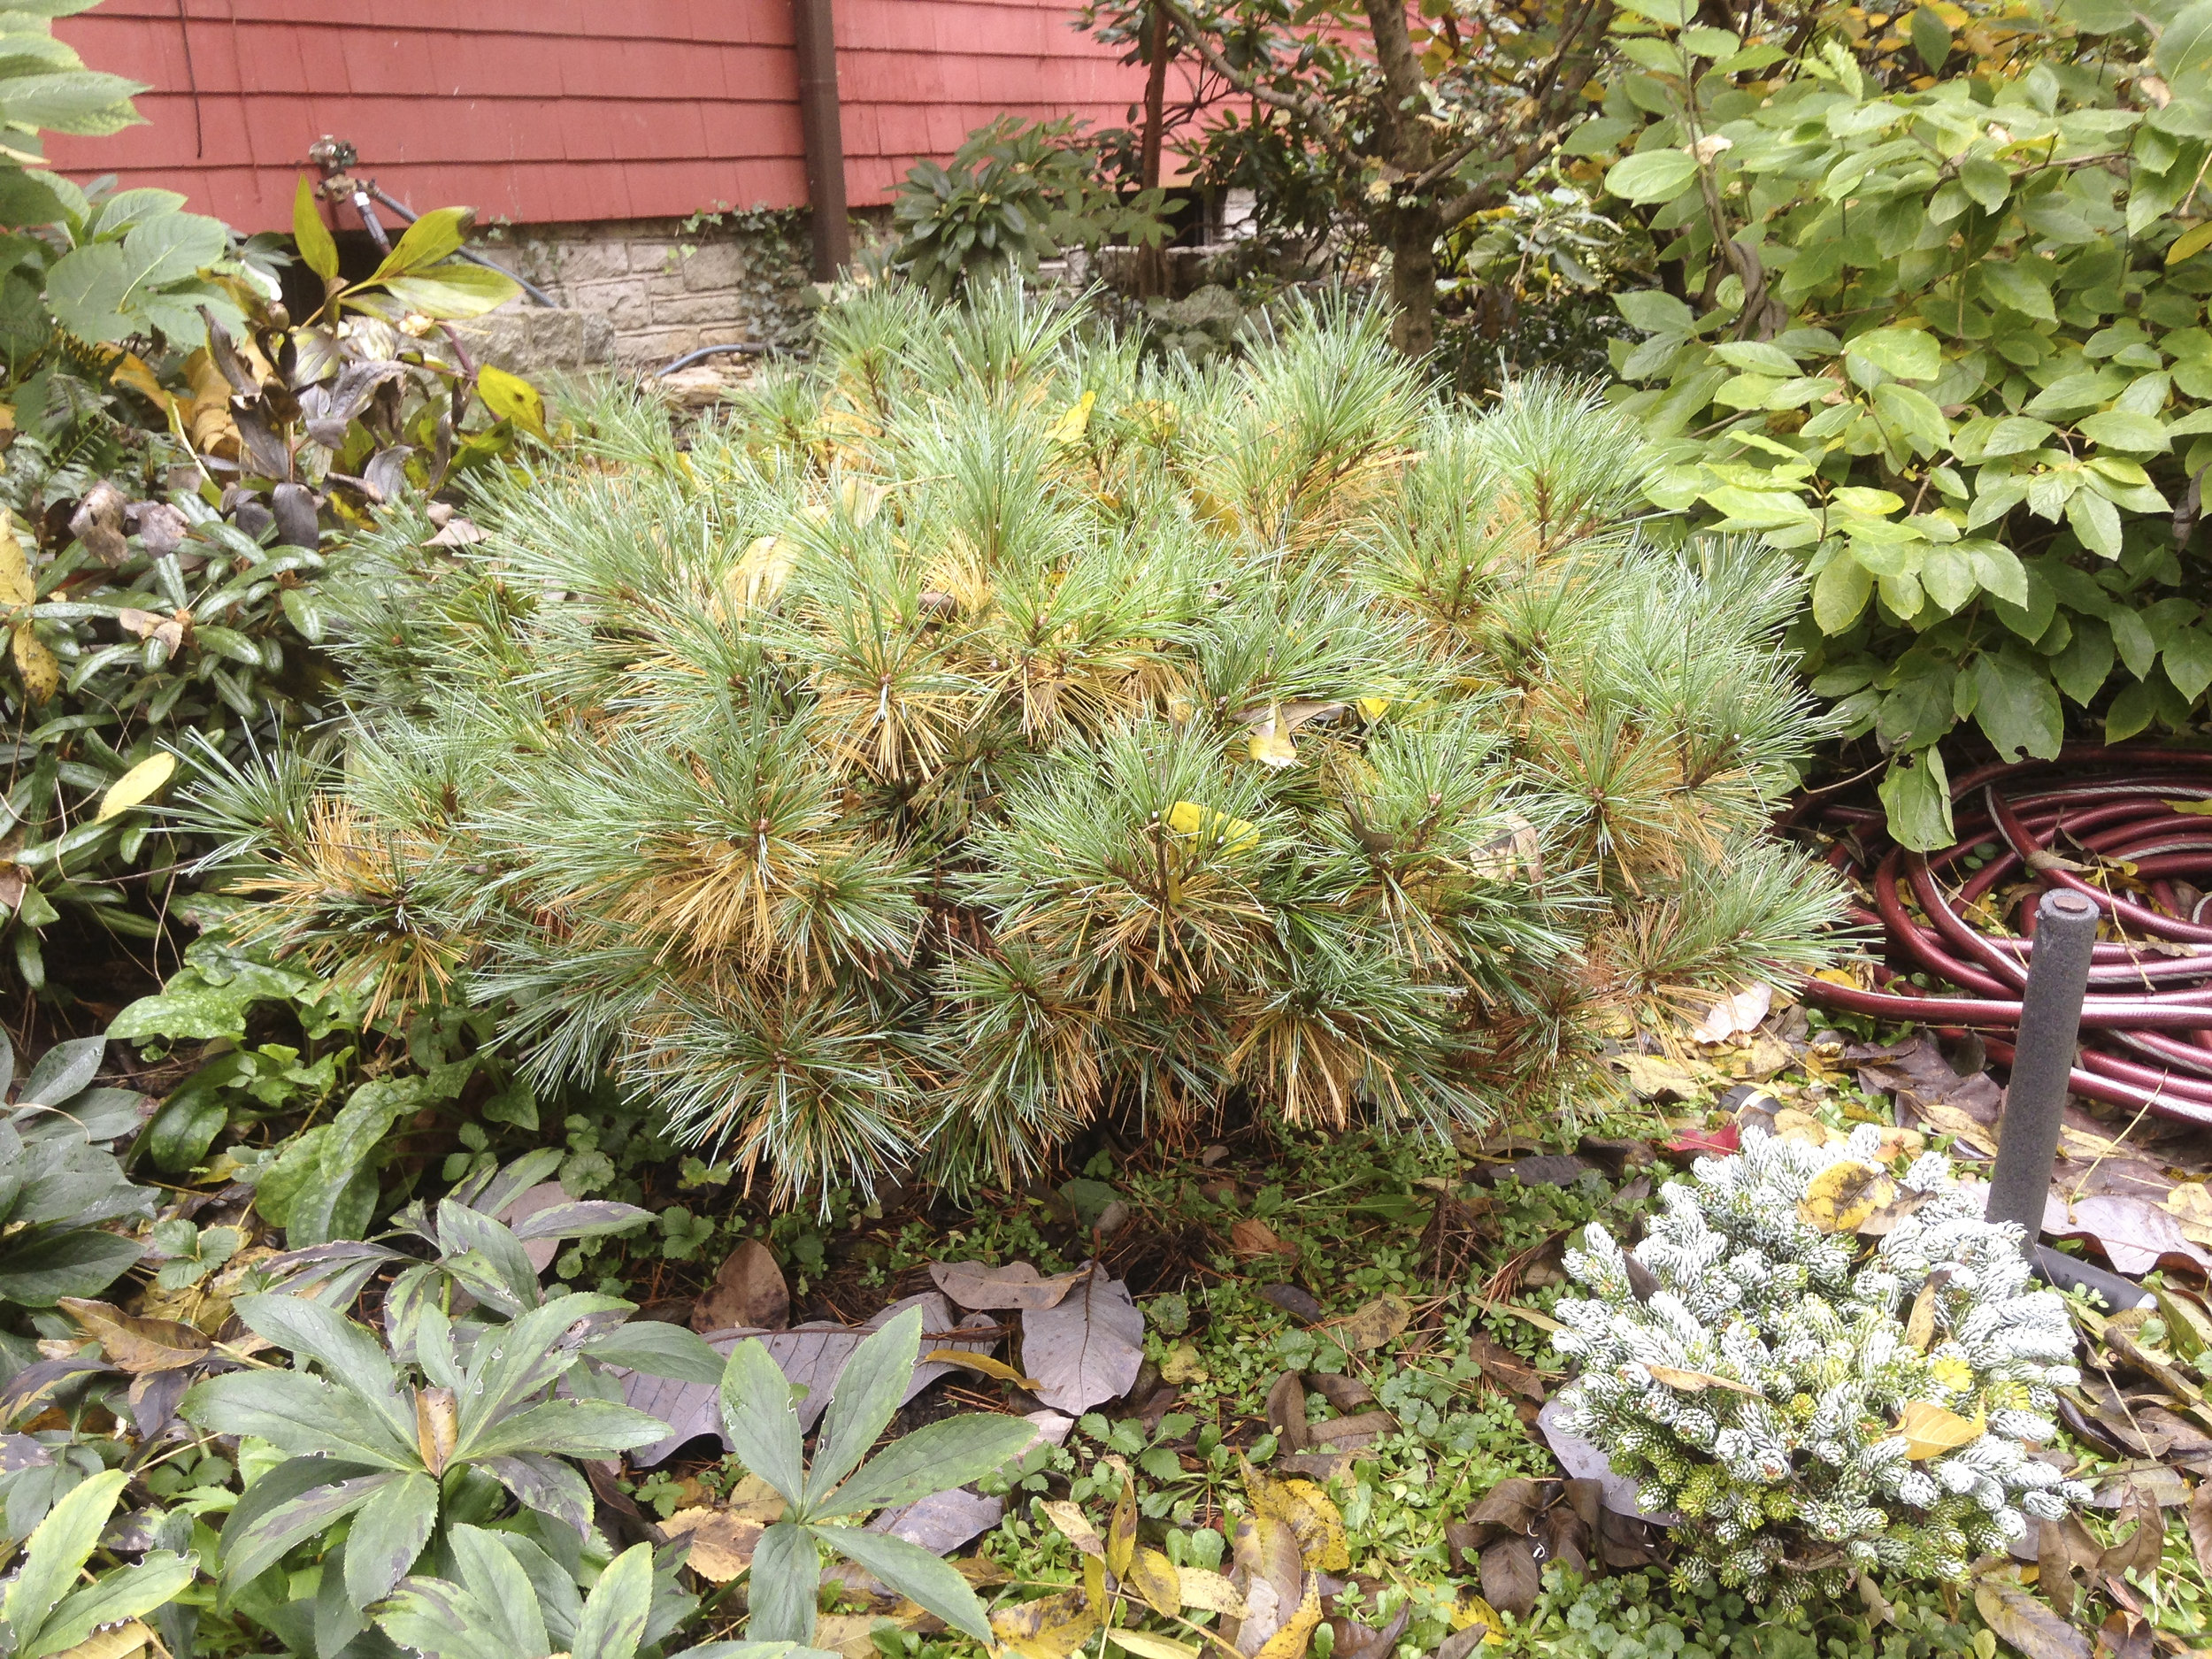
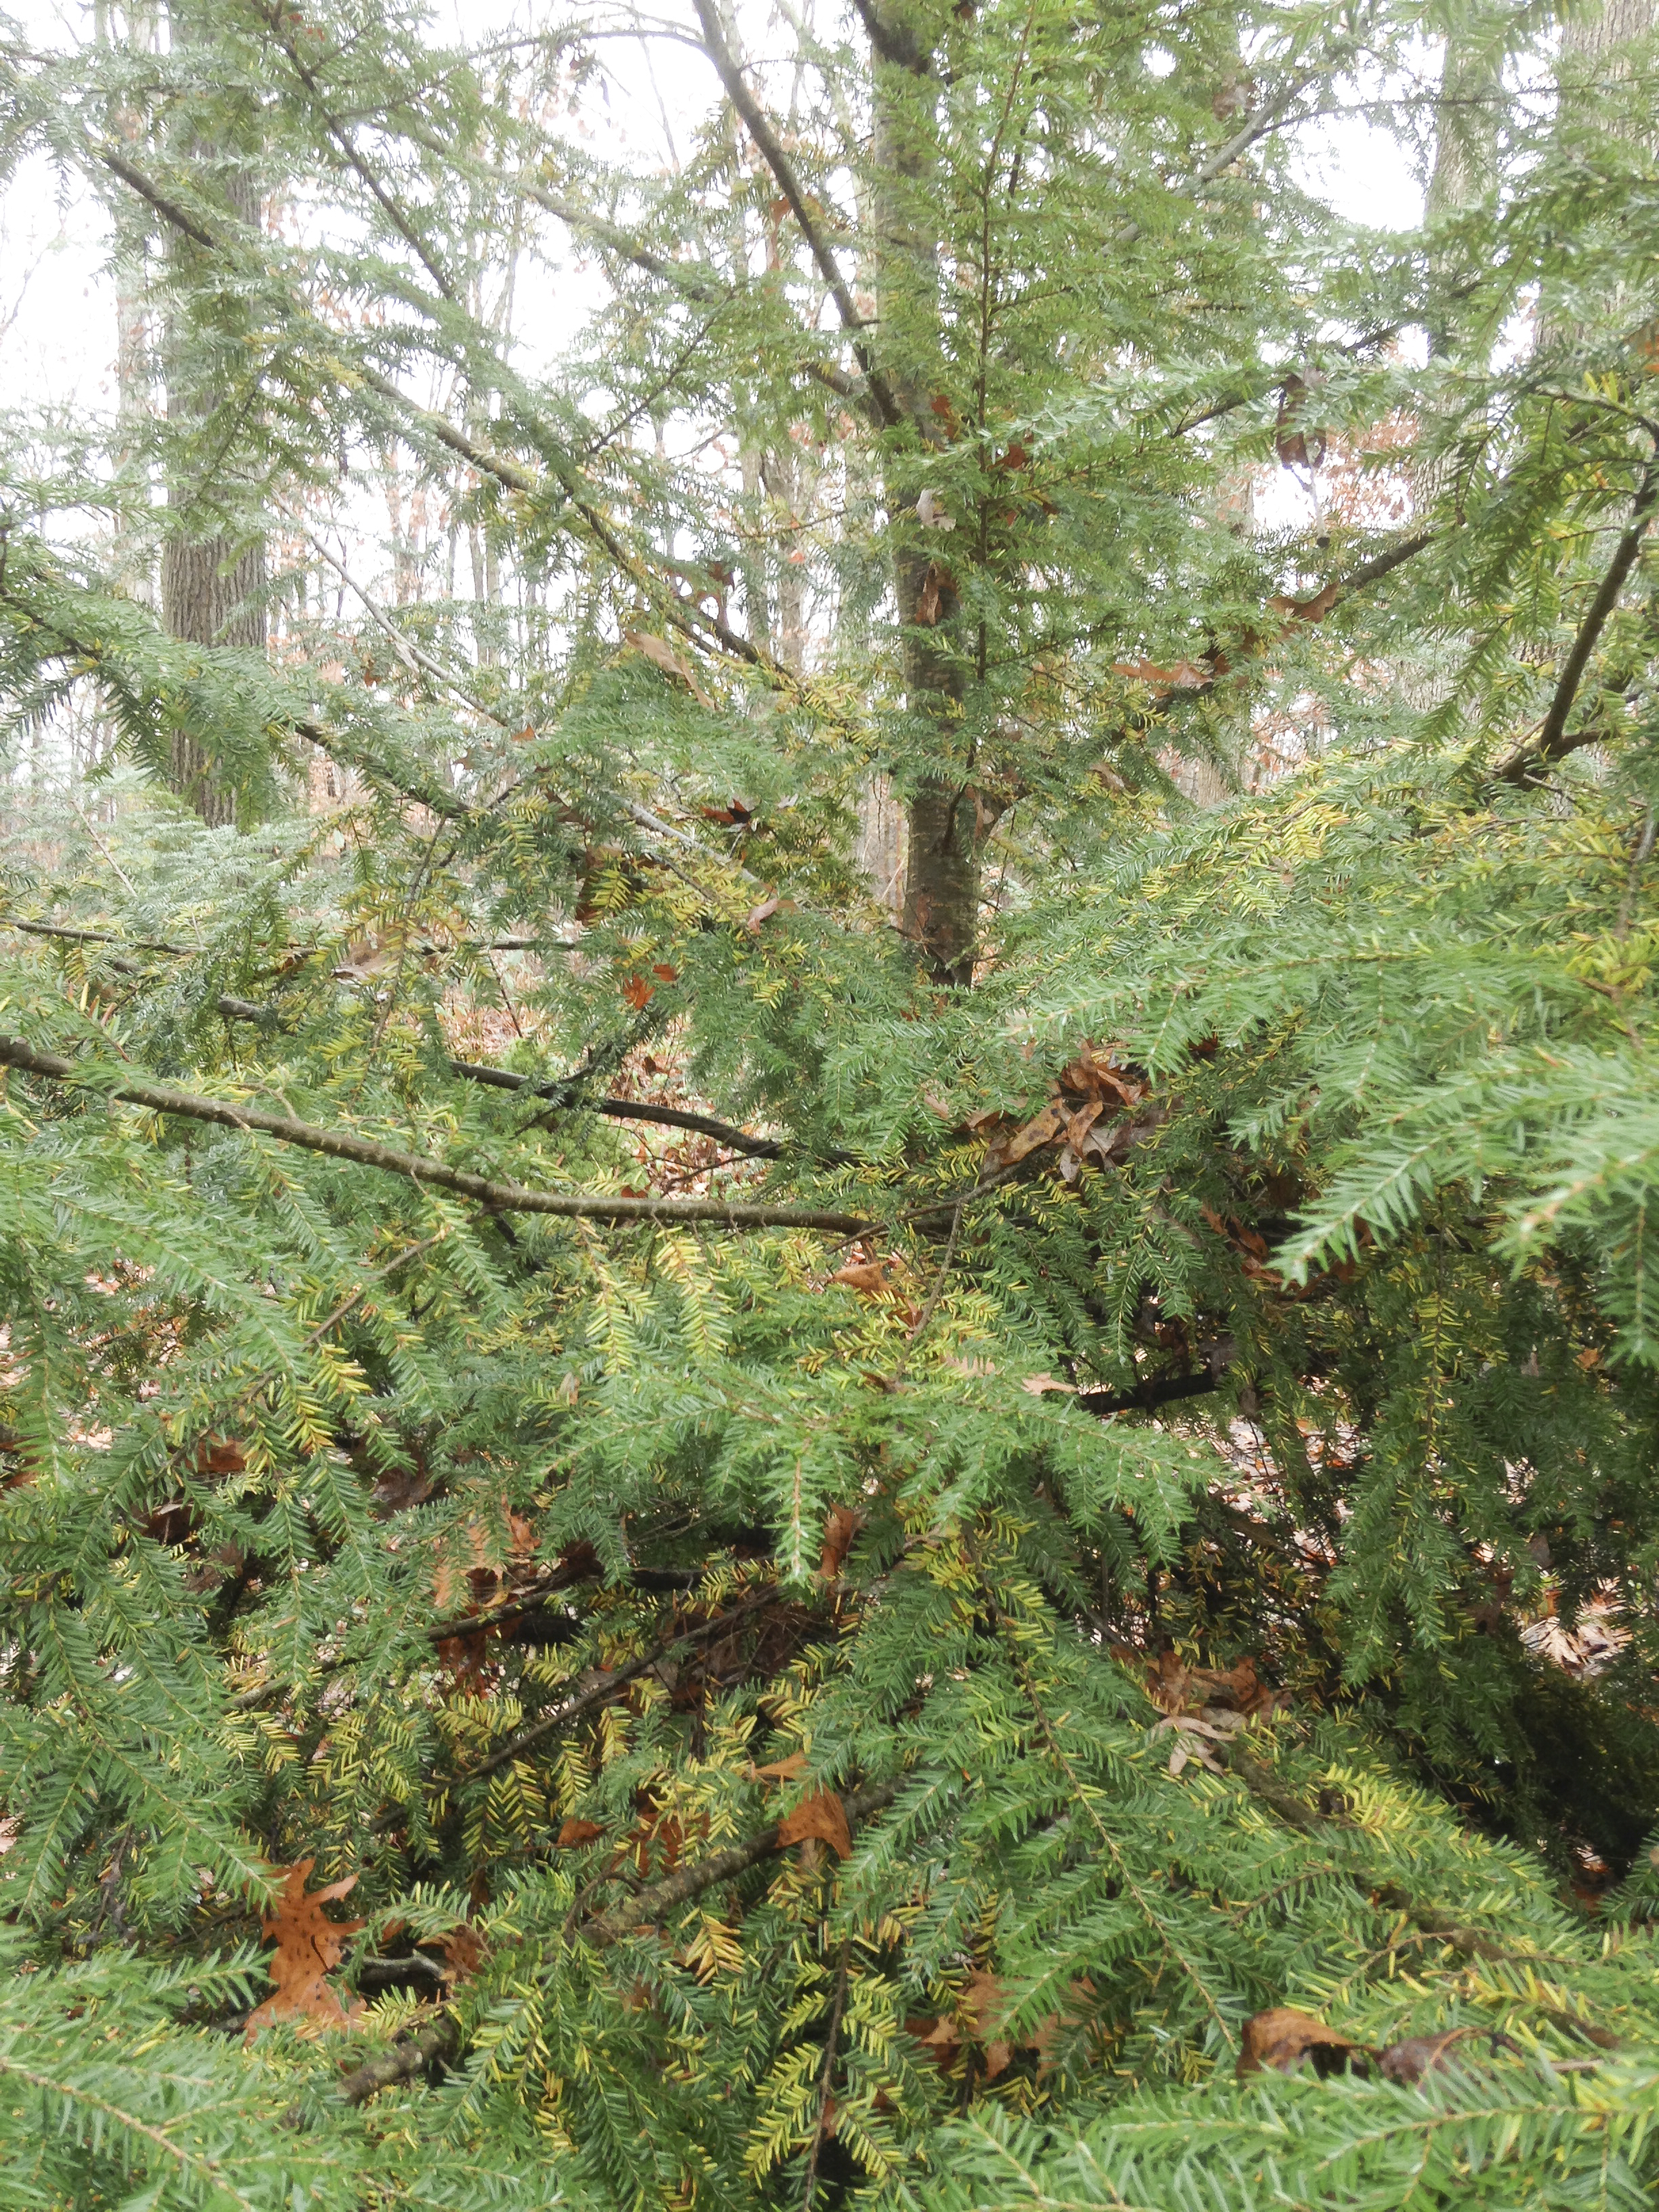
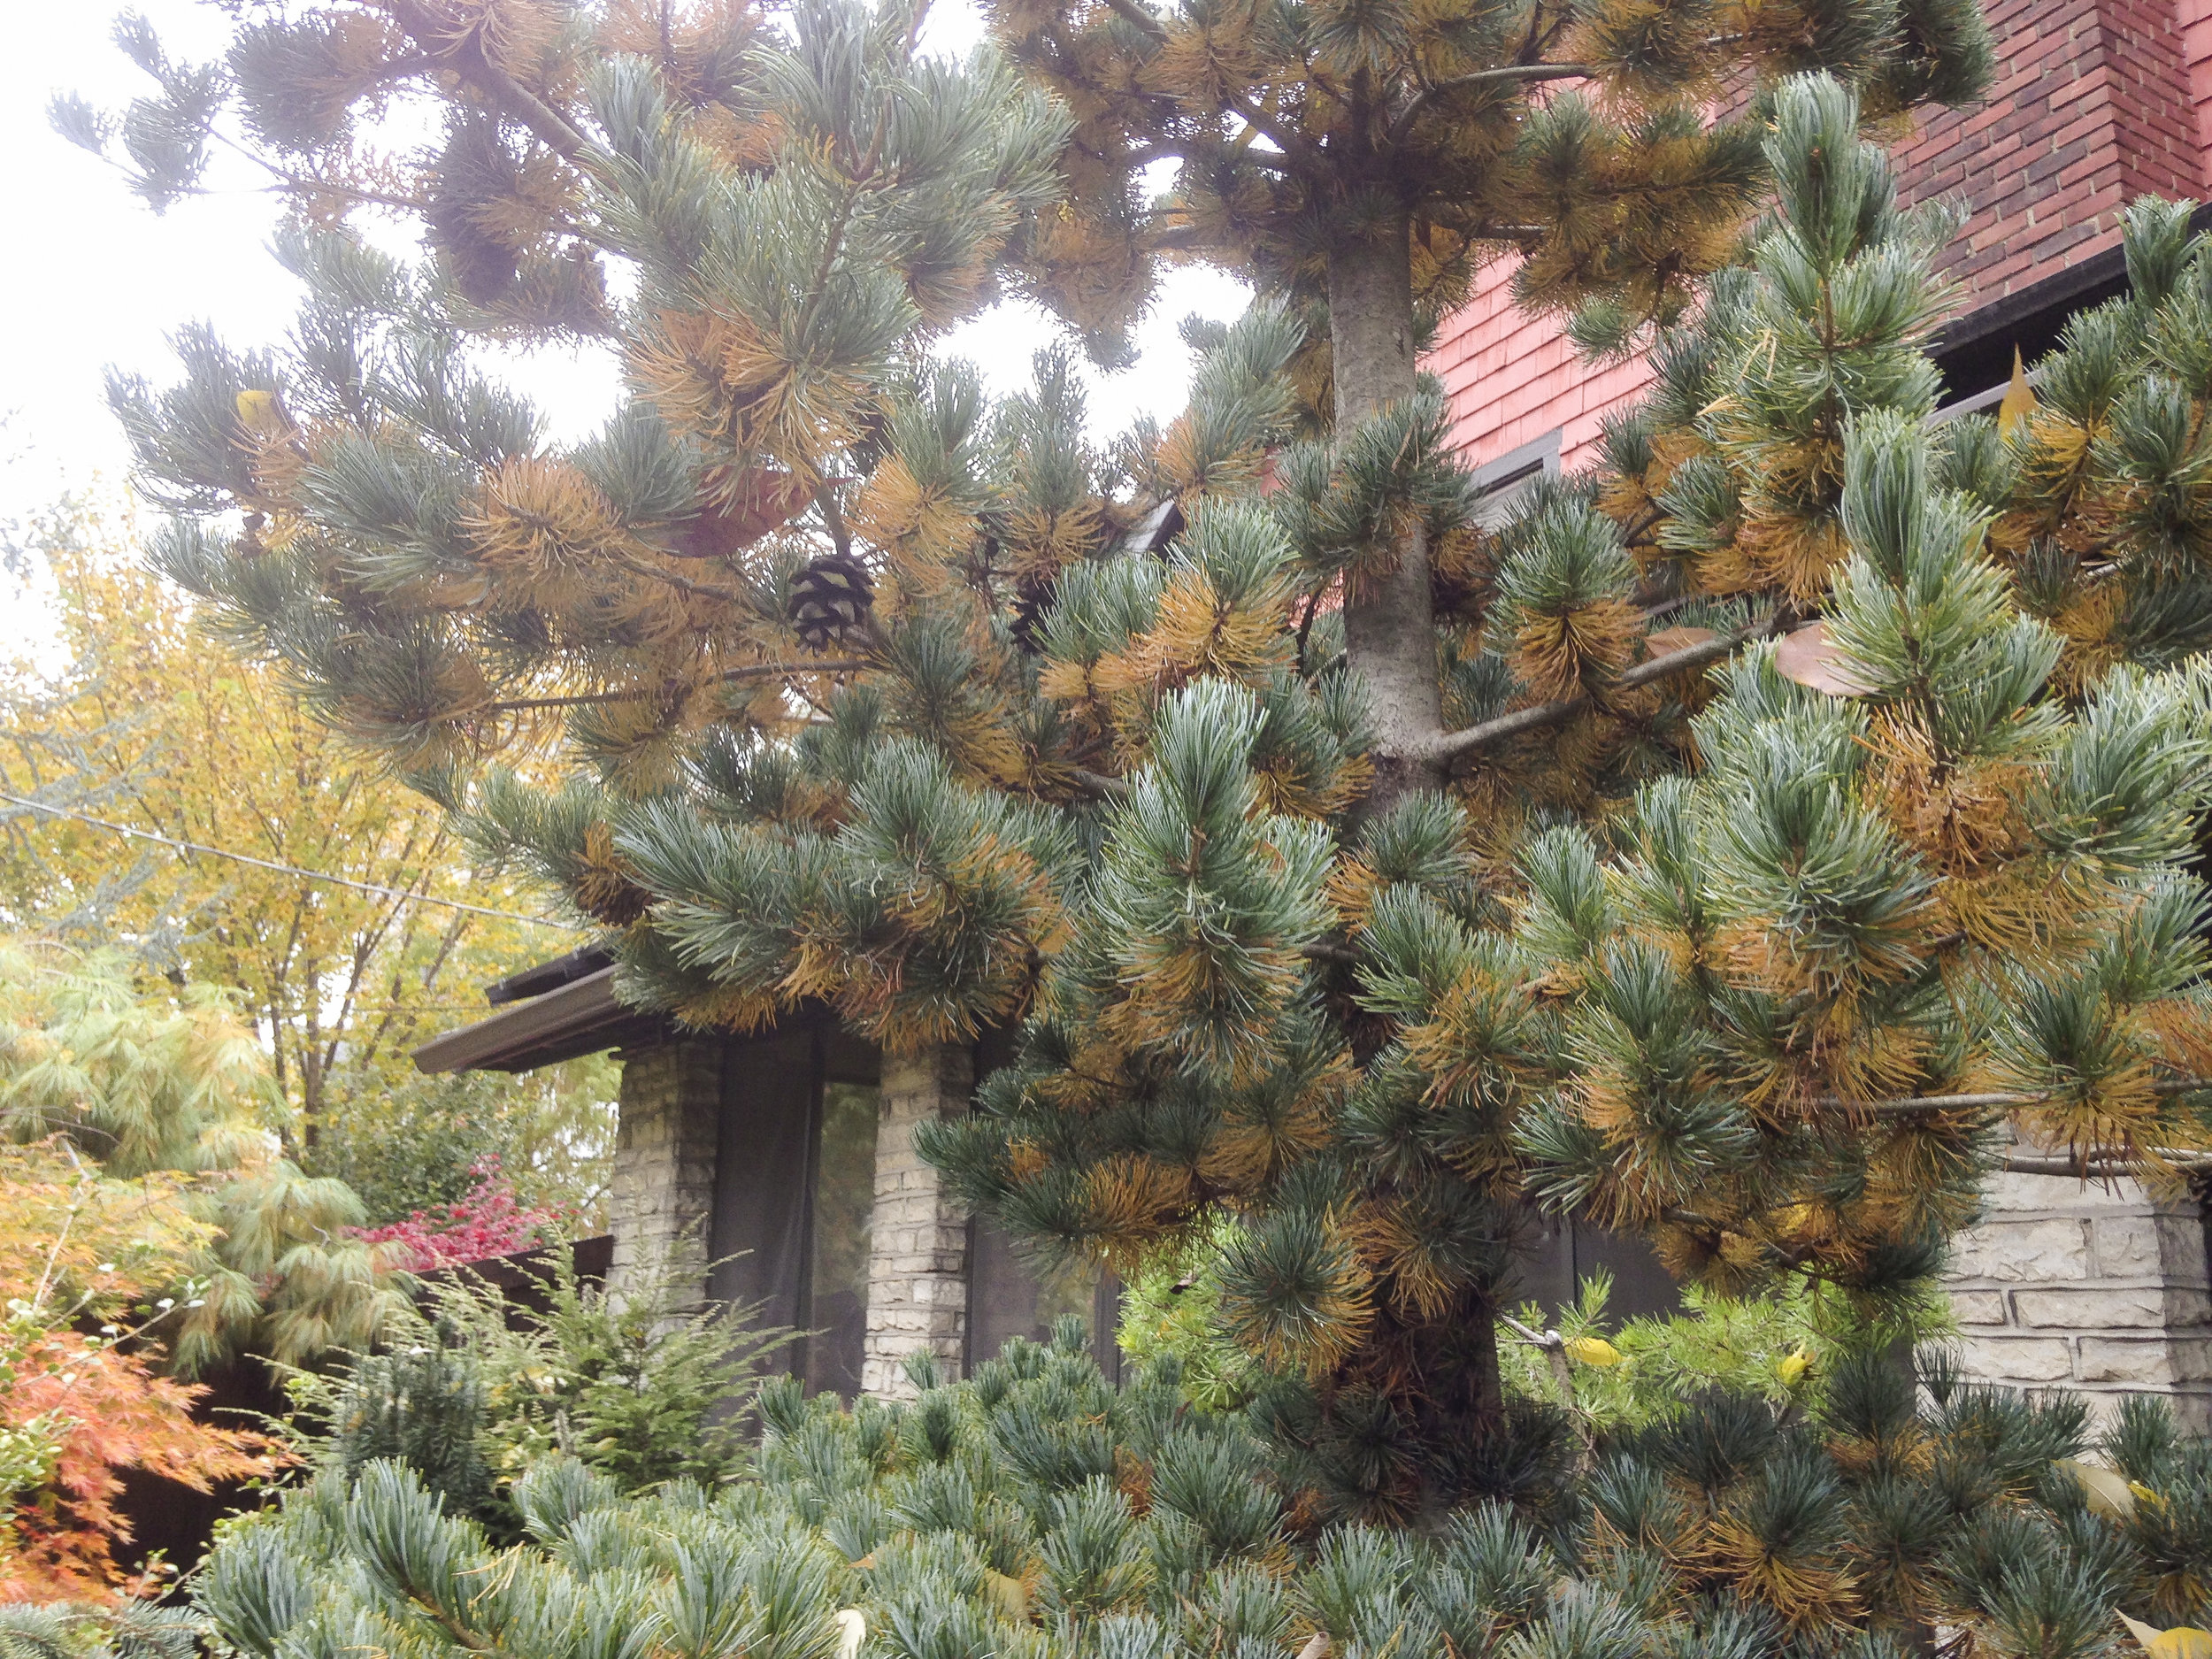
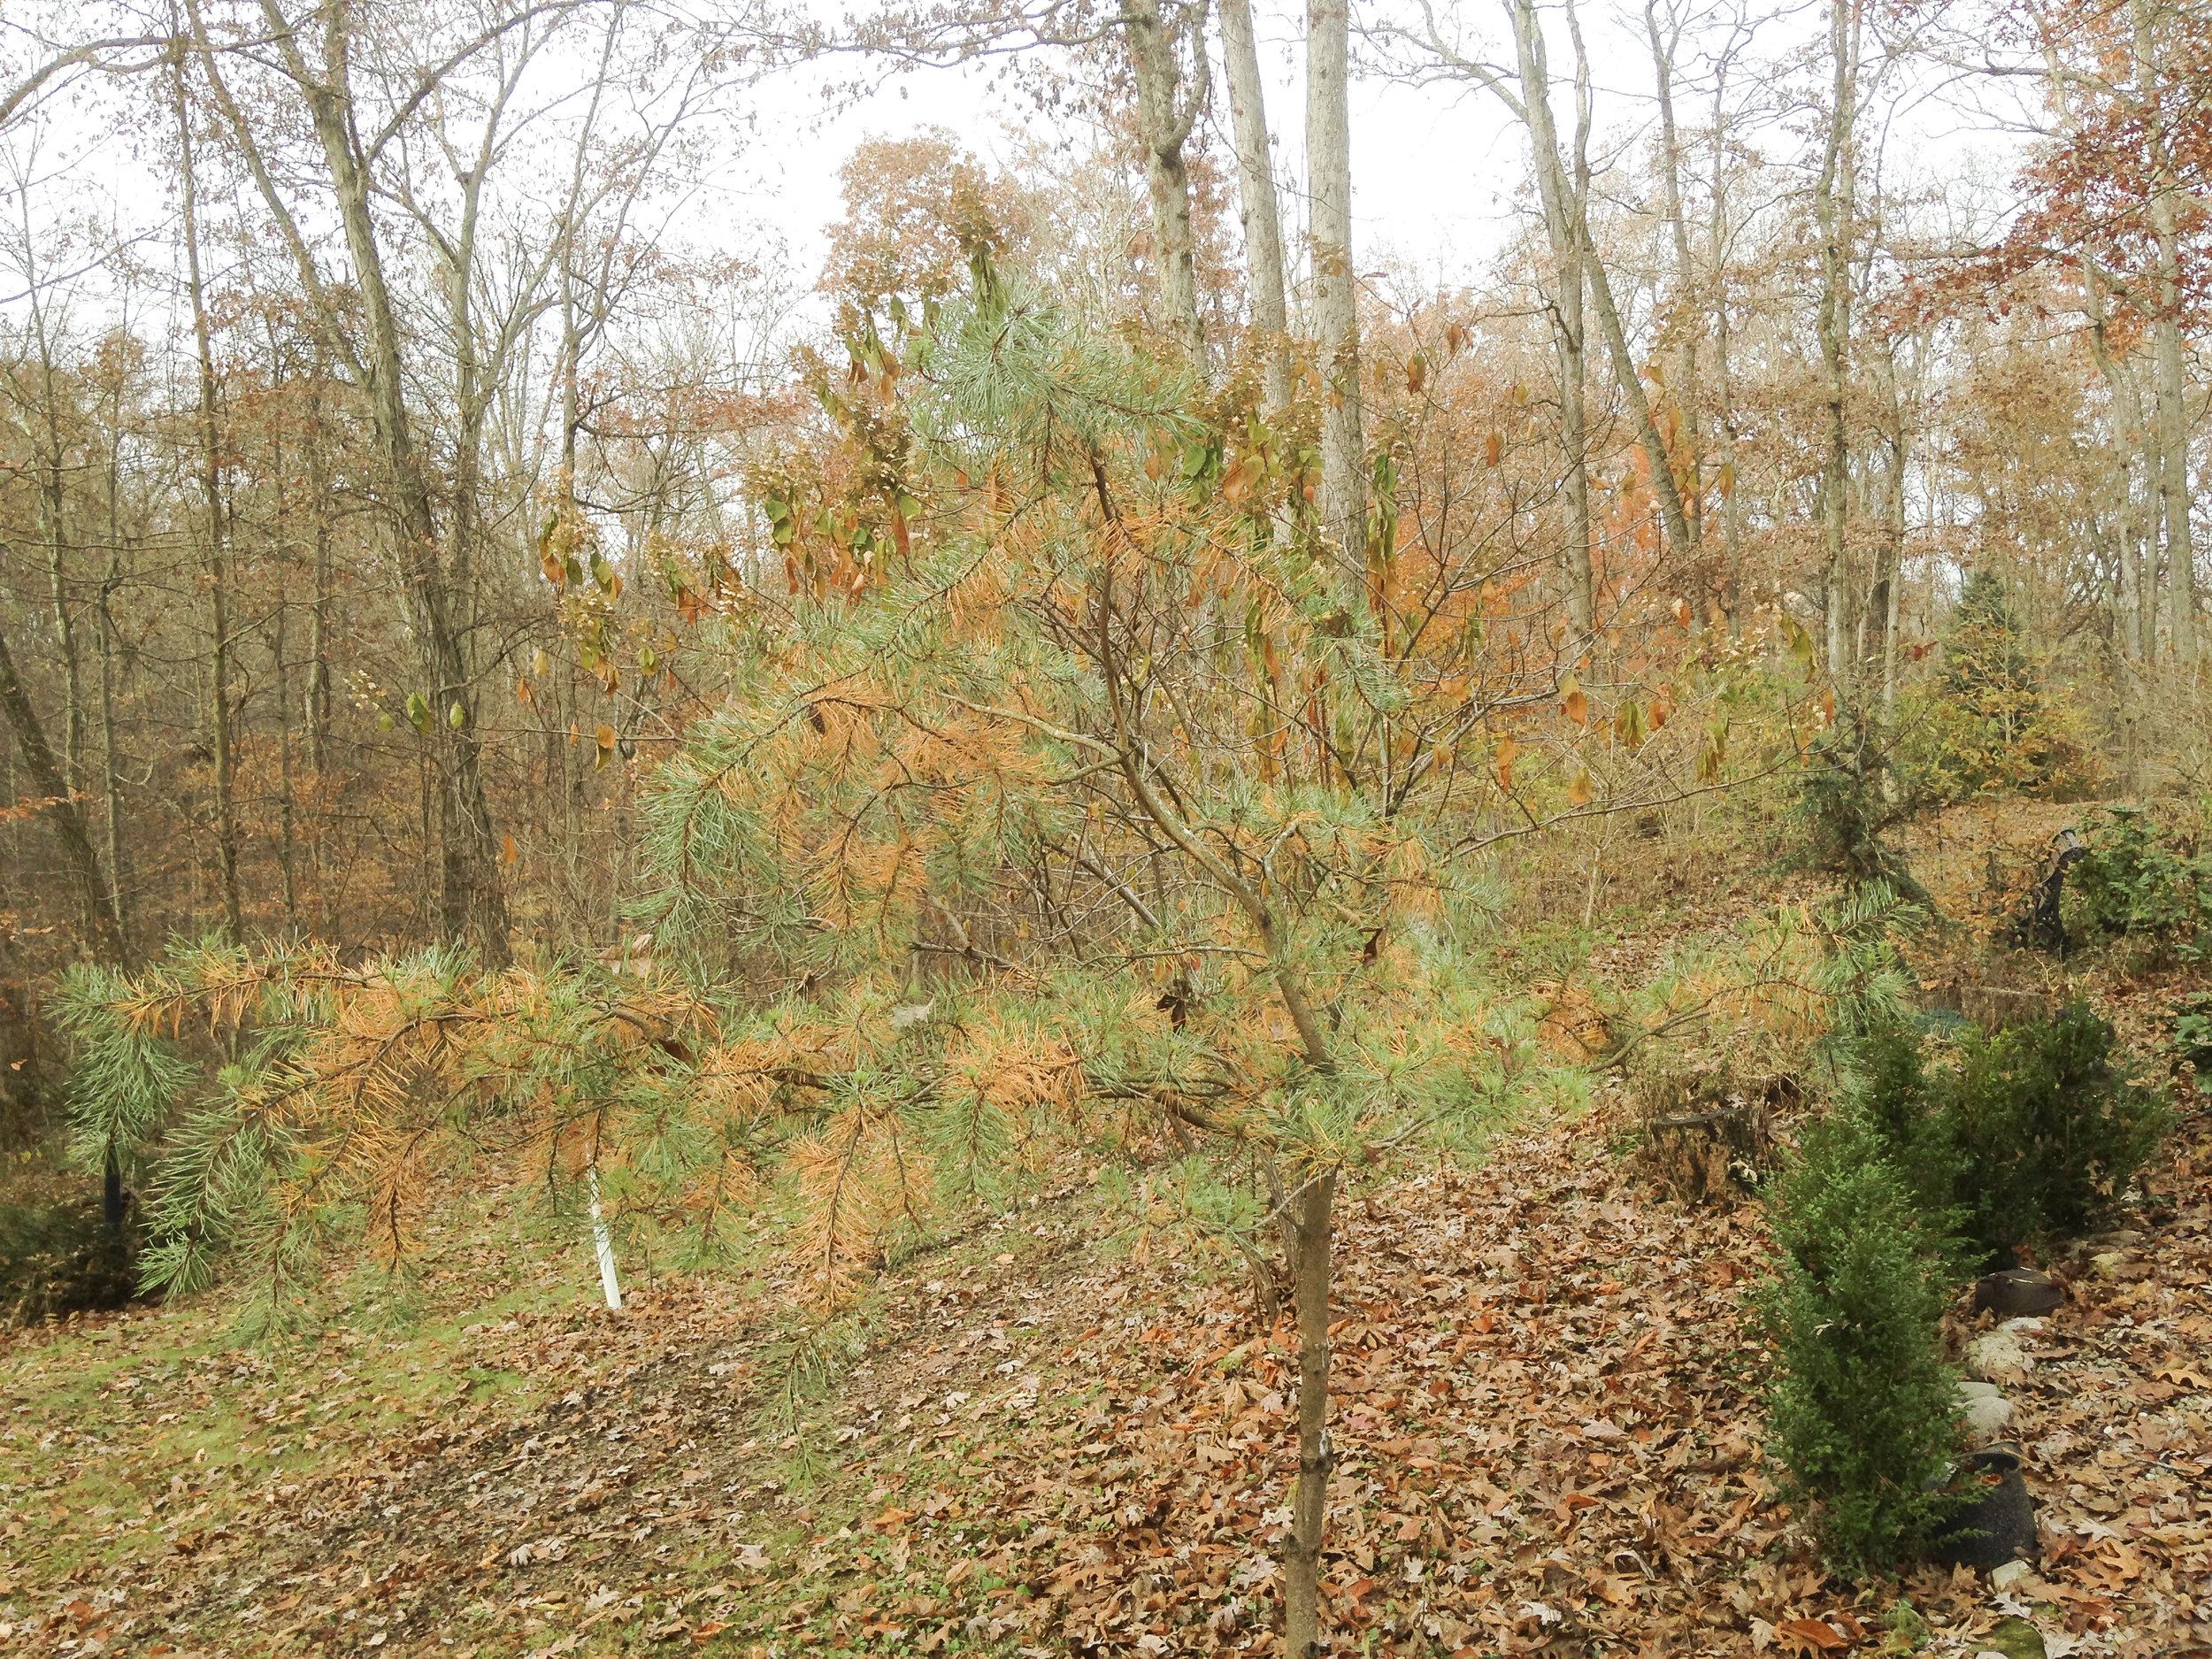
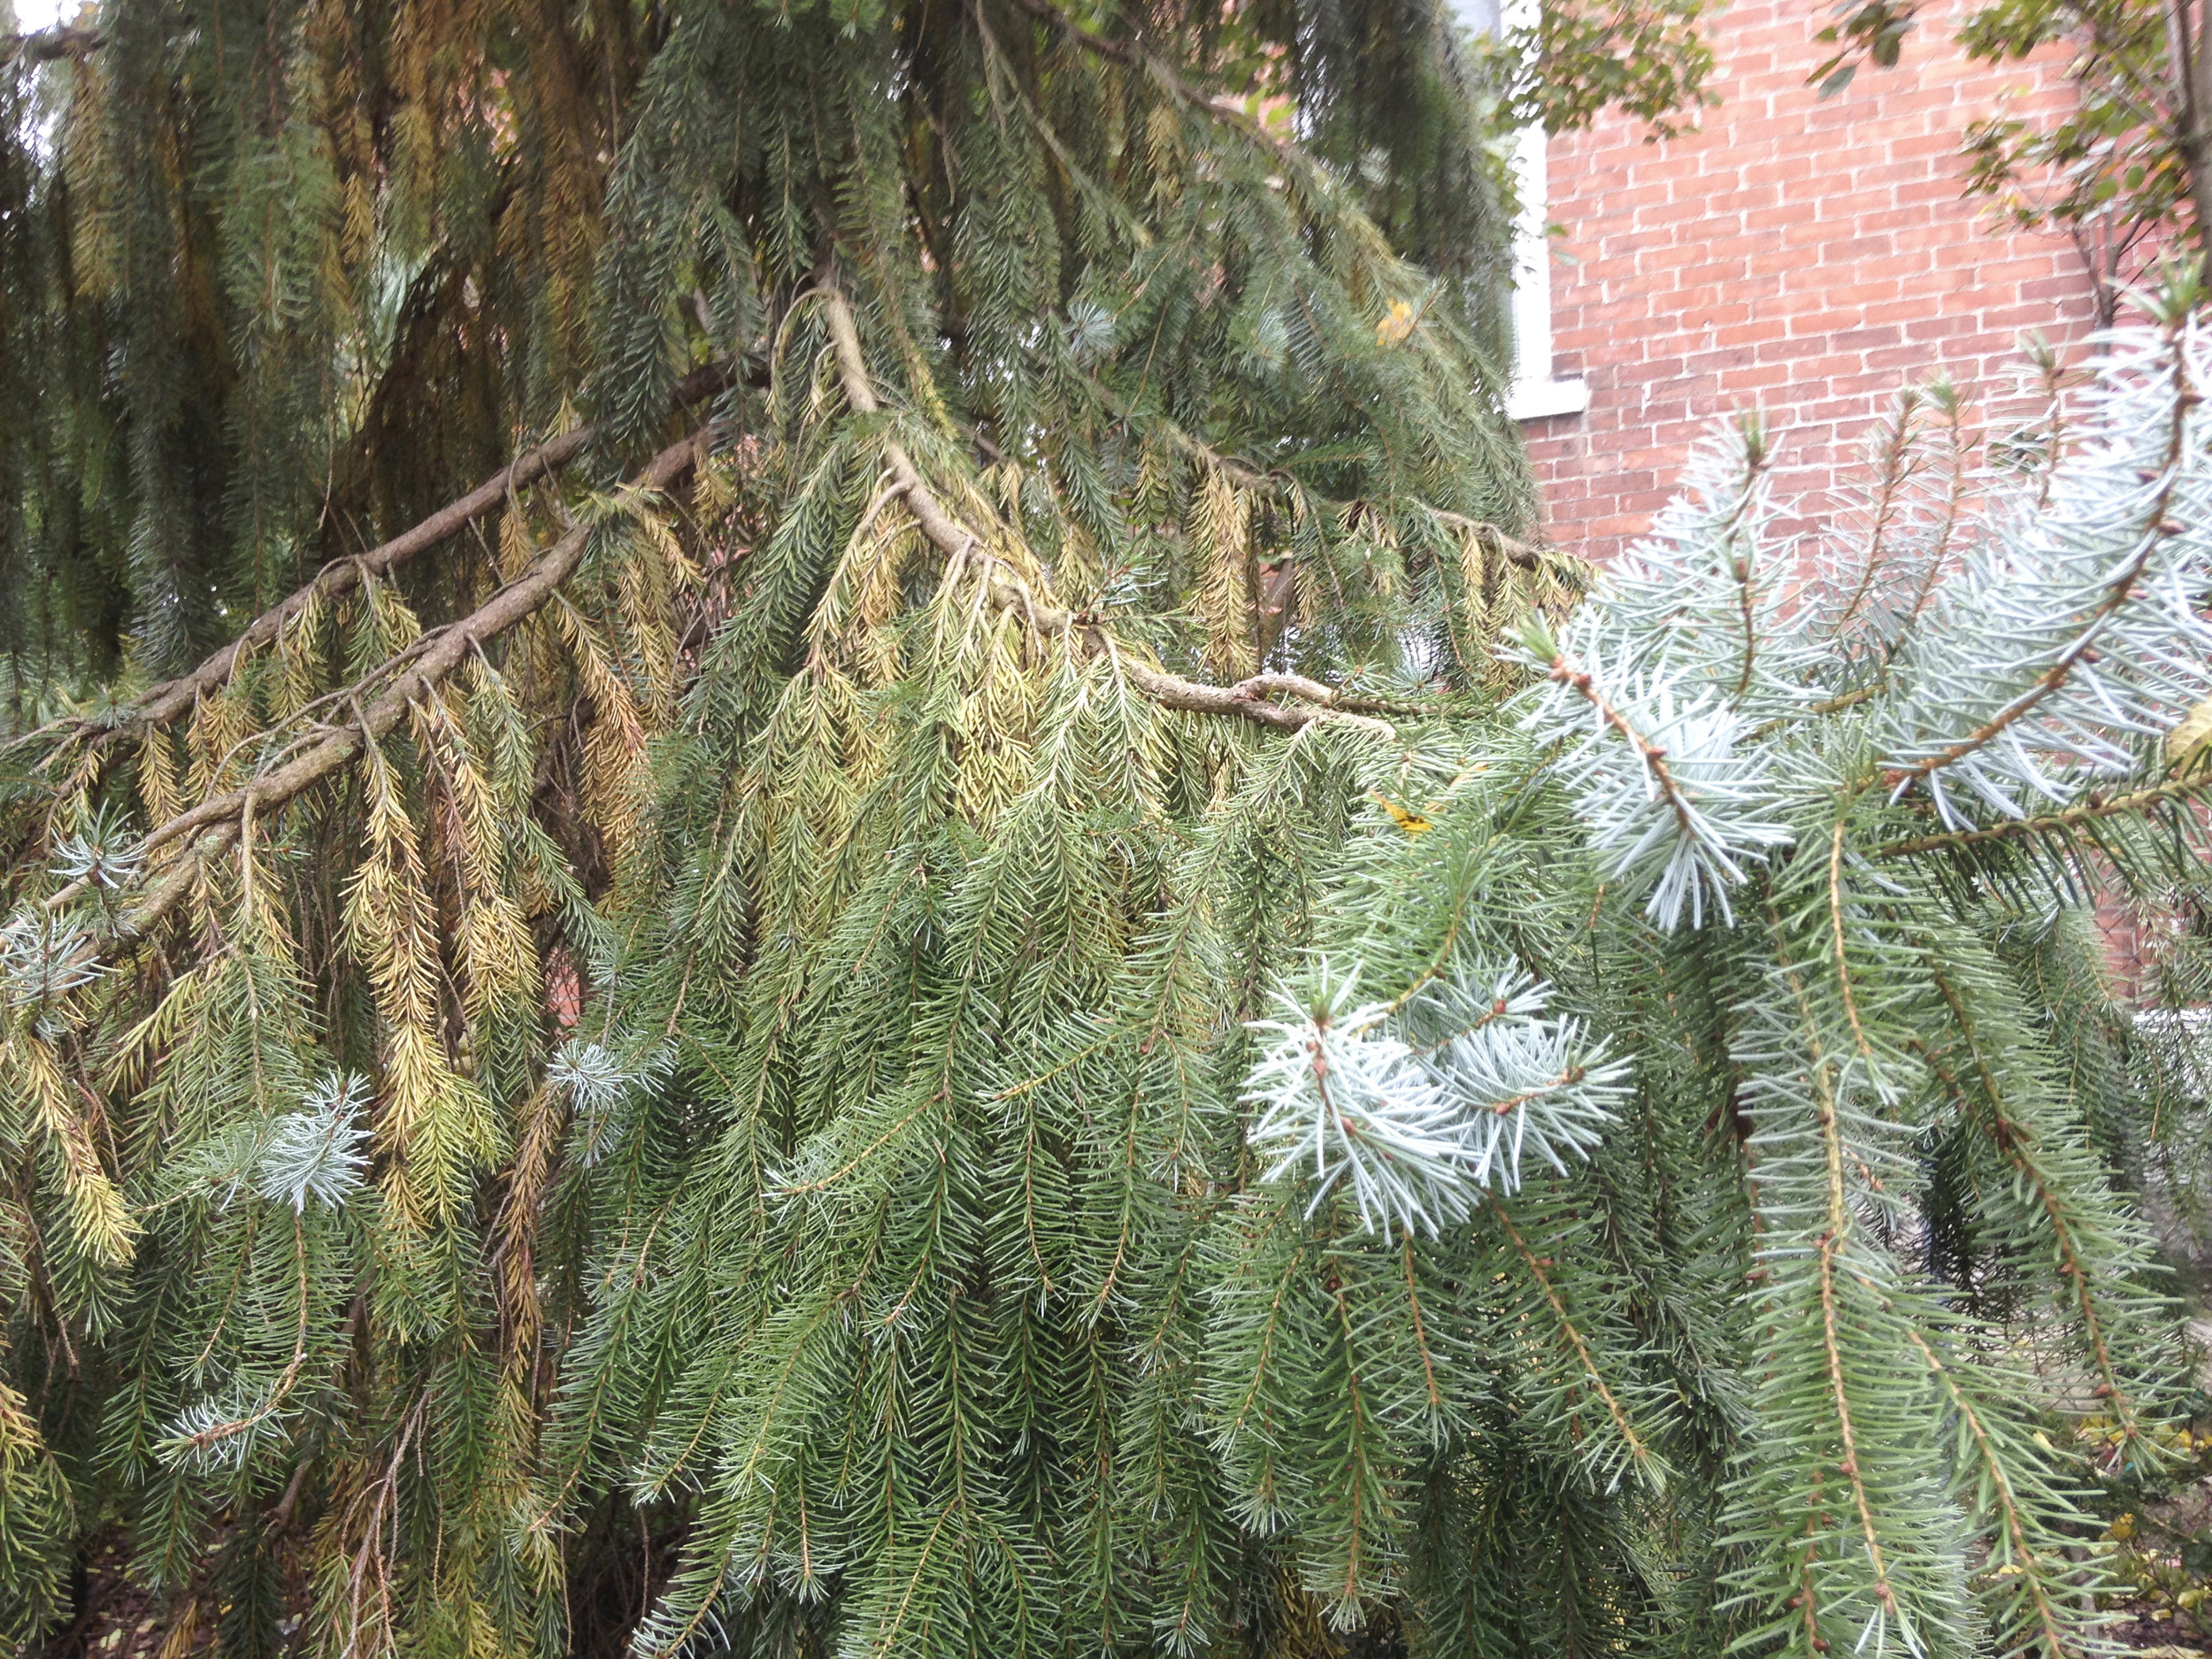
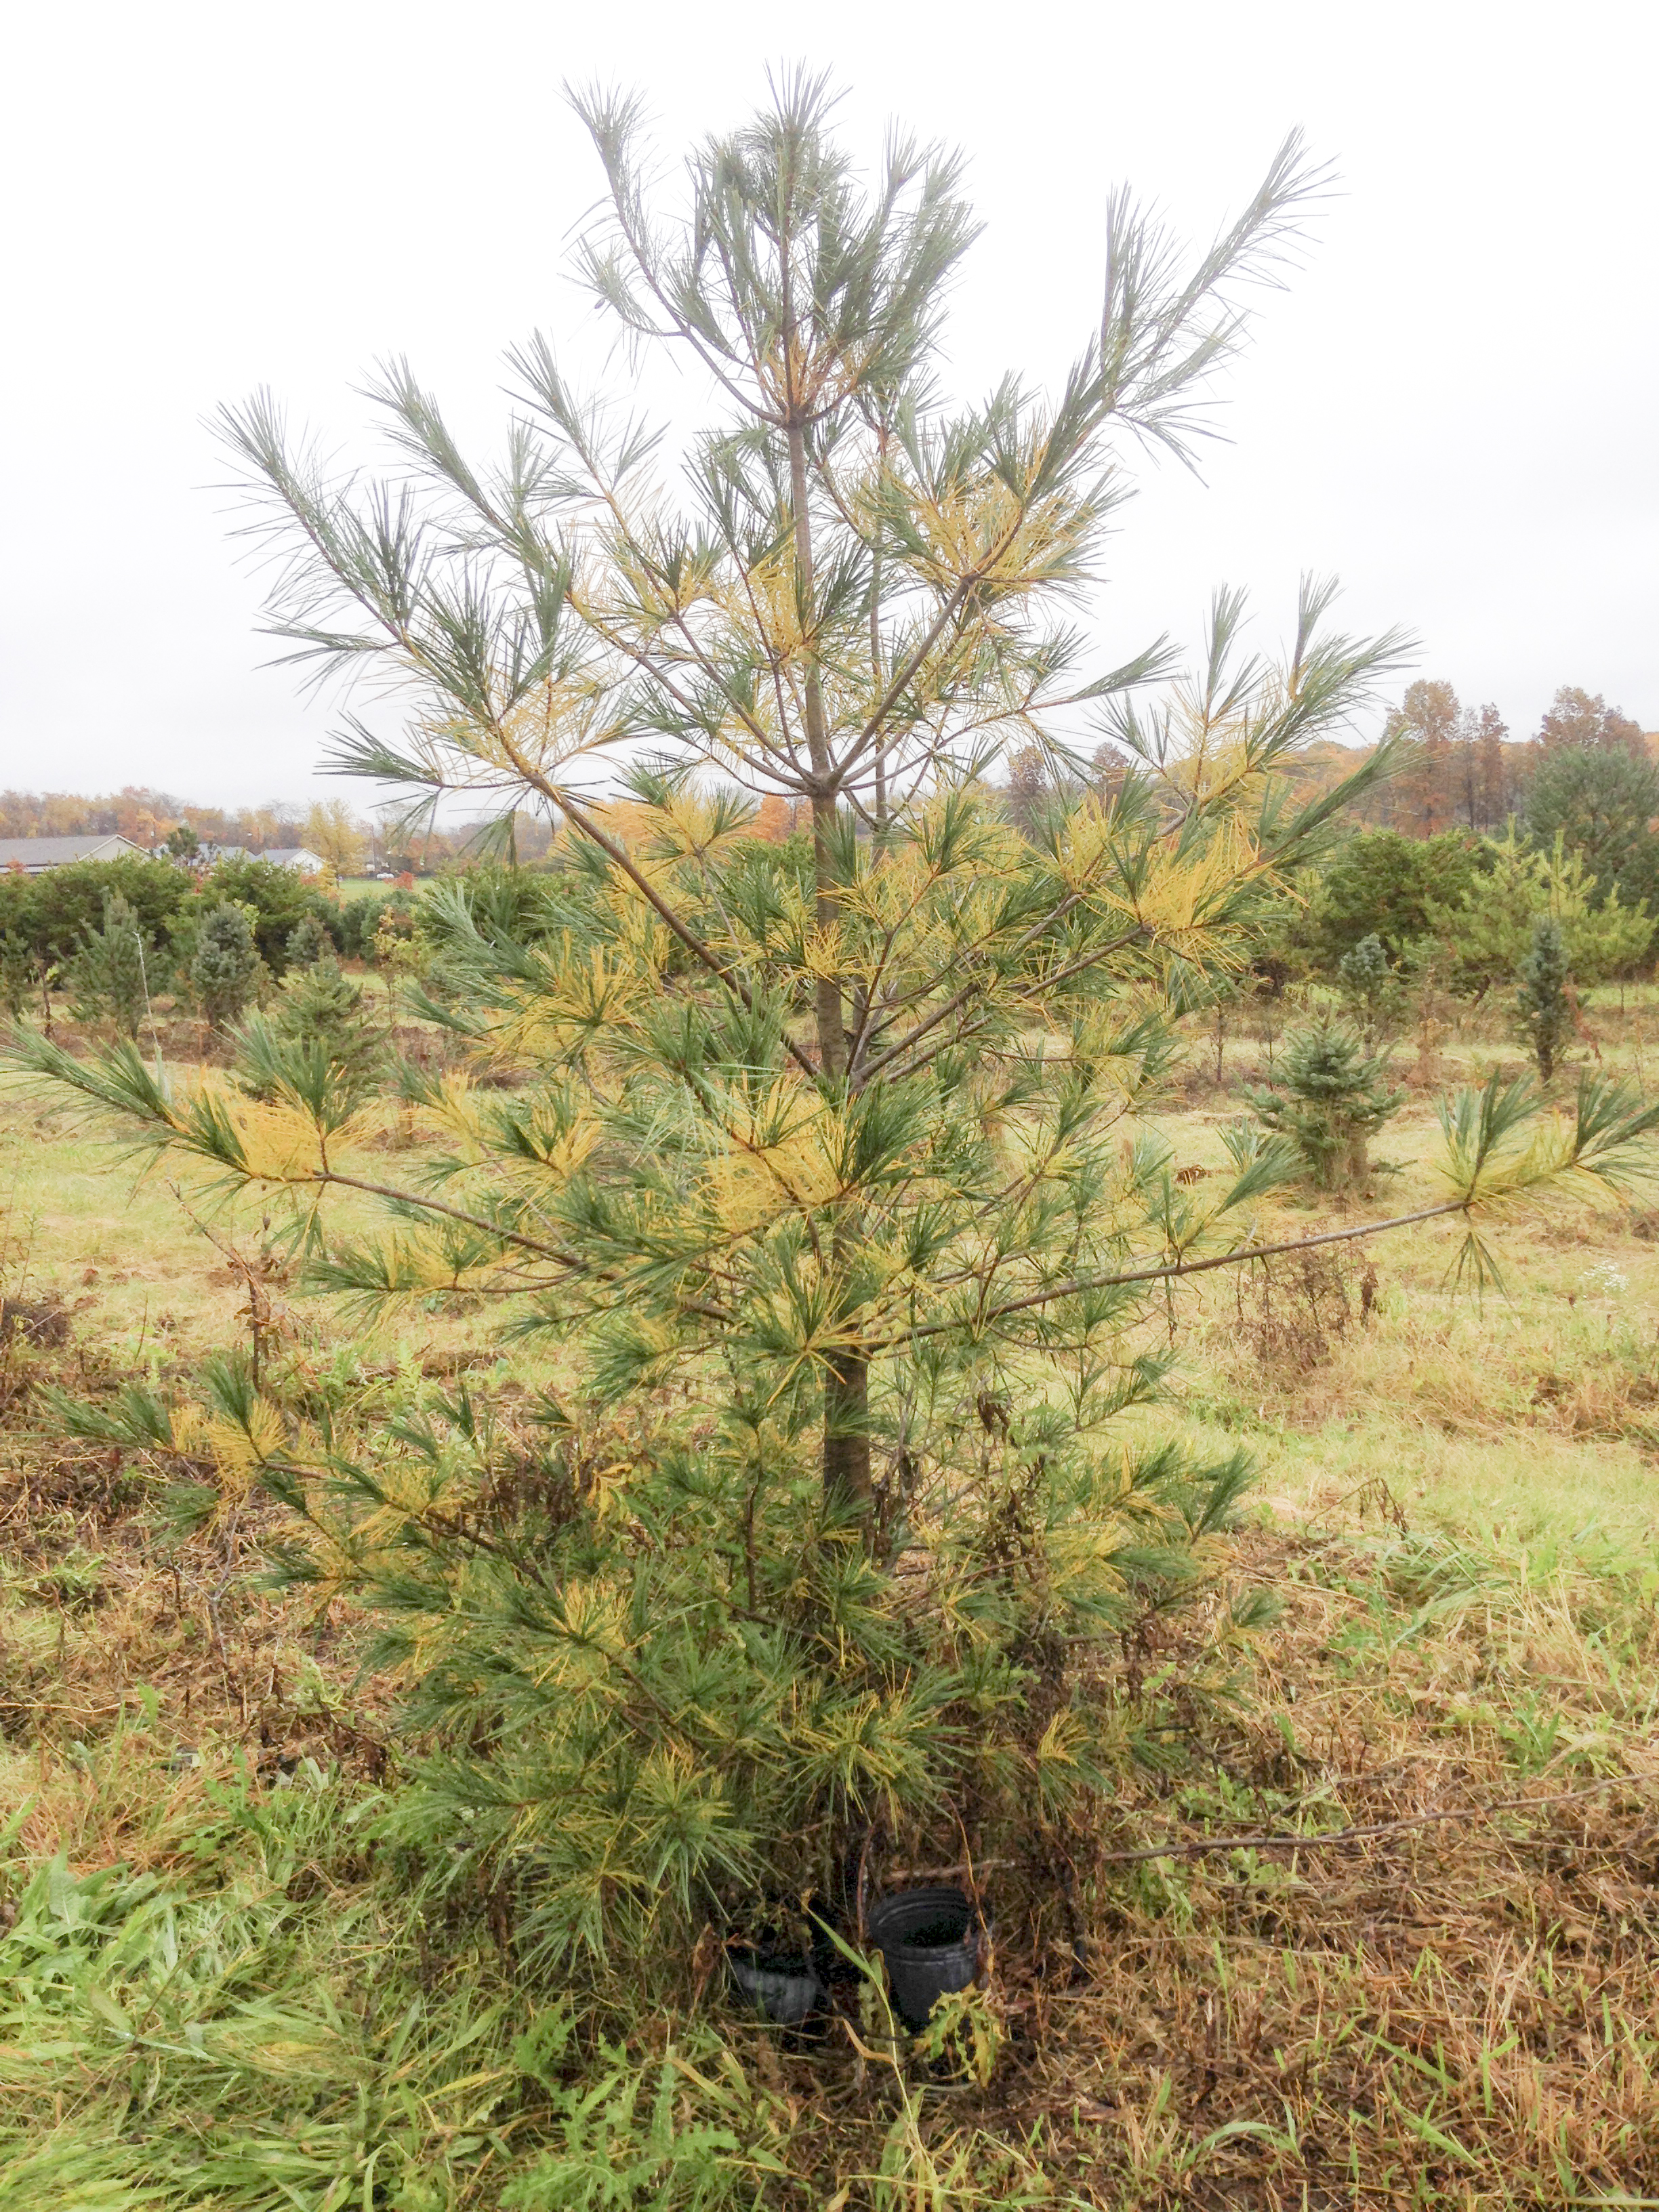
Yellowing and the loss of old needles in the fall is normal for pine, spruce, arborvitae, hemlock and most evergreen conifers in the midwest. Most conifers shed their needles each year starting in late August and continue through November. Older interior needles will turn yellow while needles further out in the canopy and at the tips of branches will stay green. The yellow needles eventually drop off starting at the top of the tree and working their way to the bottom in a uniform fashion. Taxus (also called Yew) is the exception showing it’s “fall color” in mid to late spring.
Most folks understand and look forward to the fall color change in our maples, oaks, hickories and other hardwood trees — fall needle drop in conifers is as normal as leaf drop in deciduous trees.
The change in color and eventual drop of foliage is simply a physiological response to the shorter days and cooler temperatures as trees (both evergreen and deciduous) prepare themselves for the winter.
Pictured below are some of my favorite conifers showing fall color:
Please note: This article was revised on 11/12/25 and originally published on 11/28/18.
ADDITIONAL ARBOR ED™ ARTICLES!


TJ Nagel I Scheduling Production Manager, Russell Tree Experts
TJ joined Russell Tree Experts in 2012 and loves trees. He is an avid gardener and plant collector. TJ graduated from The Ohio State University with a B.S. in Agriculture with a major in Landscape Horticulture and minor in Entomology. TJ is an ISA Board Certified Master Arborist® and well versed in plant pathology and tree ID.
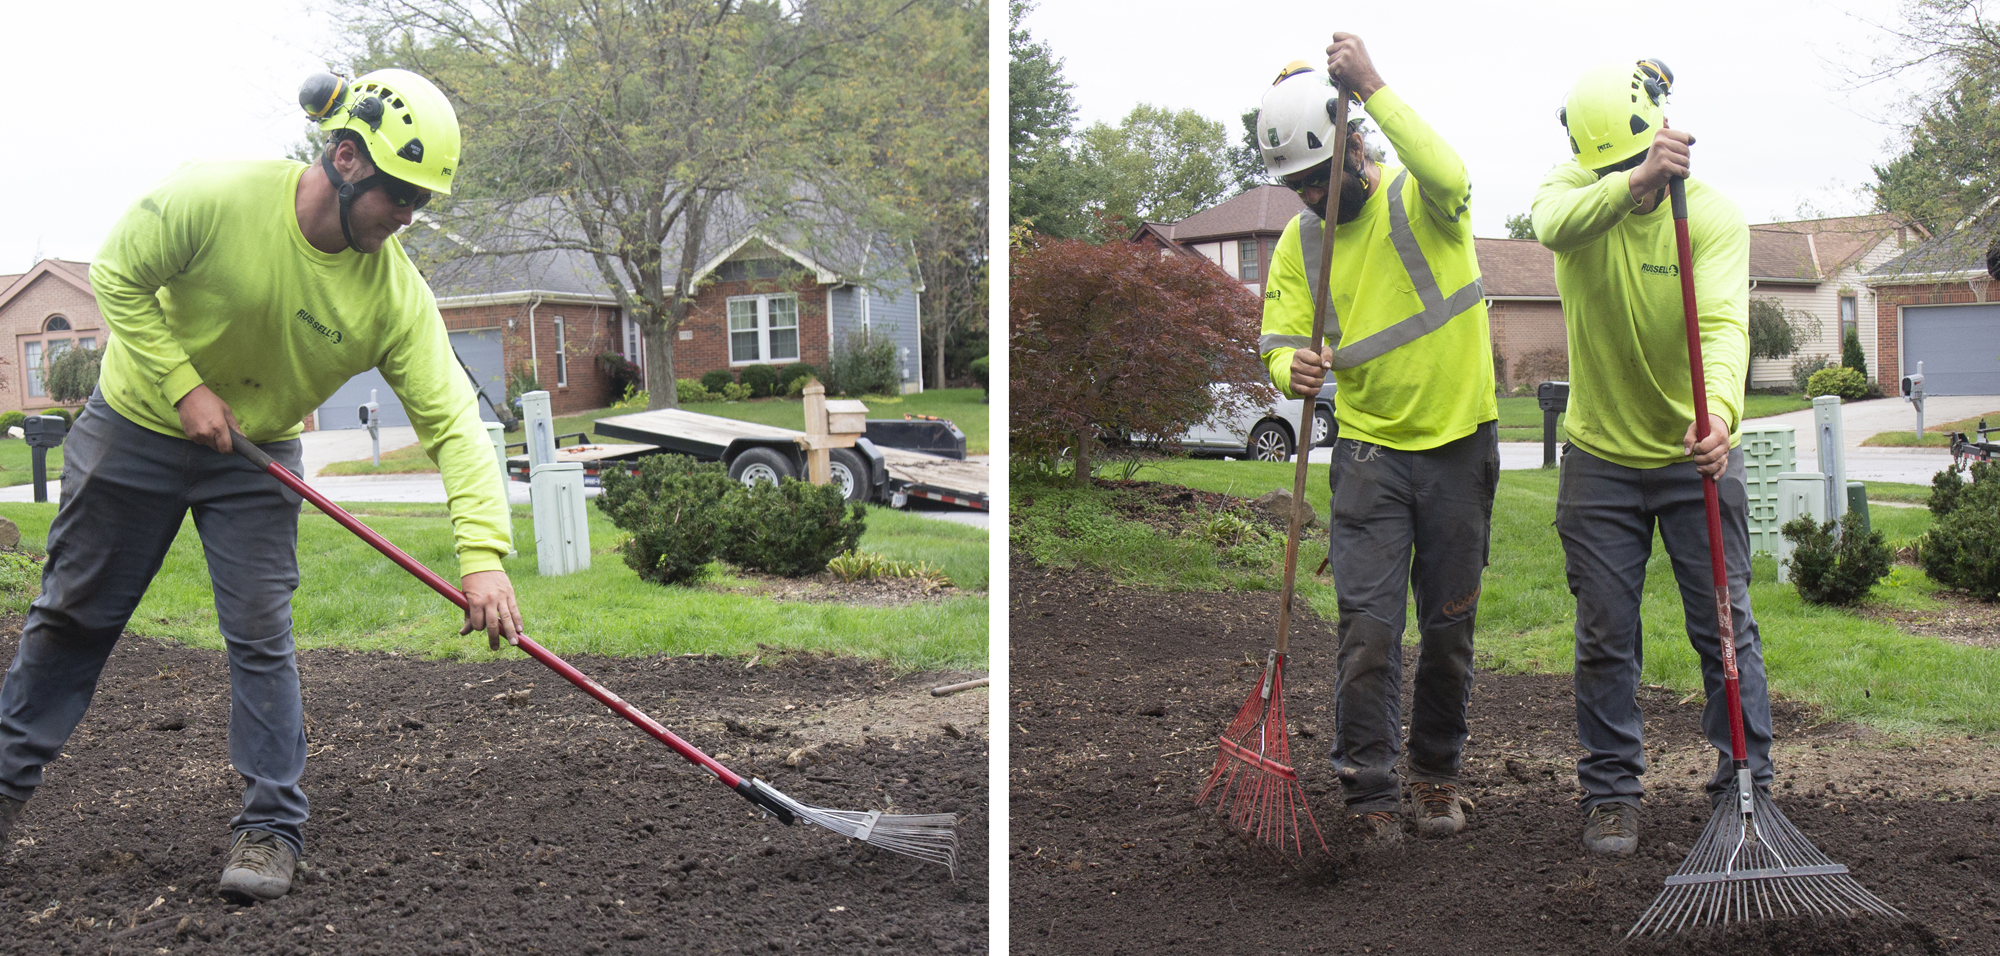
Stump Restoration Process
If you are interested in a hands-off approach to the stump removal process, consider having a stump restoration completed by Russell Tree Experts. Our crew will remove all of the stump grinding shavings, excess dirt, rocks, etc. and restore the area with fresh topsoil which is ready for grass seed, plants, or even a new tree!
If you are interested in a hands-off approach to the stump removal process, consider having a stump restoration completed by Russell Tree Experts. Our crew will remove all of the stump grinding shavings, excess dirt, rocks, etc. and restore the area with fresh topsoil which is ready for grass seed, plants, or even a new tree!
STEP 1
The stump shavings, dirt, rocks, etc. that were churned up during the stump grinding process are removed from the area and deposited in our truck. The material that’s being removed is typically dense and heavy, unlike typical wood chips or mulch.

Step 2
Fresh topsoil is applied to the area.

Step 3
The topsoil is smoothed and leveled to the natural grade of the landscape. Once complete the area is ready for grass seed!
STOP! DON'T TOP!
As an arborist I have frequently been asked to “top” people’s trees. People want their trees topped for several reasons: safety concerns, vista pruning, aesthetics or height reduction. This request prompts a conversation about the practice of tree topping and the hazards associated with it.

As an arborist I have frequently been asked to “top” people’s trees. People want their trees topped for several reasons: safety concerns, vista pruning, aesthetics or height reduction. This request prompts a conversation about the practice of tree topping and the hazards associated with it.
Topping a tree is the practice of removing tree tops or pieces of the canopy while leaving stubs or branches that are too small to assume the role of a terminal leader. Probably the most common place to observe a topped tree would be underneath a utility wire. These trees are topped in order to prevent them from interfering with the electric grid and not necessarily pruned with the overall tree’s health as the primary focus.
Topping, “hat racking” or “rounding-over” a tree can put a tremendous amount of stress on a tree. The practice can result in the removal of 50-100% of the tree’s leaves. This extreme reduction in a tree’s leaf bearing canopy places tremendous stress on the tree. If the tree doesn’t die it will use a large portion of it’s starch reserves (stored in the roots) to replace the removed canopy. The replacement shoots will grow quickly from buds located in the outer tissue around the removed branches, but will not be anchored the same as a “normal” branch. This poor attachment point and fast growth often results in these “shoots” failing.
Residential tree improperly trimmed called “topping” (click to enlarge)
The large wounds left after a tree has been topped expose the tree to more hazards than just fast growing, poorly attached shoots. The wounds are slow to heal (if they heal at all) and the exposed cambium layer is vulnerable to insects, disease, and decay. The remaining portion of the tree can also experience sunburn or “scalding” due to the lack of leaves and sun exposure.
After explaining this to a potential client I am often asked “then what should I do?” Depending on the species, location, health and client desires there are several options. Proper reduction pruning is one solution and involves reducing limbs according to industry standards (Click here to see our pruning guide). If the tree is in poor health or an unfortunate location, removal is also an option. Often times it is better to remove a poor specimen and replace it with a species that is better suited to that particular site.
As we learn more about the value of trees in our urban forest we have a responsibility to be good stewards of our trees. Witnessing the proverbial “light bulb” turn on after discussing the practice of topping trees is one of the many rewards of being an arborist.
Sincerely,

Chris Gill
Regional Manager, Russell Tree Experts
ISA Certified Arborist® OH-6416A