Latest

The Root of Many Plant Problems in Central Ohio: Soil pH

By Walter Reins
ISA Certified Arborist
January 16, 2025​

[Please note: This article was revised and republished on 1/16/25 from its original publish date of 4/24/24.]

You’ve probably heard the term pH. You may even think “I know this one - it means something is either acidic, neutral, or alkaline”, and that wouldn’t be wrong. But what does that mean and why does it matter? What determines the pH of soil, water, or even the human body? Like the periodic table of elements, pH may be something that reminds you of high school chemistry class, something you’ve filed away under the “when am I ever going to use this?” section of your brain, long ago forgotten and collecting dust ever since it was put there. While pH is far from being an endorphin-producing topic, it does significantly influence plant growth and overall health in your landscape. Let’s discuss the role that soil pH plays in nutrient availability, soil chemistry, and even microorganism activity, and why it matters for your plants.

pH and How It’s Influenced

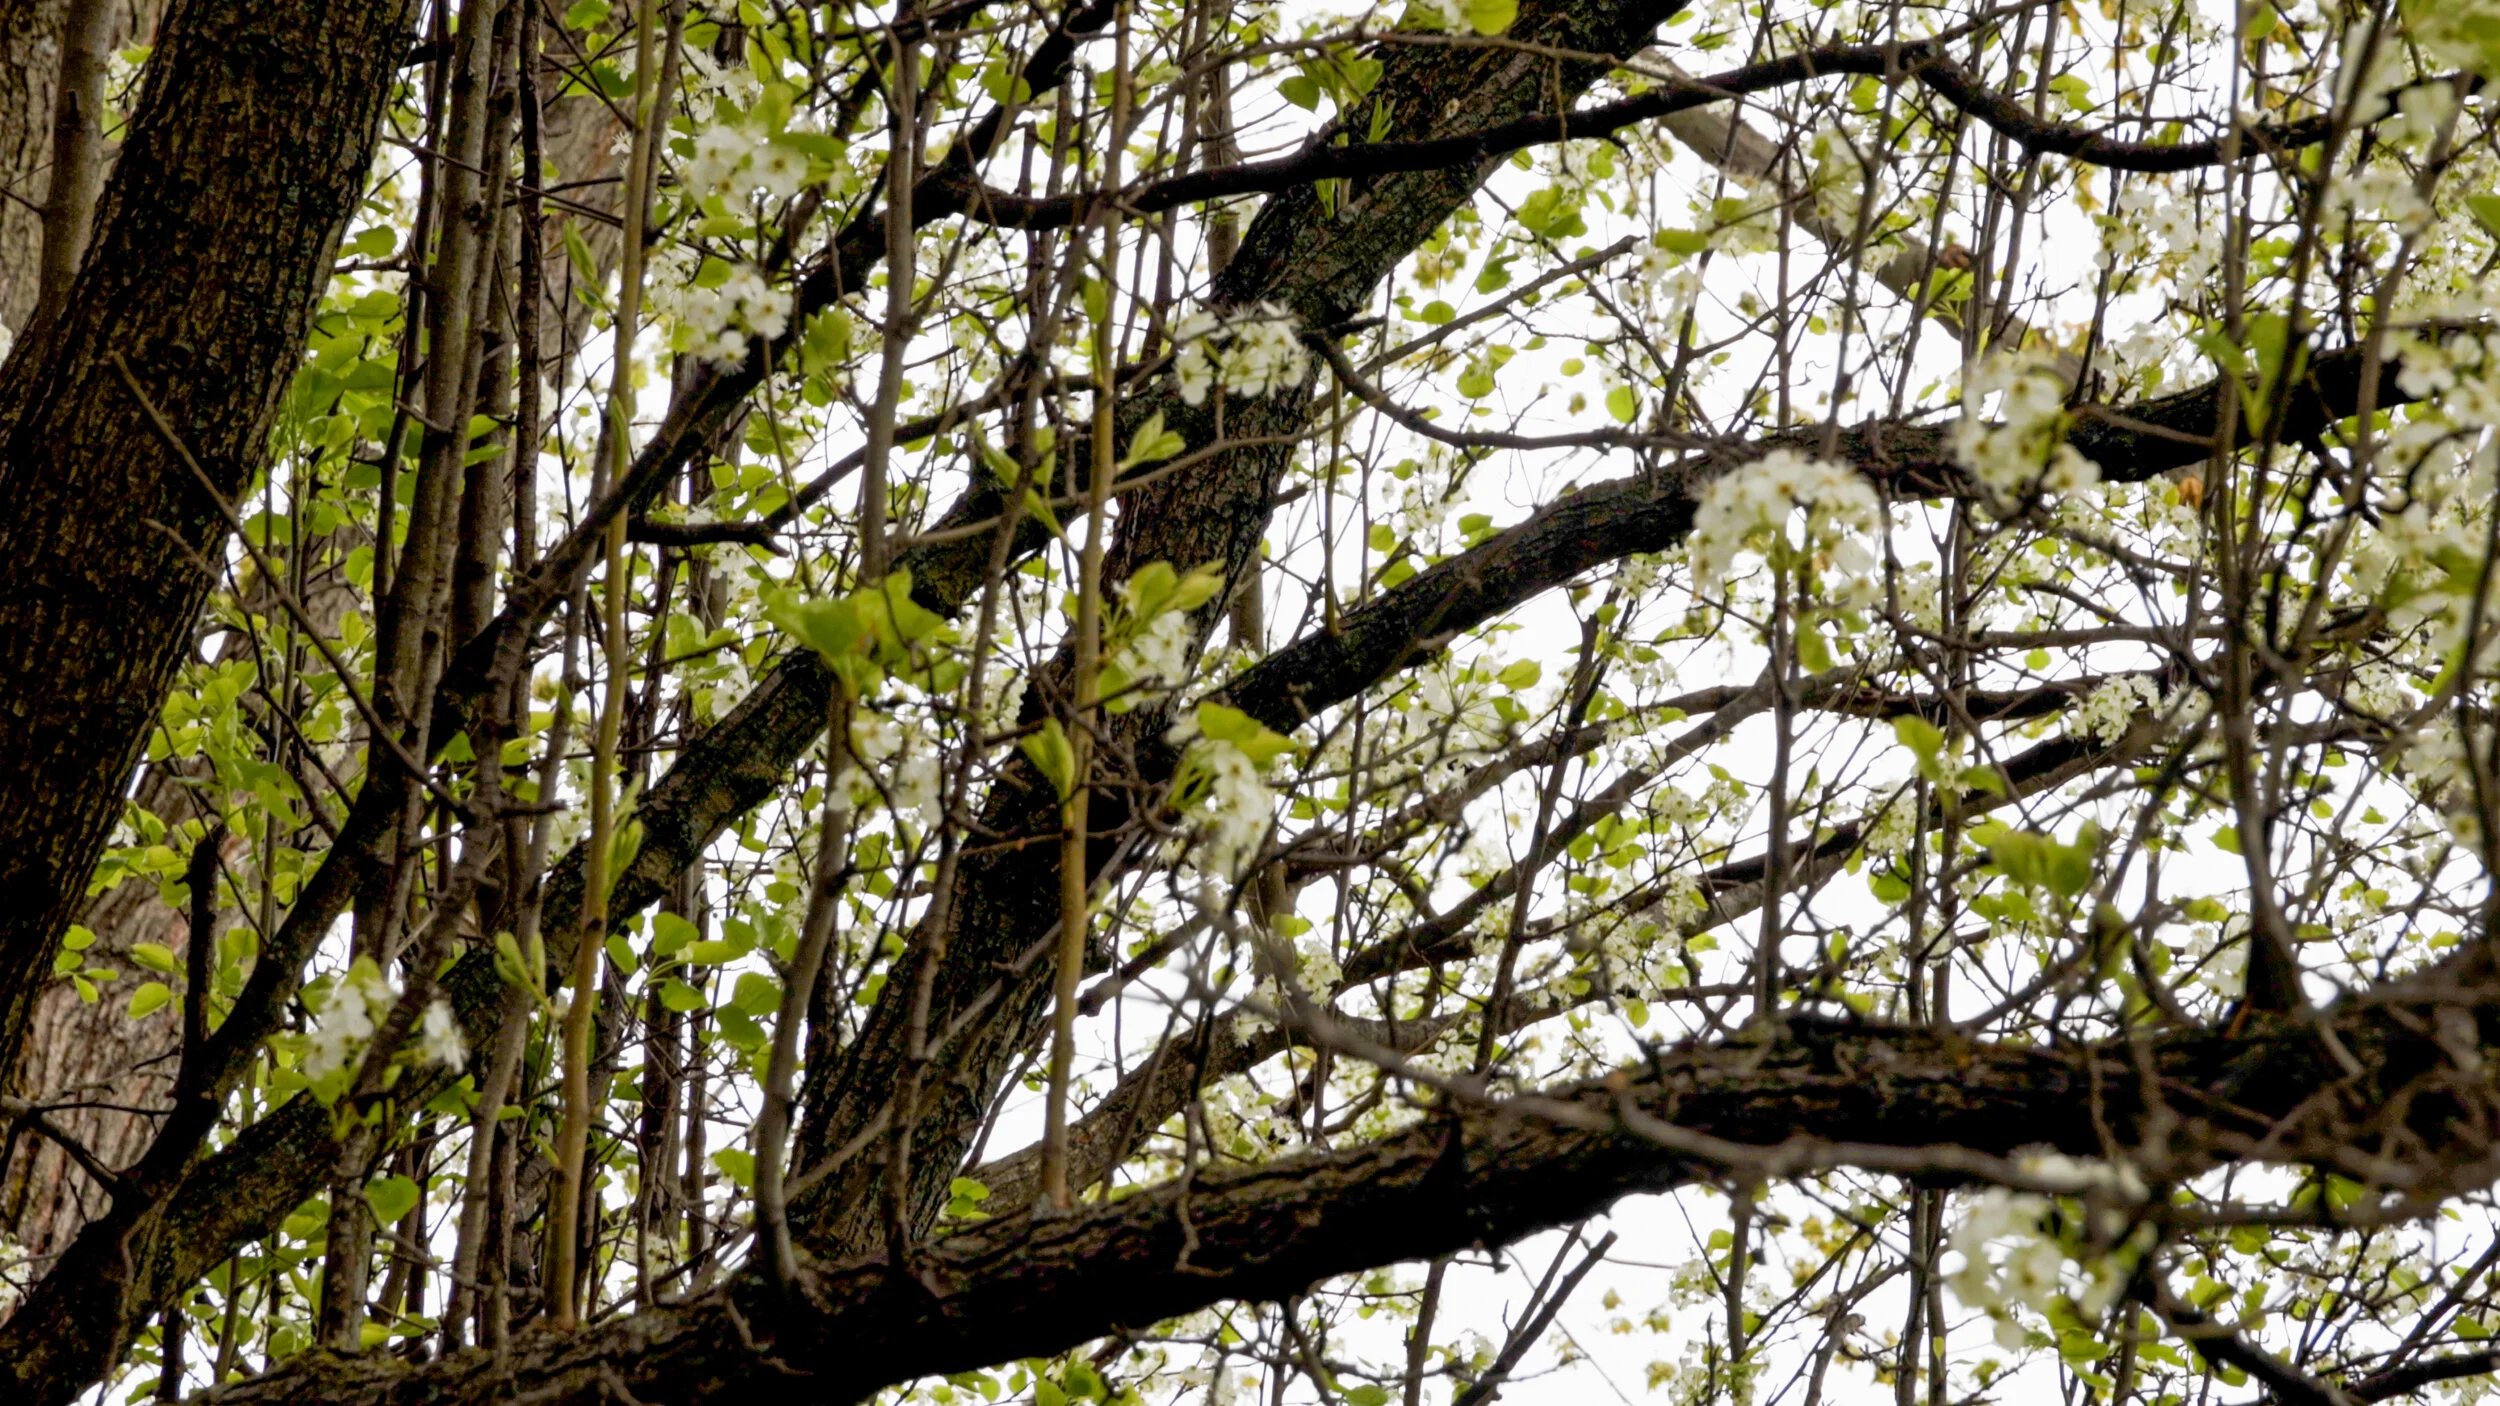
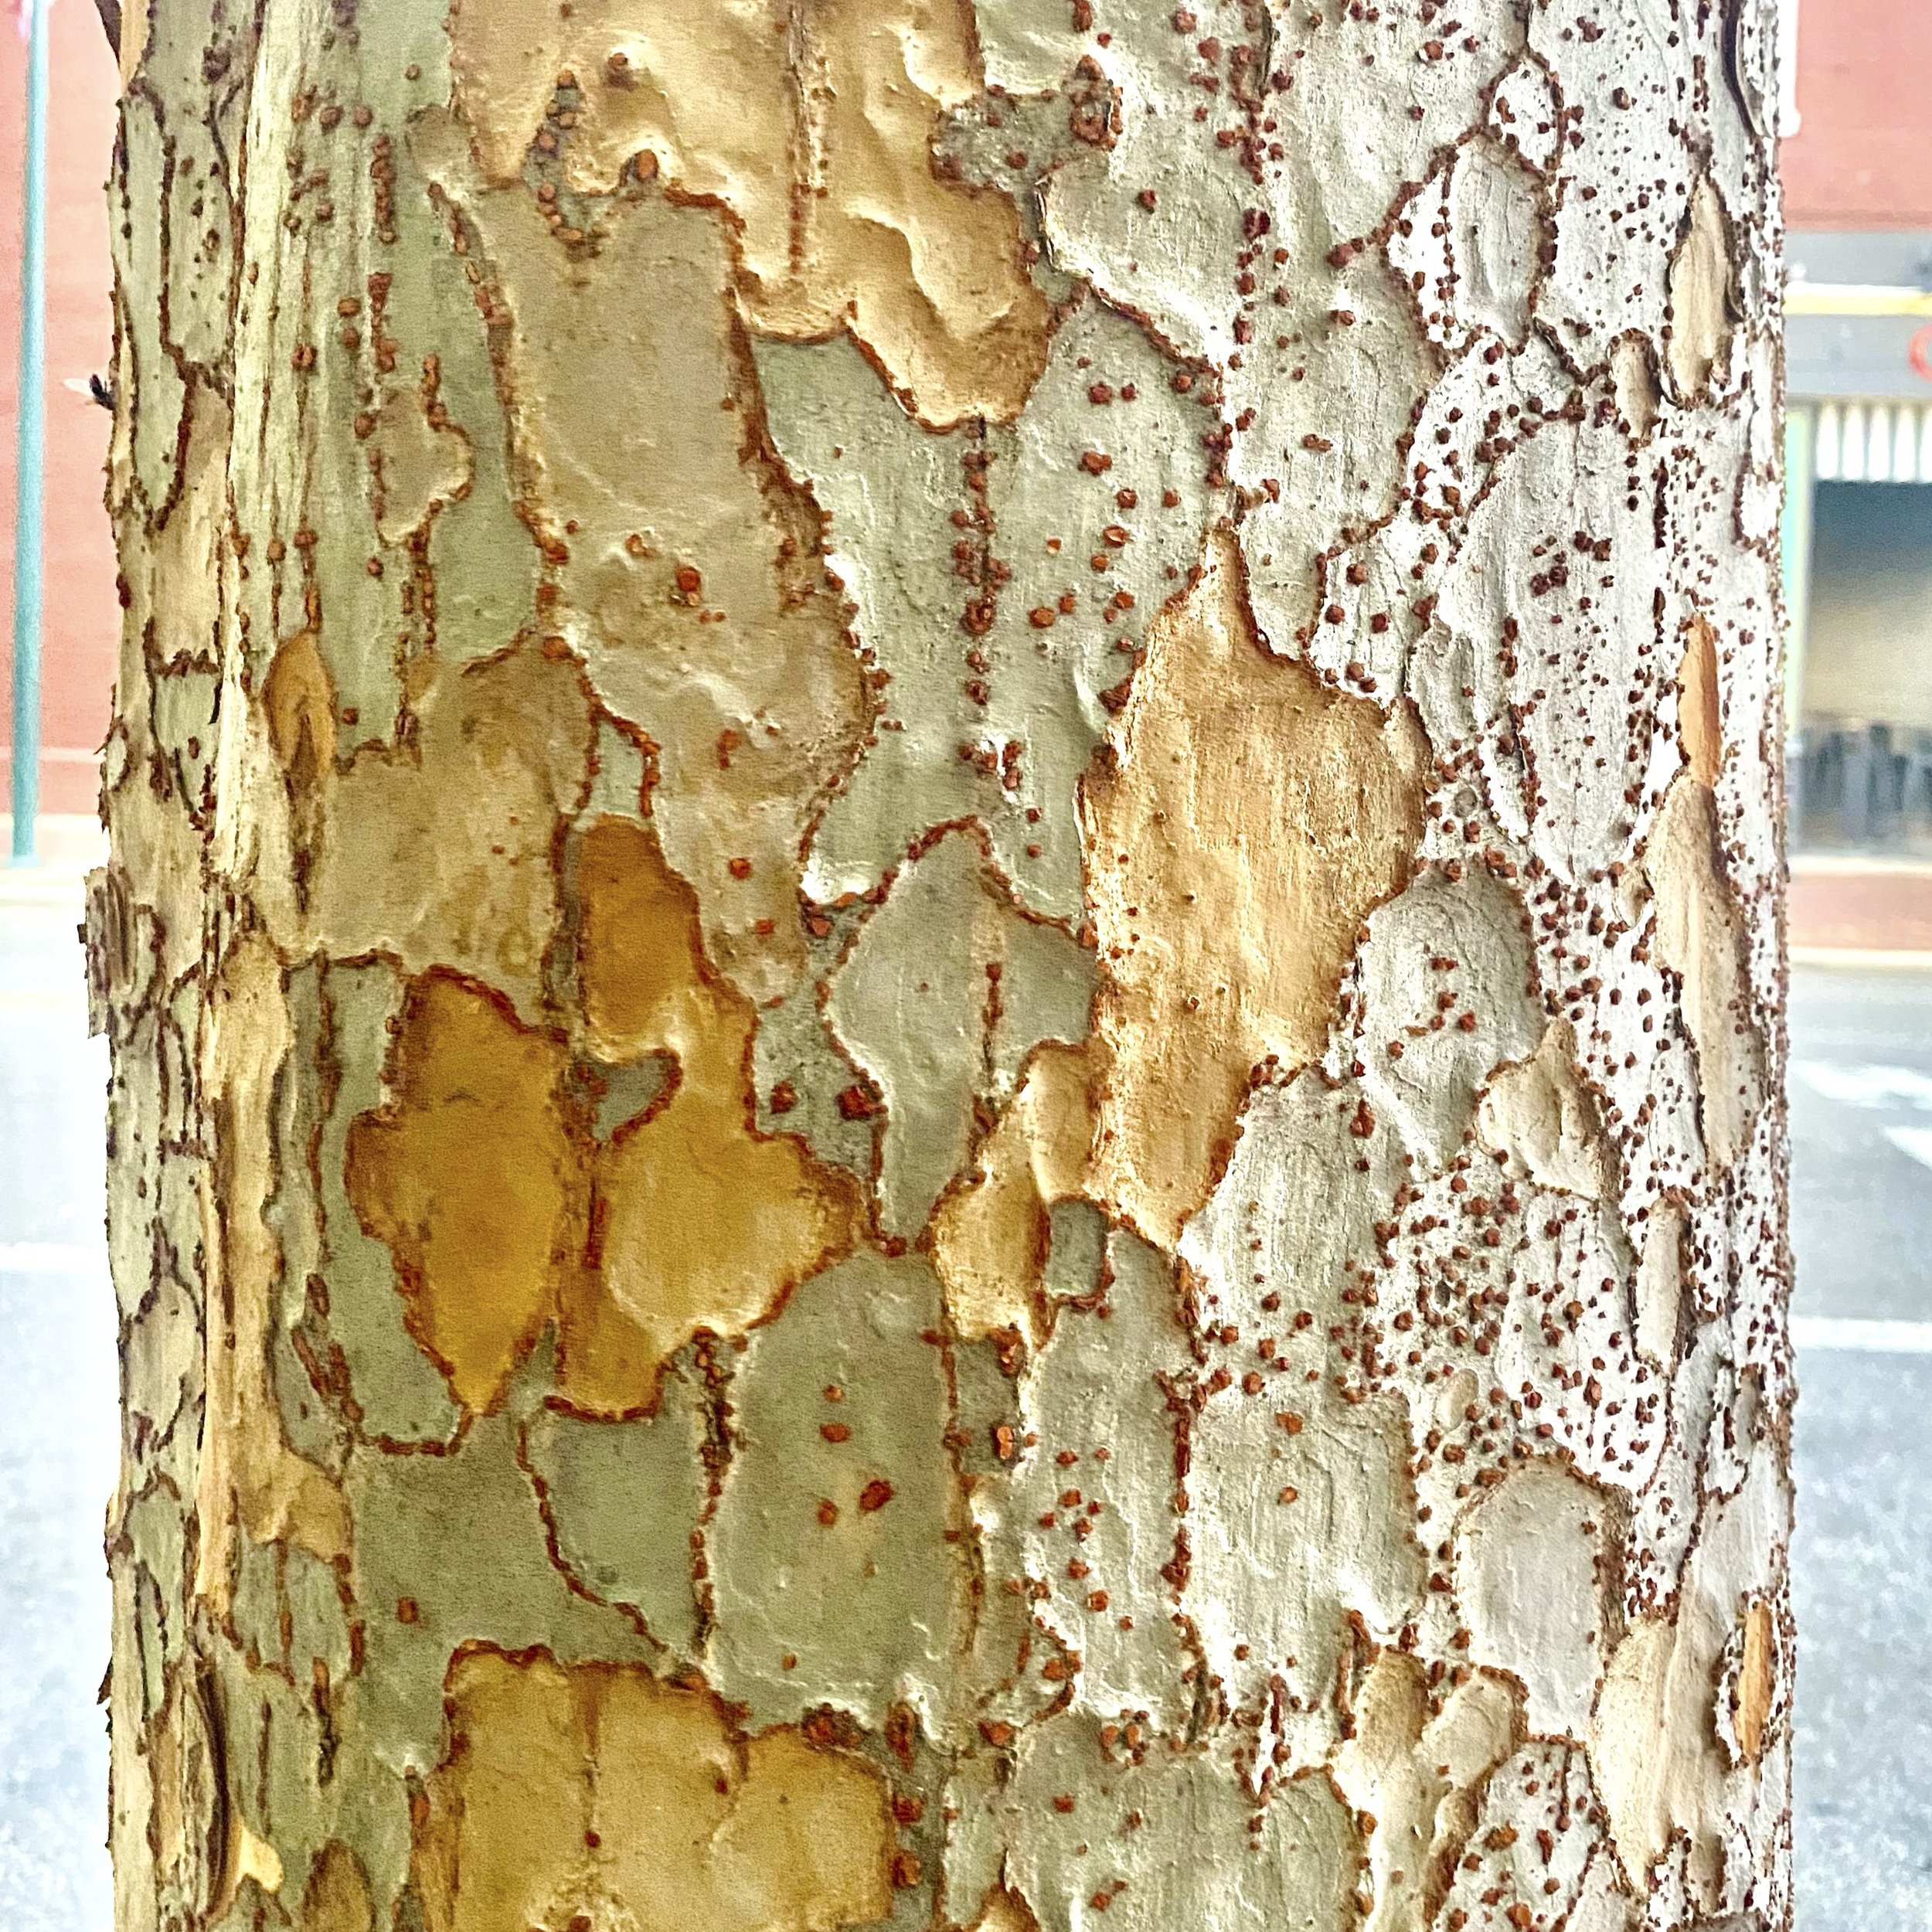
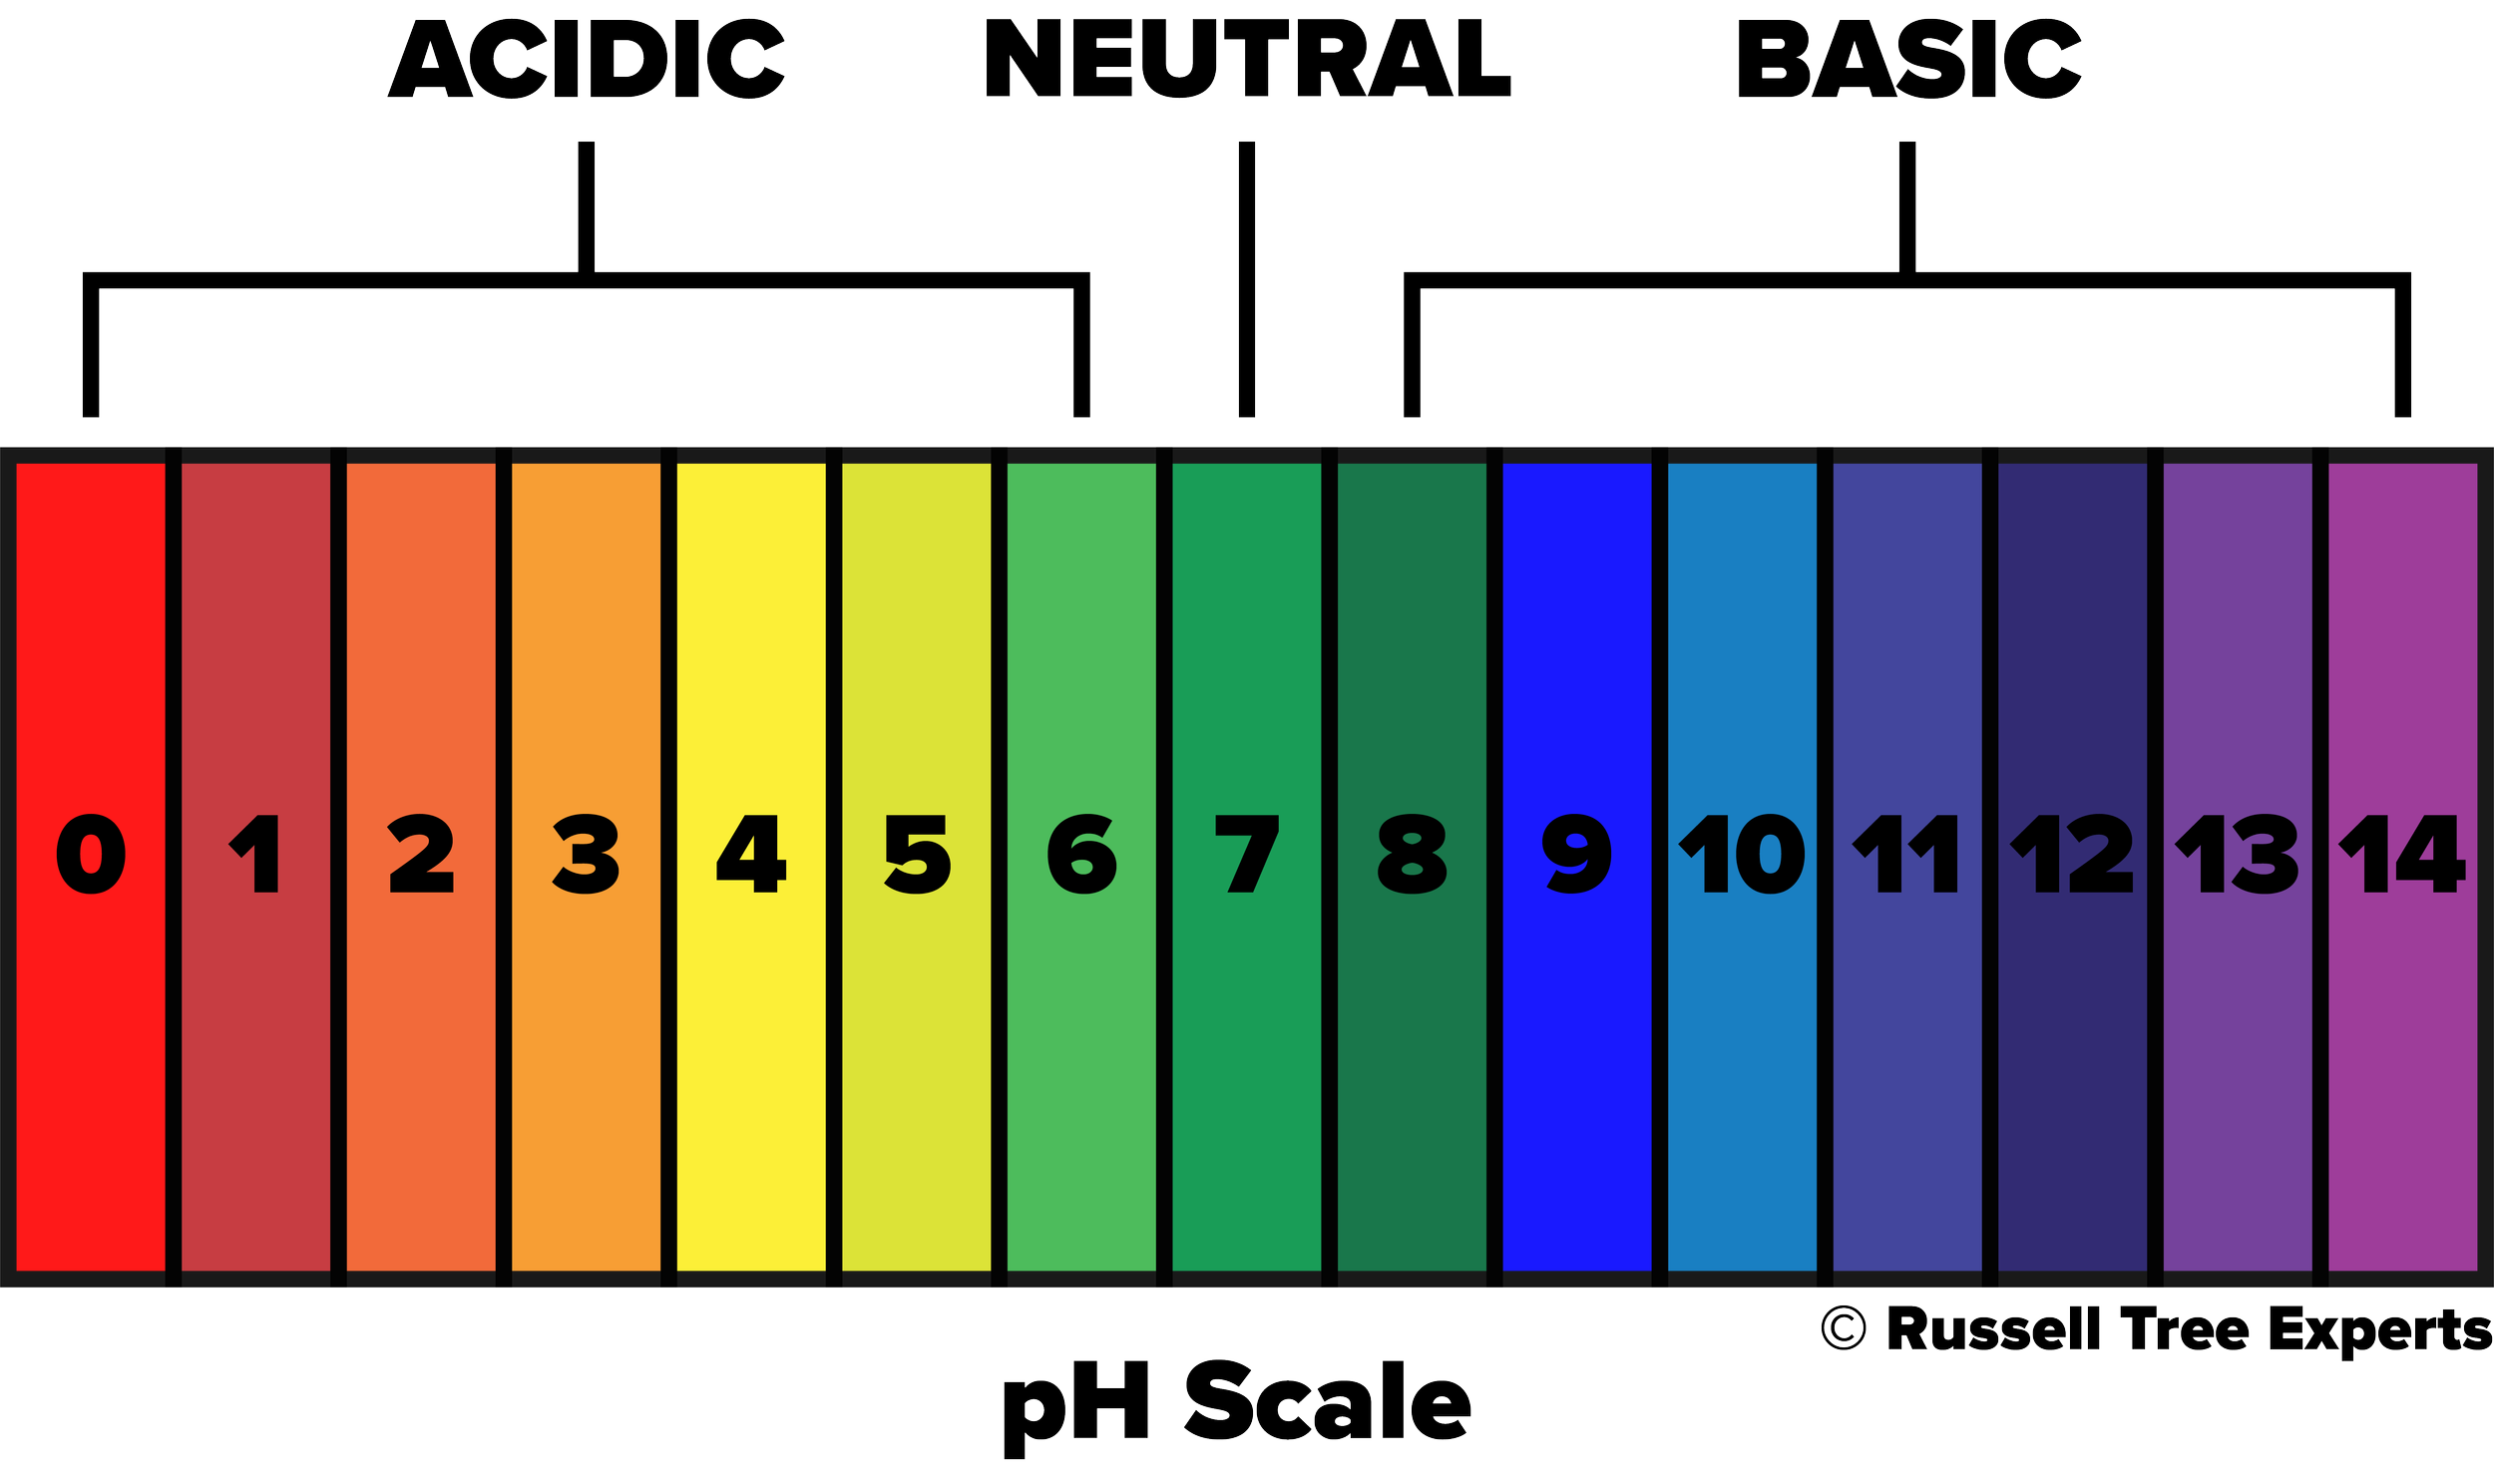
pH stands for “potential of hydrogen”, and is a measure of the acidity or alkalinity of a solution, ranging from 0 to 14 with 7 being neutral. A value below 7 is considered acidic while a value above 7 is considered alkaline (or basic). This scale represents the concentration of hydrogen ions present, with acidic solutions having a greater number of ions and alkaline solutions having fewer ions. In soils, that concentration of hydrogen ions is influenced by things such as the parent rock material that originally formed the soil, human activity, climate, and the presence or lack of organic matter. In turn, the resulting pH will influence the availability of nutrients essential for plant growth, microbial activity that helps with nutrient absorption, and soil chemistry that influences the breakdown of soil particles into more usable forms. Of the influencing factors mentioned above, parent rock material and the presence or lack of organic matter often go hand in hand and are the most significant influencers in our central Ohio landscapes. Central Ohio largely consists of limestone bedrock, which naturally has a higher pH than what’s preferable for most plants. So you might ask “Well, how is it then that any plants can be healthy and thrive in central Ohio?”. The answer is organic matter. In an undisturbed, natural environment like the forest, years and years of organic matter have formed on top of the infamous “Ohio clay” subsoil that we encounter in our backyards. The source of this organic matter comes from falling leaves, dead branches and trees, and dying organisms just to name a few, that collect on the forest floor year after year, decade after decade. These are all things we tend to remove from our landscapes to keep them tidy, which results in a lack of organic matter formation over time. For more on how to address this topic, check out our Arbor Ed article “Leave those Leaves!

Nutrient Availability

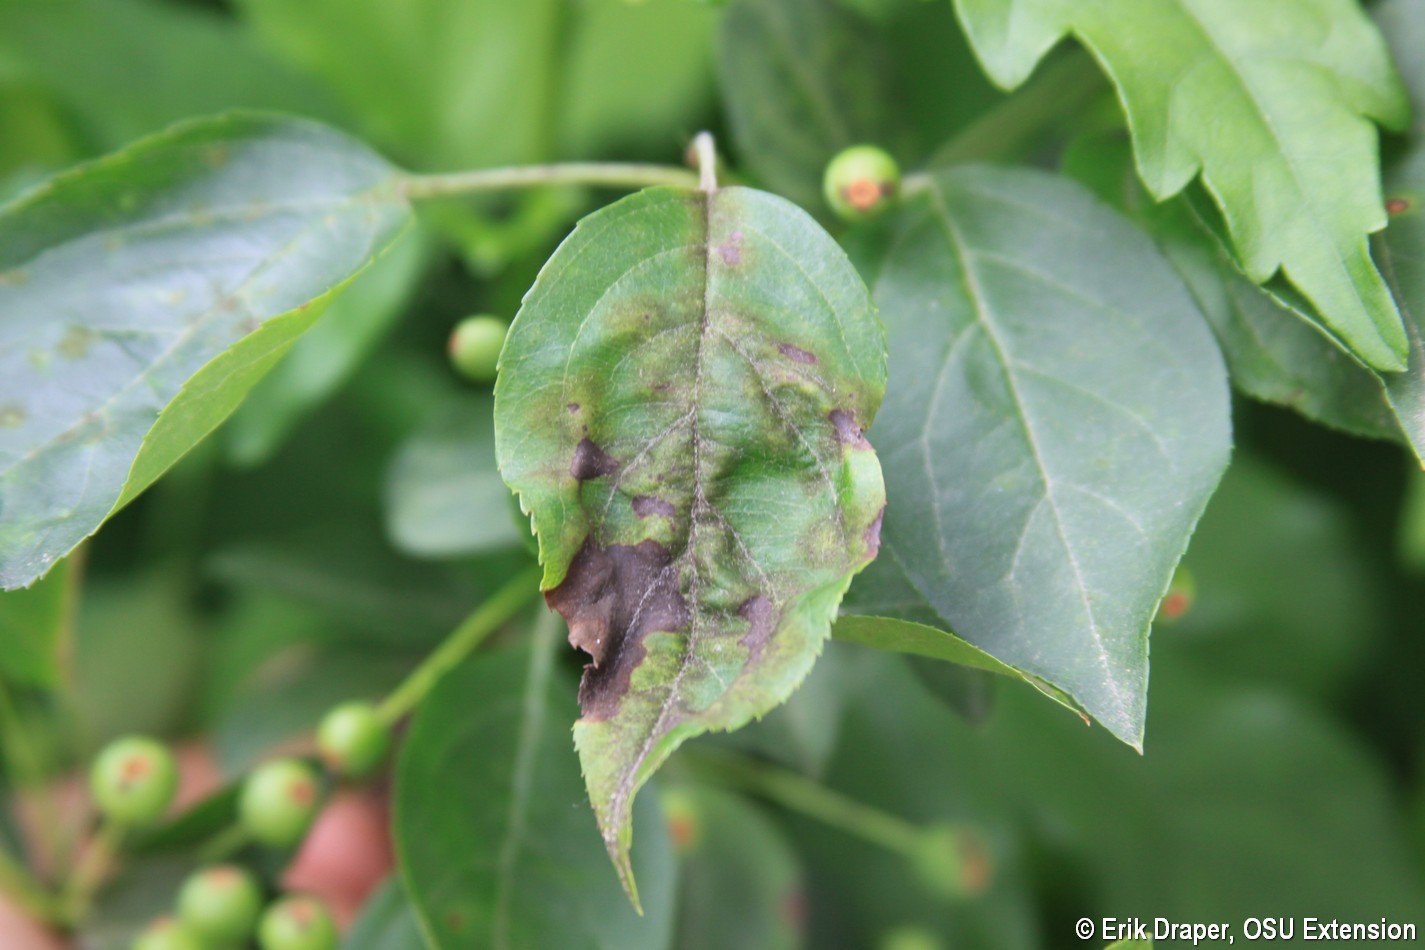
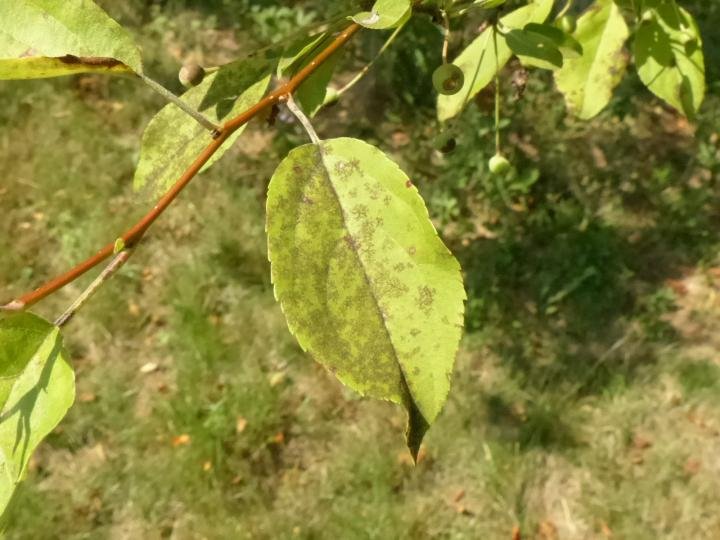
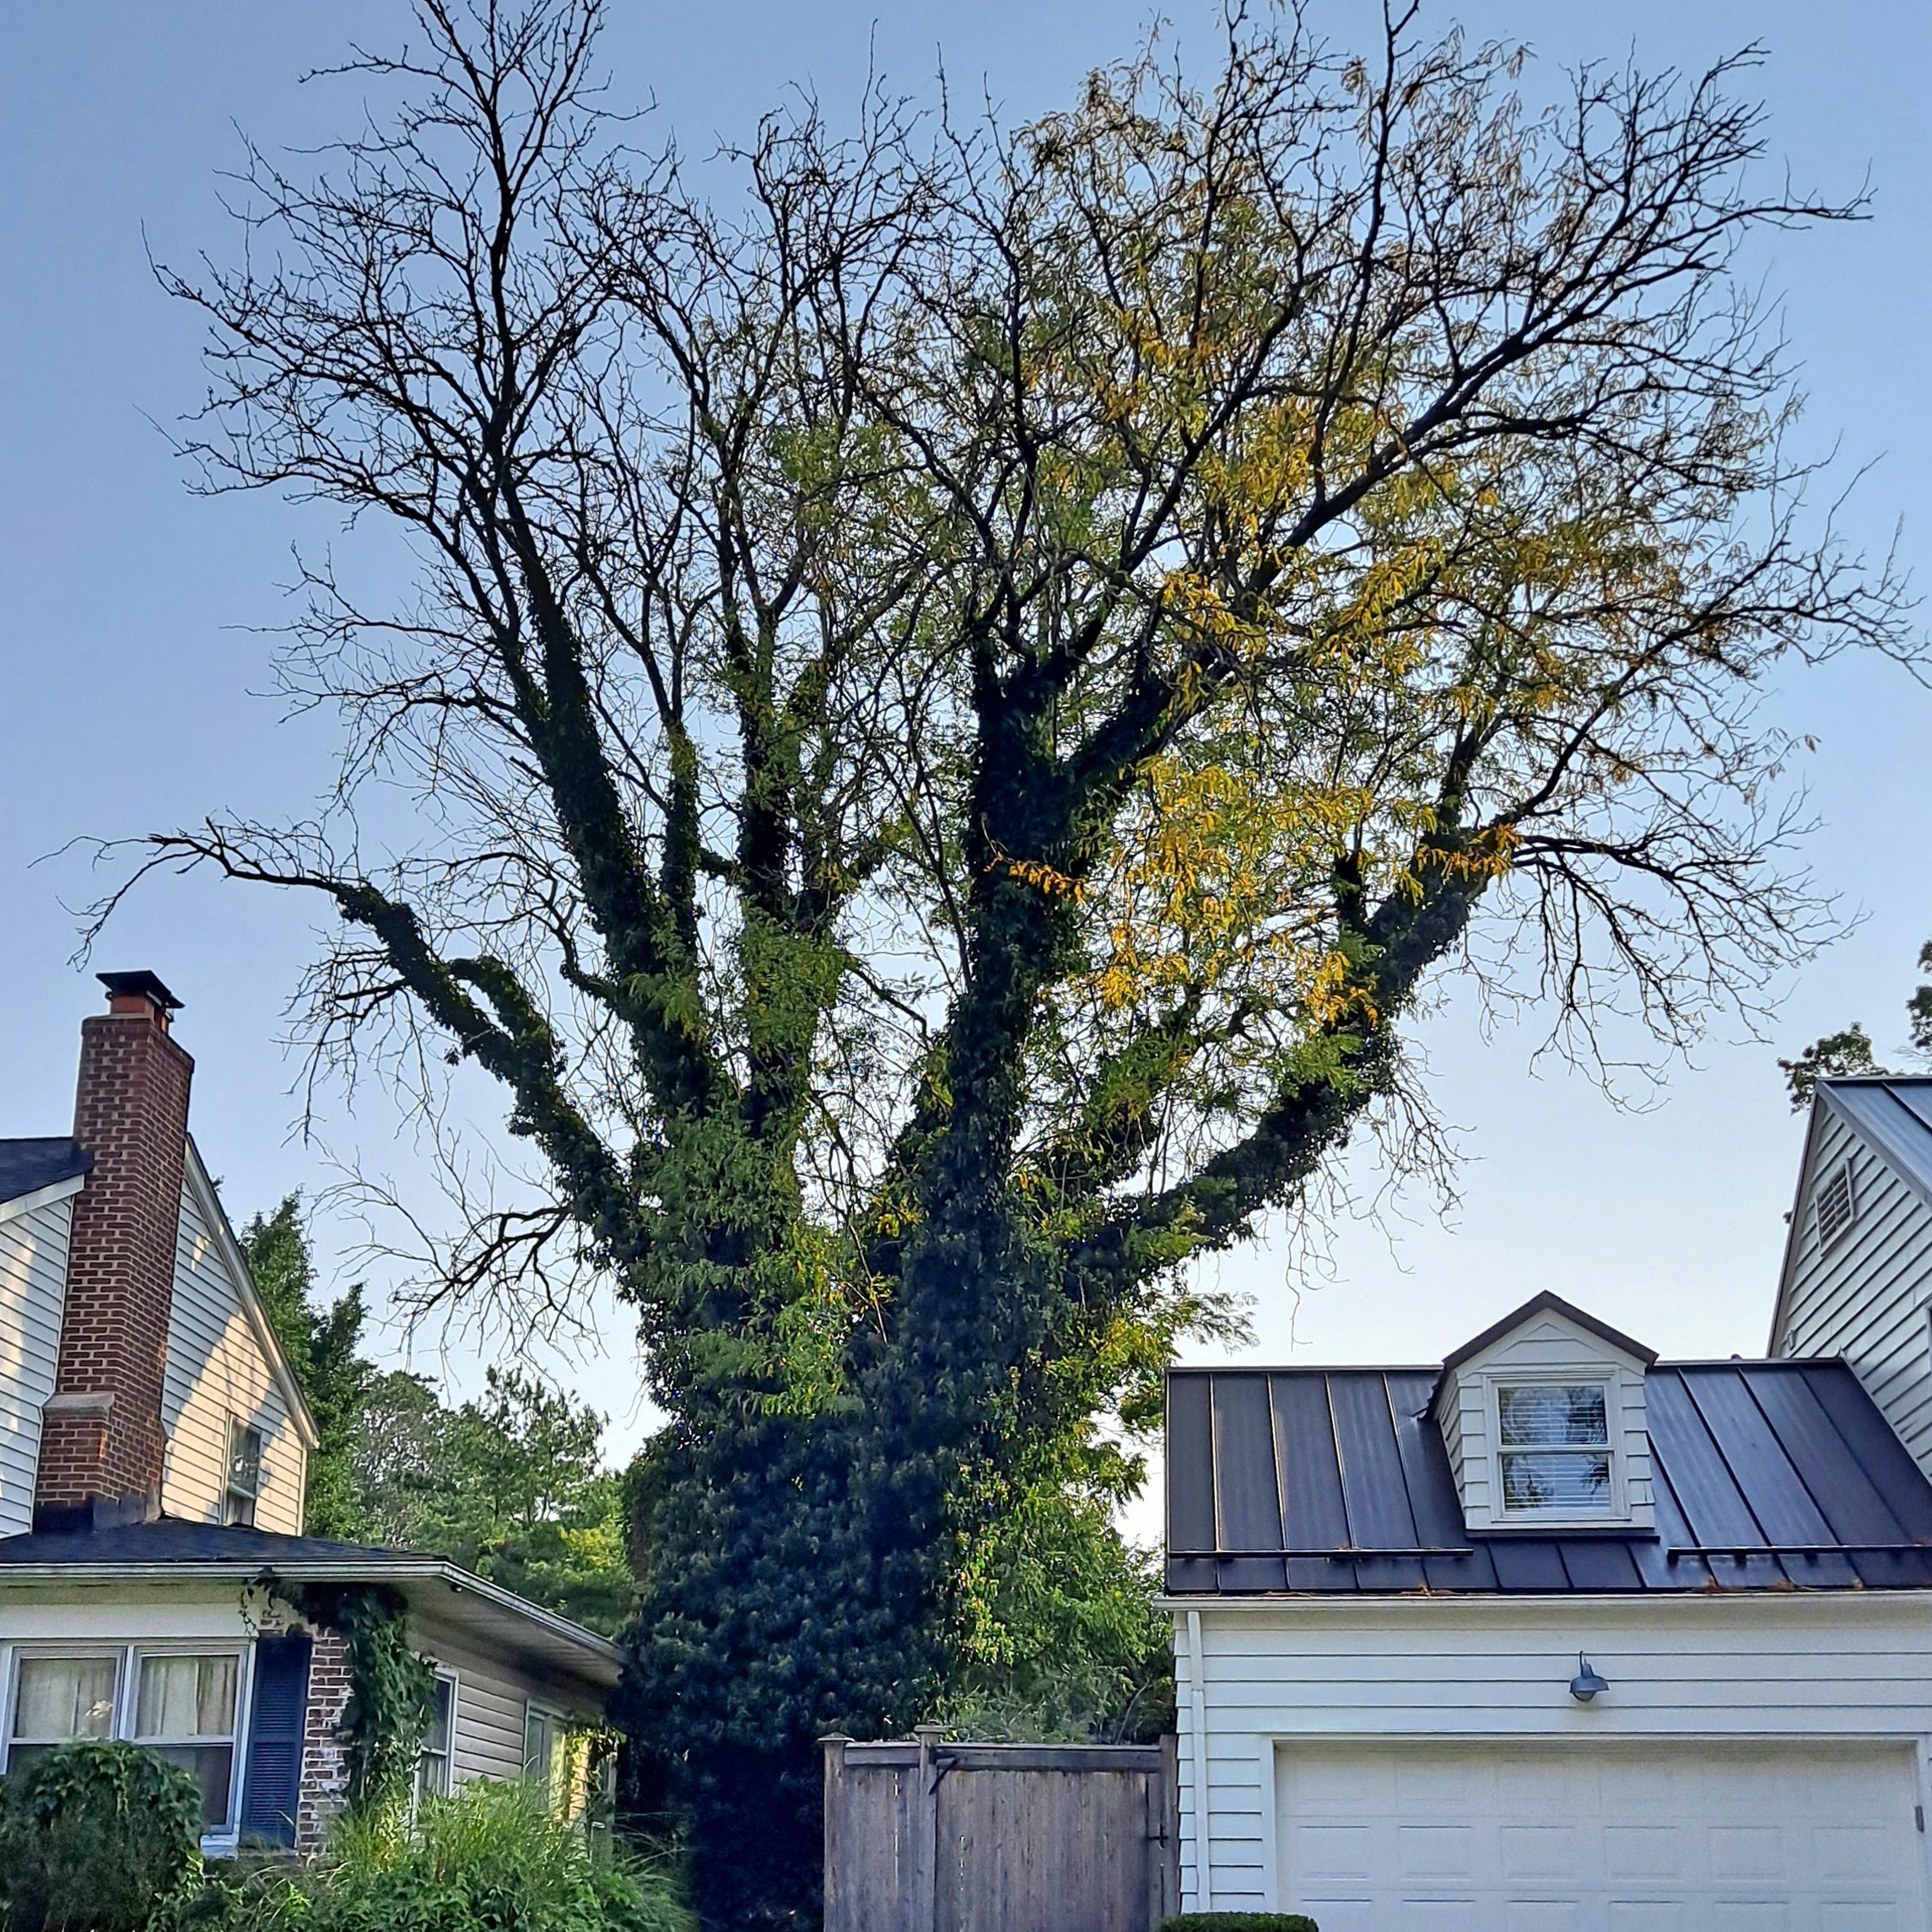
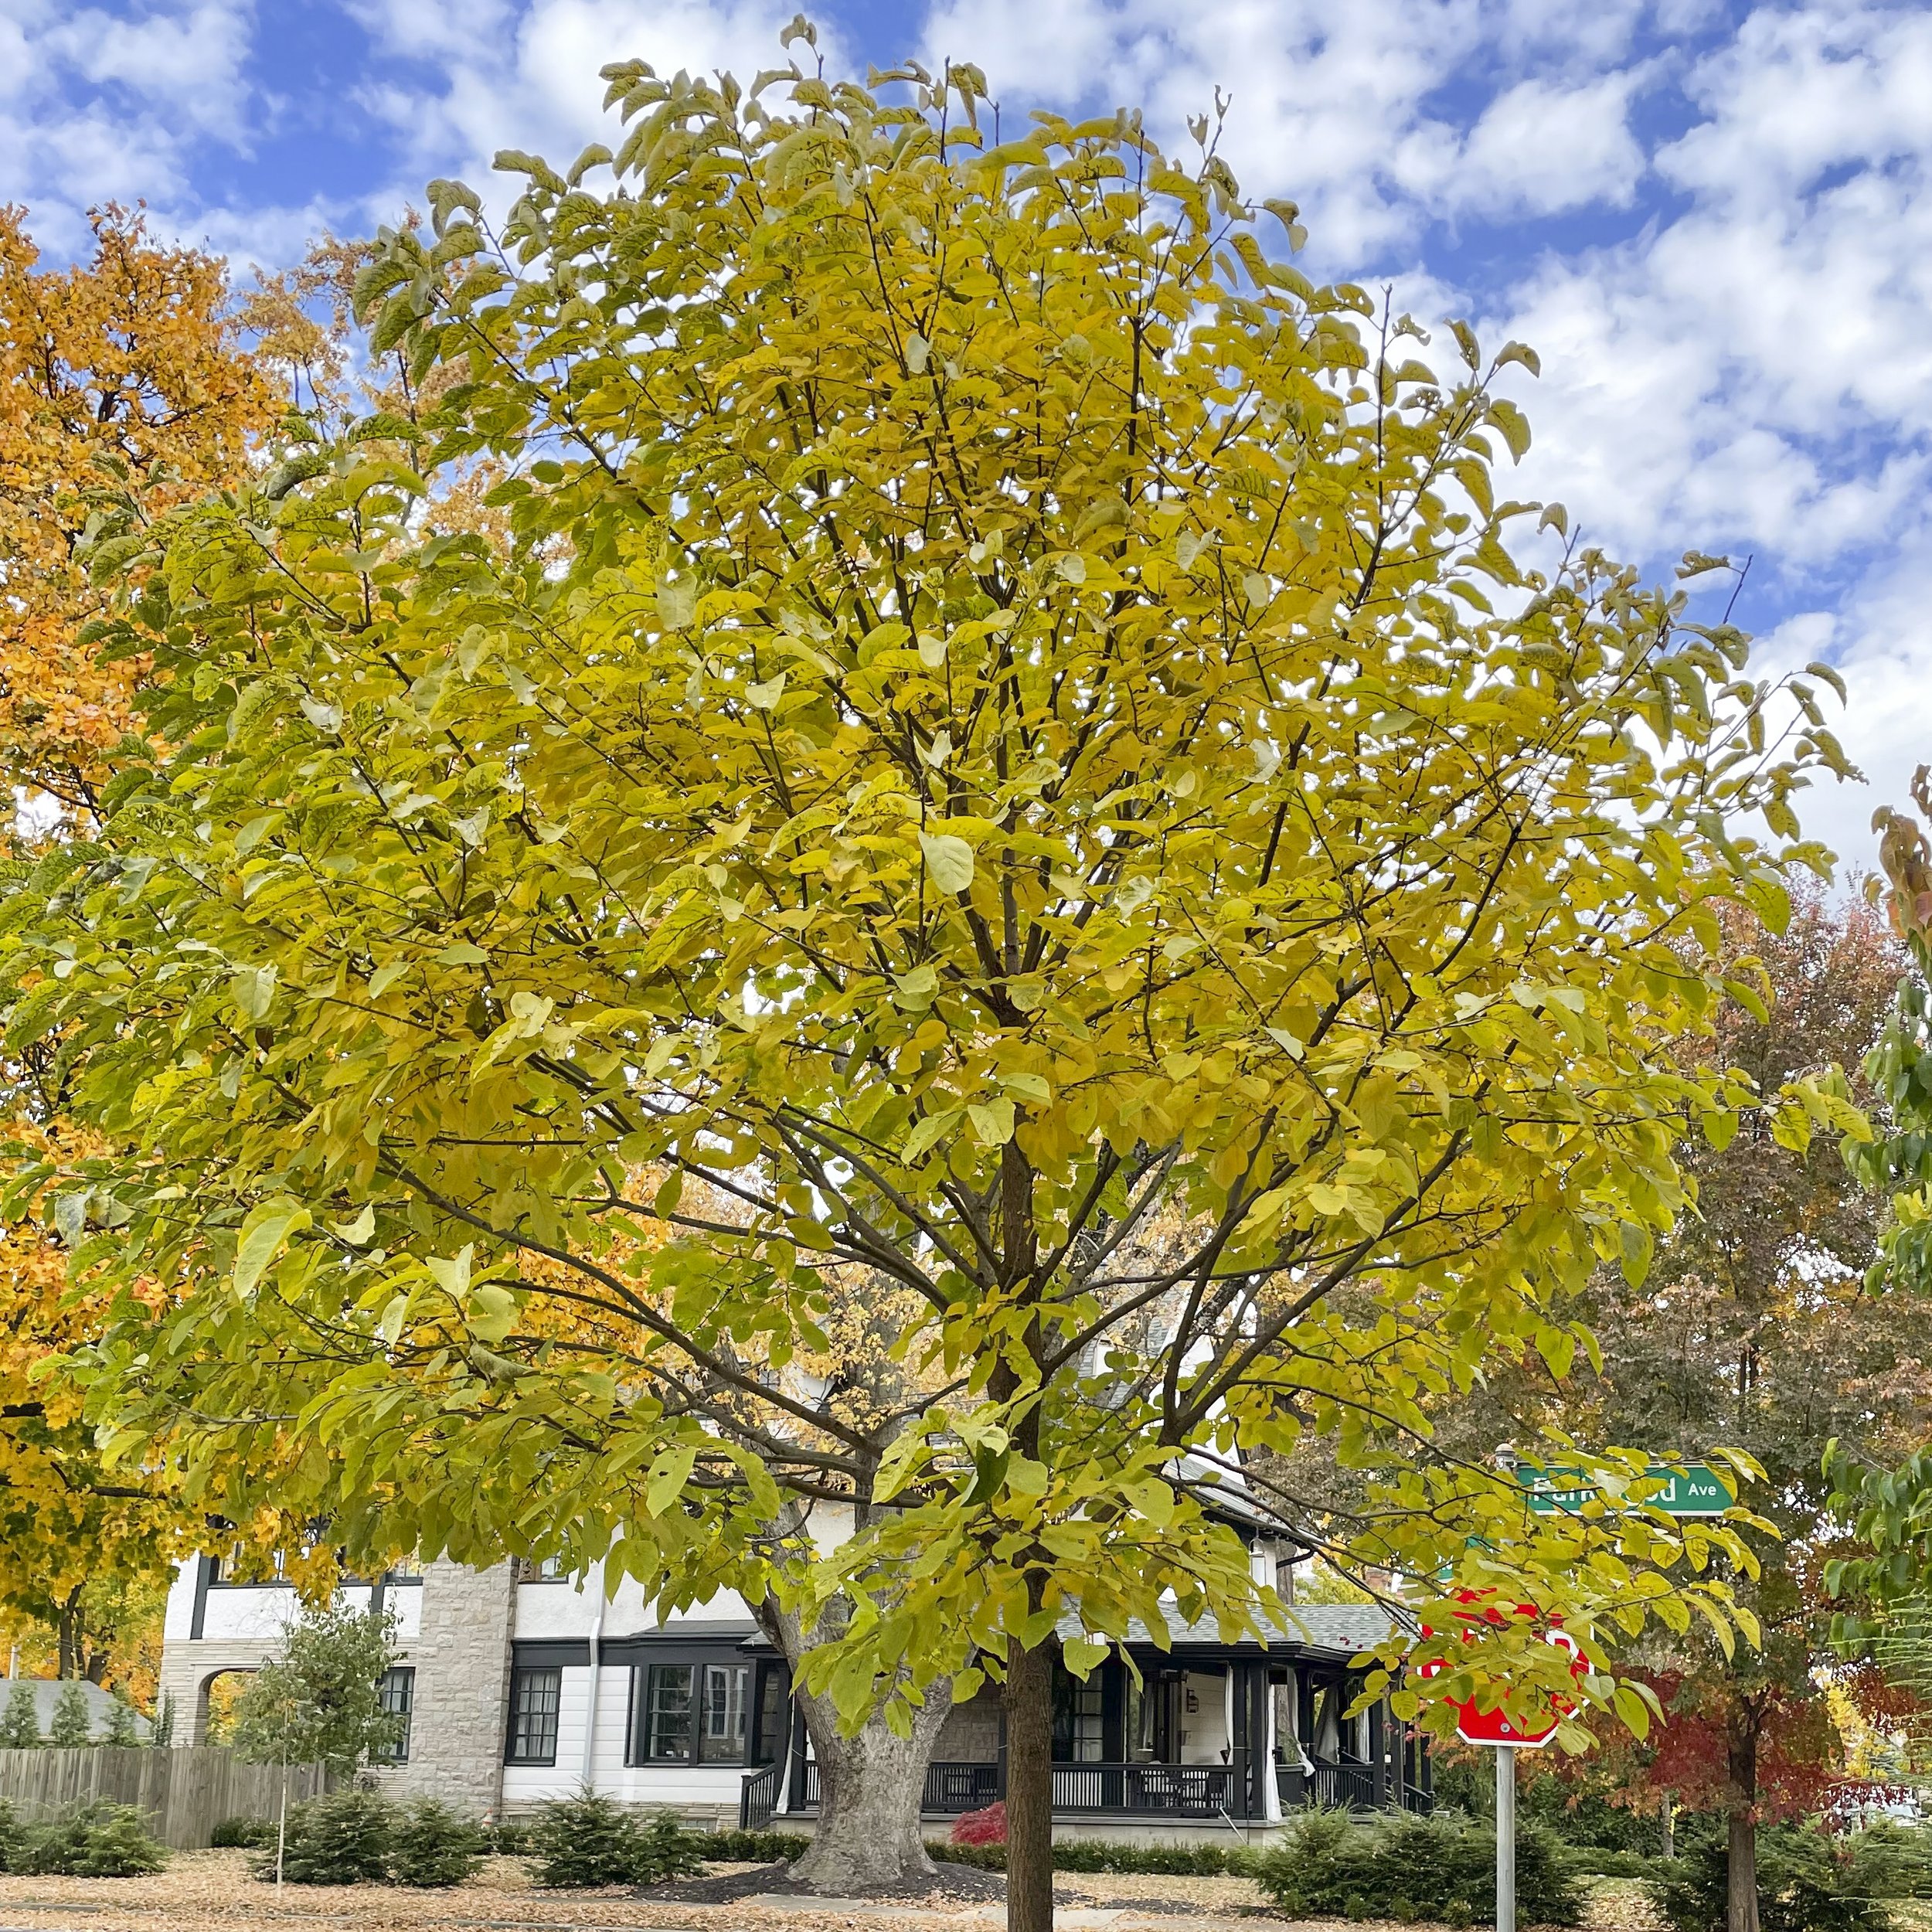
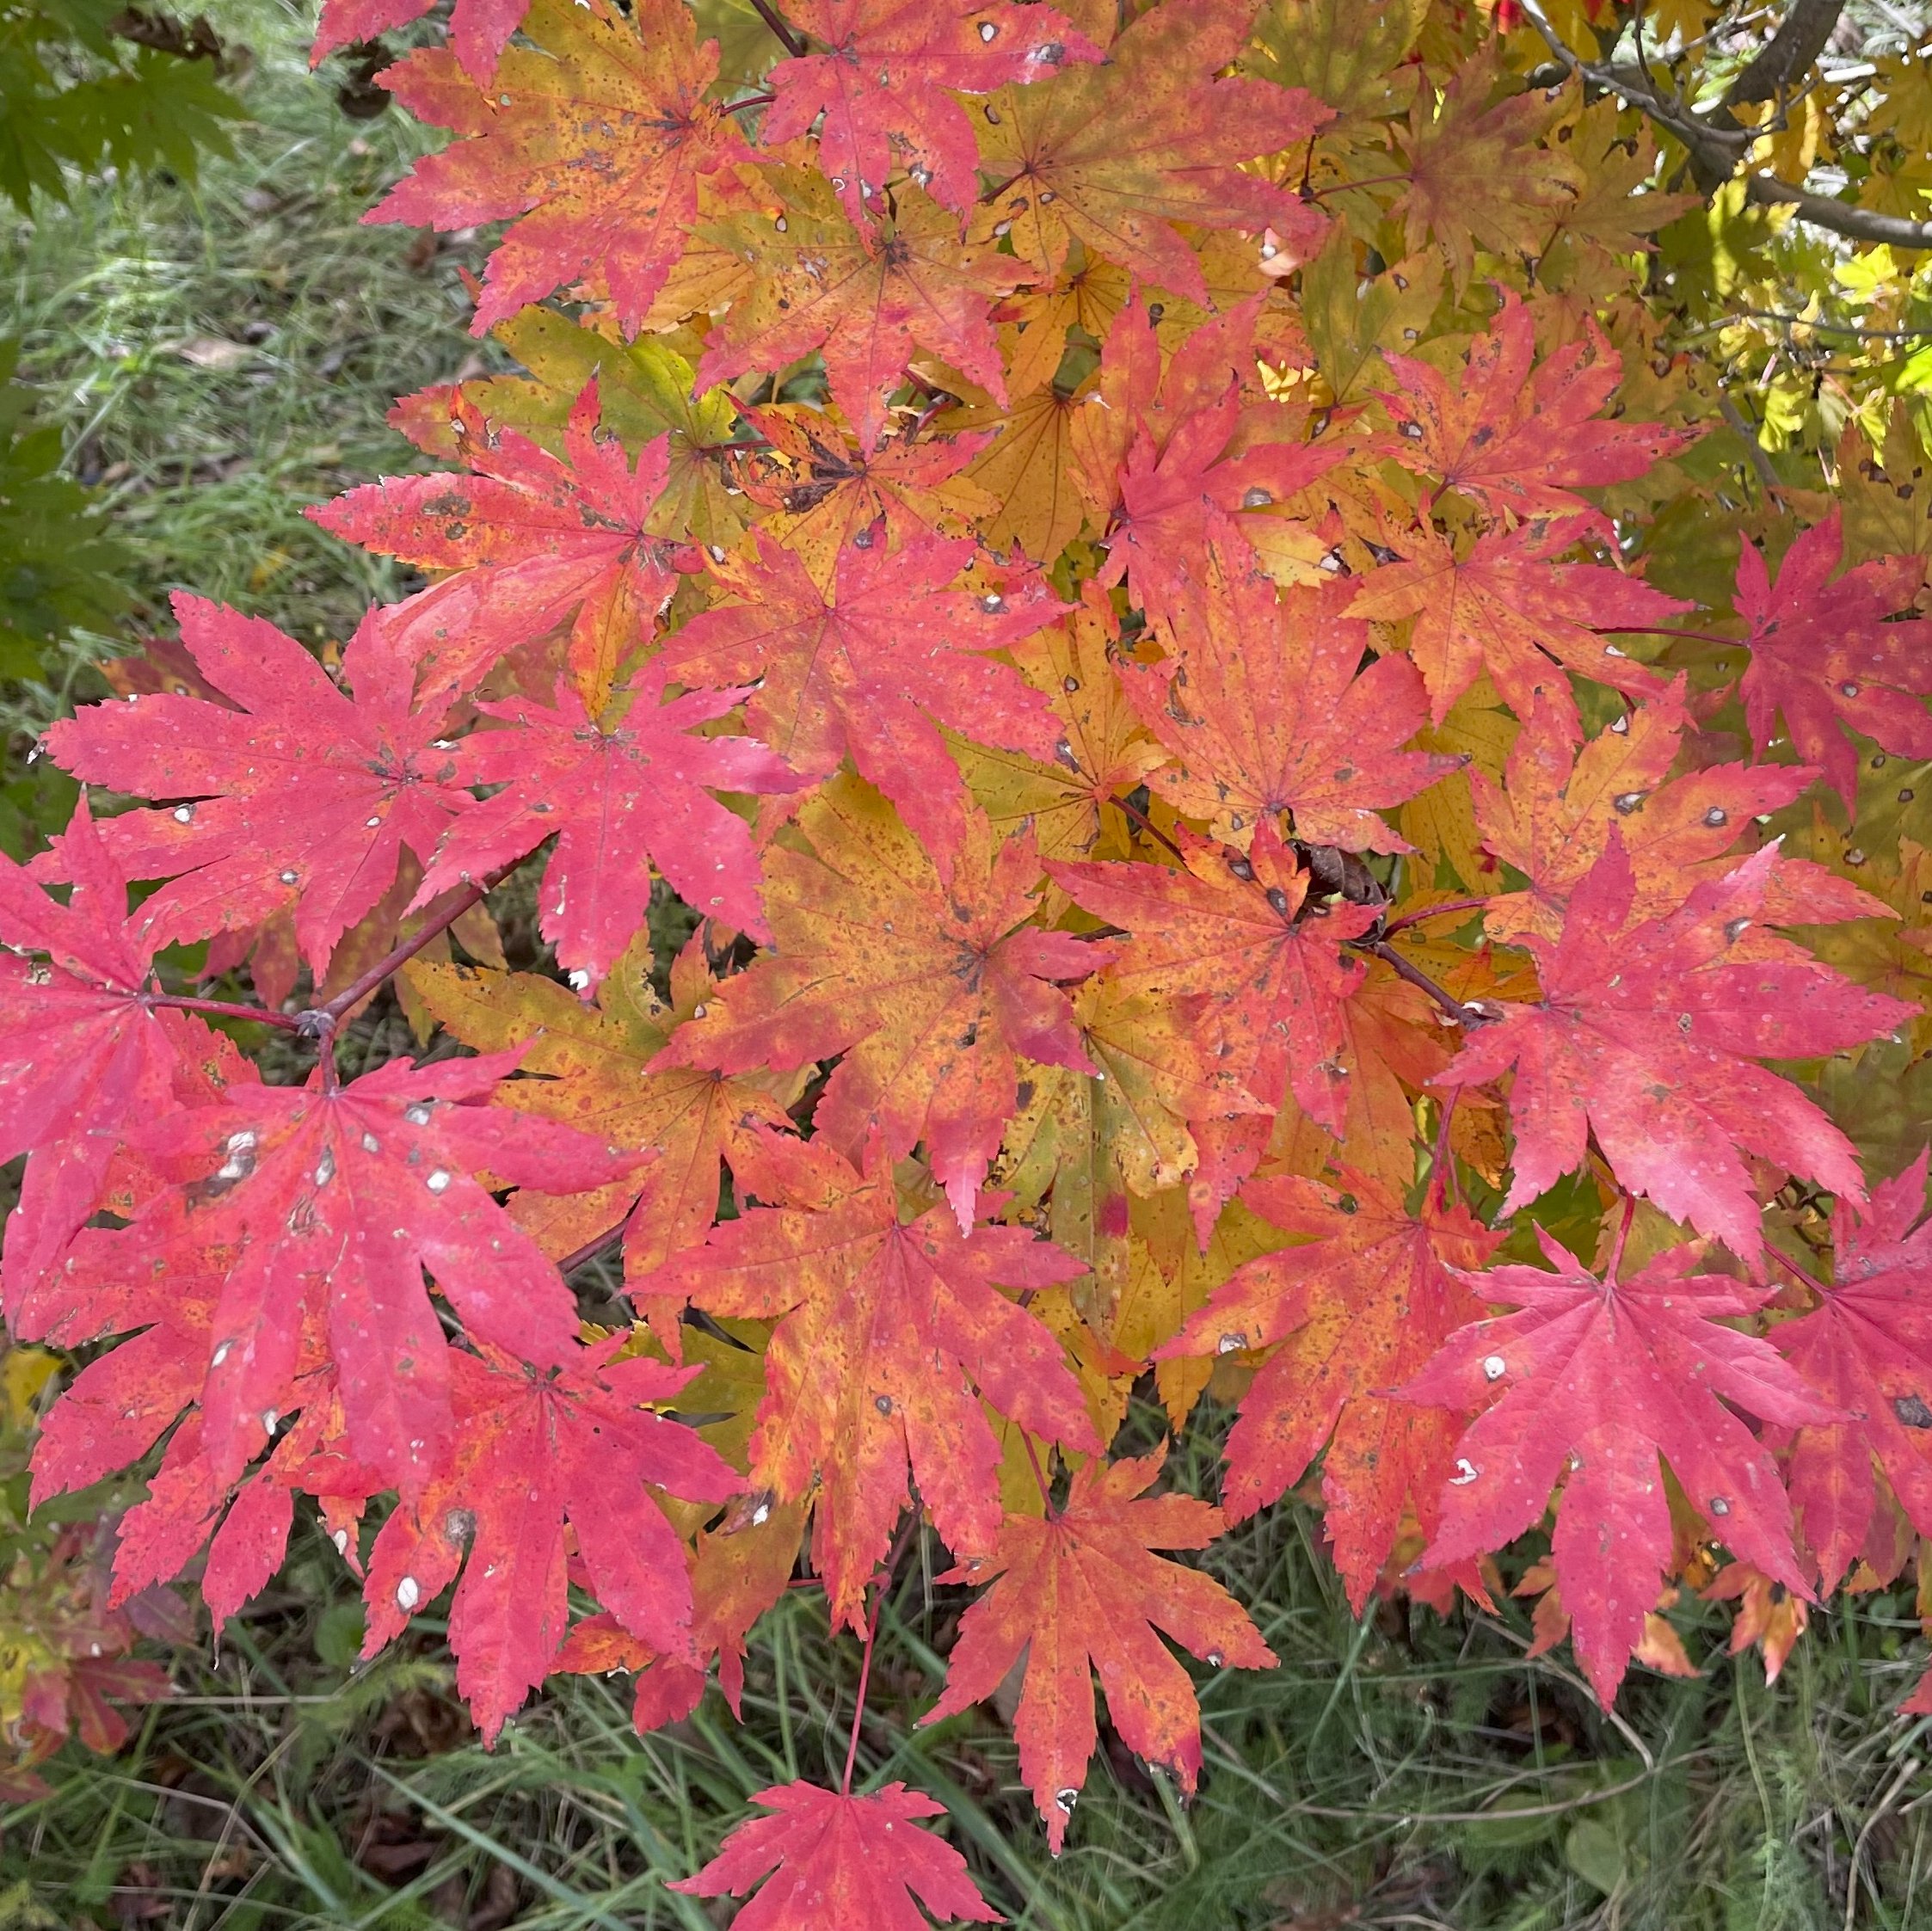
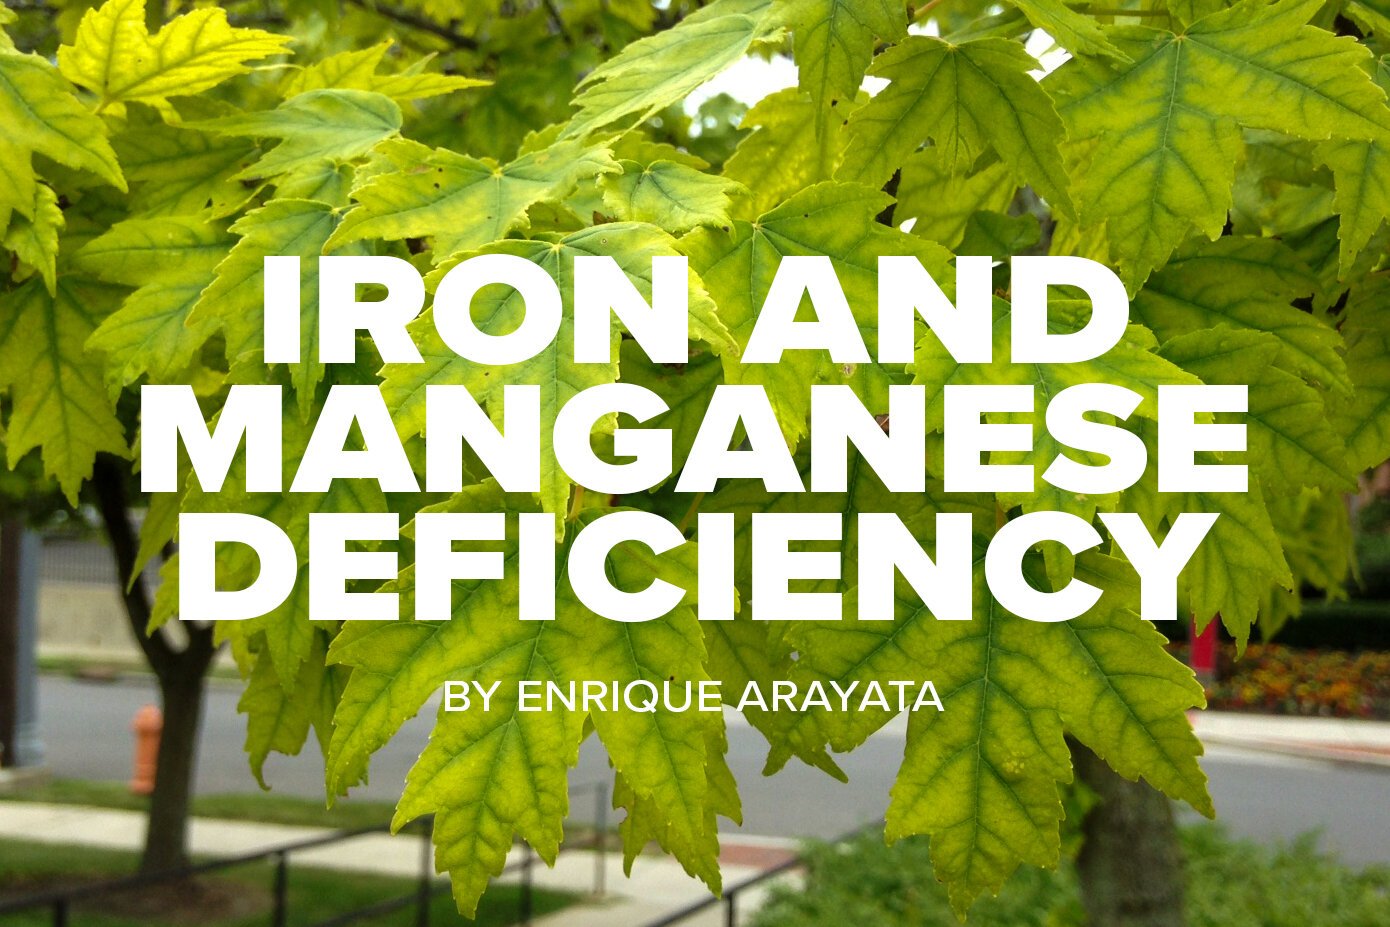
Chlorosis in a pin oak tree in Bexley, Ohio

pH influences the availability of essential nutrients in the soil by changing their level of solubility. This simply means that pH will determine whether or not these nutrients are in a form that can be absorbed by the tiny roots and roots hairs of plants. Most plants will prefer growing in soil with a pH range between 6-7, slightly acidic to neutral. When the pH is out of its optimal range for a particular plant (generally too high in central Ohio), the plant’s growth may slow, it may lose overall health and vigor, or conditions like chlorosis can develop because that plant isn’t getting the nutrients it needs to carry out essential functions for growth. Chlorosis, or yellowing of leaf tissue, is a very common condition in central Ohio and can be seen most often with trees like pin oak, red maple, white pine, and river birch. It’s interesting to note that these are trees that are either native to Ohio or an adjacent region. In their natural habitats where organic matter is abundant, soil pH is lower and nutrients are readily available for uptake. The parent material, derived from limestone and having higher pH levels, does not affect the trees since the absorbing roots are largely growing in the organic layer above it. In our backyards however, carpeted with lawn but cleared annually of leaves, higher pH levels can quickly cause issues even with otherwise healthy trees.

Chart showing availability of essential elements at various pH levels

Microbial Activity

pH affects the activity of microorganisms in the soil. These microorganisms are essential for plant health, helping plants to absorb certain nutrients, or aiding in the breakdown of organic matter into available forms for your plants. Certain fungi, bacteria, or insects that benefit a particular plant will naturally thrive in the same pH that is ideal for that plant. Encouraging the proper pH for your plants in turn helps to foster a healthier population of these important helpers in the soil. In the same way that our own bodies are influenced by the health of our gut bacteria, plants rely on microbial activity in the soil. Without it, they can struggle to carry out essential functions for proper growth and overall health.


Soil Chemistry

Similar to nutrient availability, pH can affect the chemistry of the soil and determine whether or not the available nutrients will be absorbed by roots. It also influences the composition of the soil, helping certain minerals to break down into smaller molecules, ultimately affecting the charge of soil particles and the ability for the soil to hold on to essential elements that could otherwise be removed from the soil. A good example of this would be a soil’s ability to retain certain nutrients by preventing them from getting washed out of the soil by irrigation or rainfall. Acidic soils tend to be better at retaining more of these charged nutrients. It's no coincidence then that most plants prefer acidic or slightly acidic soils, as the lower pH makes those soils richer in nutrients and more “user friendly” for plants.

 ~

Soil pH plays a significant role in the overall health of trees, shrubs, and other plants in our landscape. A little bit of knowledge can go a long way in helping to understand the unique issues you may have in your central Ohio landscape. Below is a list of a few things you can consider in determining what’s best for your yard.

  • Have a soil sample from your yard submitted for analysis to help determine if there is a pH issue or nutrient deficiency.

  • If you know that you have higher pH levels, consider planting trees and shrubs that are more tolerant of alkaline soils.

  • Try incorporating more organic matter into your soil by allowing leaves to decompose in landscape beds over the winter, and consider enlarging groundcover or mulch beds around trees (less lawn)

  • Have root zone invigoration work done for trees that are struggling with nutrient deficiencies and/or soil compaction.

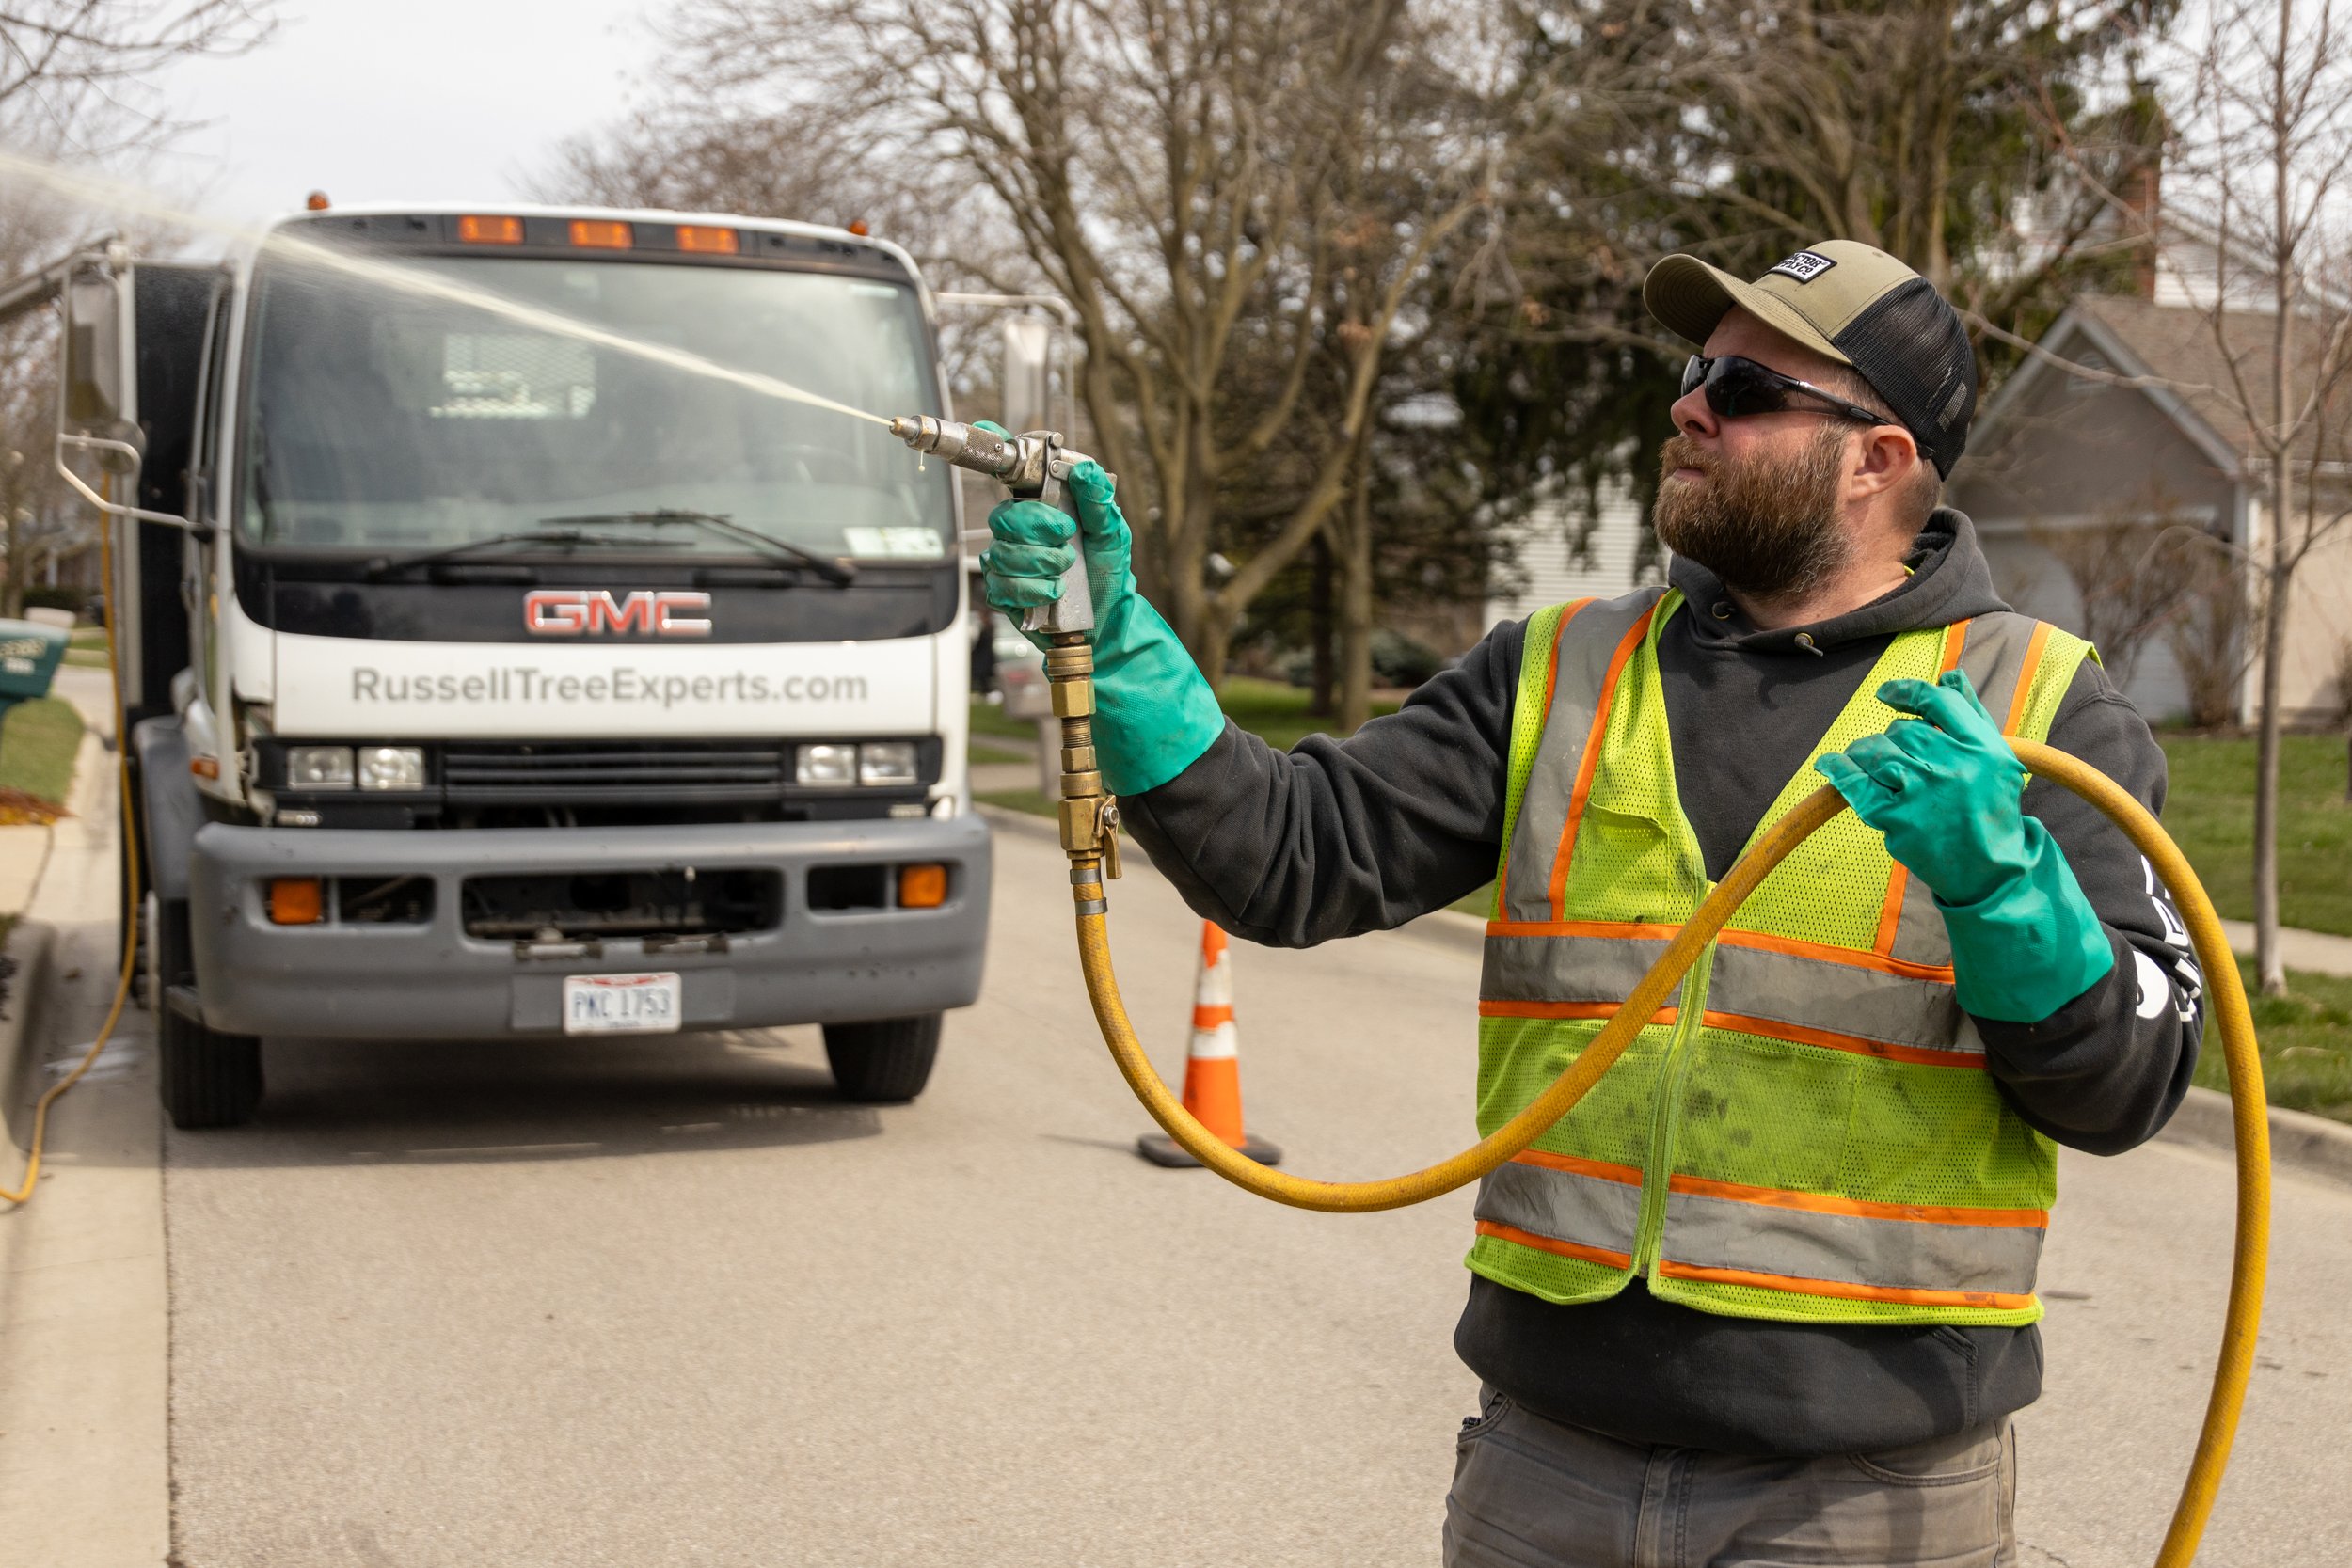
  • Apply pH lowering products to landscape beds with particularly sensitive trees or shrubs (note that this is something that generally needs done annually, as permanently lowering the pH of soil with additives is next to impossible).  

As always, one of our 20+ ISA Certified Arborists® are happy to provide a free tree quote by giving us a call at (614) 895-7000 or by visiting RussellTreeExperts.com/Quote

Additional Tree Preservation Articles!

Walter Reins I Regional Manager, Russell Tree Experts

Walter became an ISA certified arborist in 2003 and has a degree in landscape horticulture. He has 25 years of experience in the tree and landscape industries and originally began working at Russell Tree Experts in 2011. Walter is also the owner/operator of Iwakura Japanese Gardens, a small design/build/maintenance firm specializing in Japanese-style gardens, and also offers responsible tree planting for all landscapes.

Right Tree, Right Place!

By Mitch Lippencott
ISA Certified Arborist® OH-6715A
May 8, 2025


Much of the tree work Russell Tree Experts performs is a direct result of trees and shrubs being planted in inappropriate locations.

When we prune trees to clear a house, roof, or utilities, it's often because a large tree was planted too close, or a smaller tree should have been used. When we shear shrubs to stay below windows or to not encroach on walkways, a smaller, narrower shrub would not have needed maintenance. When we repeat micronutrient fertilizations or fungicides, it's usually to support a tree that doesn't belong in its environment. In short, we make wrong trees fit in wrong spaces.

Newly planted Jane magnolia tree!

The unfortunate fact is most trees and shrubs need a specific set of conditions to thrive - they can't just go anywhere. While figuratively forcing square trees in round holes is good for our business, the savvy gardener will not pick out a tree they 'like' and plant it in a spot where they think it 'will look nice'. Instead, they will study the conditions of their site, then choose the tree that best fits those conditions.

So how can you, the savvy gardener, 'study' your planting site? It's more than looking out the window once. Measuring is a good idea, but still not enough. Instead, examine your area from multiple vantage points, during multiple weather conditions, and multiple times of day.

Does rainwater pool anywhere? Where does the sun hit, and for how long?  Which direction does the wind come from? Where would privacy be preferred? These, and many more questions should be incorporated into the plan.

While this seems cumbersome, the process can be broken down into five important factors: size, water, soil, exposure, and goals.

1) Size

Yes, plants can be pruned to keep them smaller, but most don't want to be! Severe pruning and shearing can cause stress, which in turn, makes plants less capable of defending themselves against diseases and insects; especially near a house or patio. Research plant sizes and don't get greedy - if a plant gets too big for your space, it's out of contention.

2) Water

As the global climate continues to change, Ohio is experiencing warmer, wetter winters and springs. Few plants can tolerate both wet and dry conditions. So if your area is wet most of the year, only water-loving plants should remain in the candidate-pool. Forcing dry-footed plants to wet soils will likely leach away vital nutrients and cause fungal infections. Conversely, heavy drinkers in dry soils will likely need continuous watering, which is time-consuming, expensive, and environmentally careless.

Newly planted prairifire crabapple tree!

3) Soil

Soils vary greatly by location, but in general, central Ohio soils have a heavy clay texture with poor drainage, and a neutral pH (neither acidic, nor alkaline). Undisturbed soils tend be more loamy and acidic. New builds and urban areas tend to be more compacted and alkaline. Plants in soils not matching their needs can suffer from fungal infections, nutrient deficiencies, and instability due to poor root growth.

4) Exposure

While sun and wind are obvious factors, deer-resistance, salt tolerance, limited root space, planned or recent construction, and known insect pests or pathogens are other common exposures in our region.      

5) Goals

I will discuss this more thoroughly in a future article because this is the most fun part - this is where all of your research and observation pay off and your plant starts to work for you! Privacy, traffic noise reduction, food production, bird watching, and a created, desired aesthetic are all examples of good planting goals. Luckily, there is a plant for every size and for every site, so be diligent and find exactly what you need. Scott Zanon's excellent guide Landscaping With Trees in the Midwest lists trees for a variety of situations, including photos, plant sizes, and recommended cultivars.

~

An example of a tag on a tree at a nursery with planting site preferences.

Pairing the correct plant to the correct location may take time and research, but it is the best path to a long-lasting, low-maintenance garden. When planting your next tree, thoroughly observe your site before heading to the nursery, then limit your search to the trees that match those conditions. It is common for most trees and shrubs in nurseries to have a tag with brief planting site preferences on them. This can be very helpful to help match that tree or shrub to your planting site! Just don't get too carried away - we still have a business to run over here! ;) For a free tree quote by one of our 20+ ISA Certified Arborists®, visit RussellTreeExperts.com/Quote or speak with our friendly, local office staff at (614) 895-7000!

Please note: This article was originally published on 4/10/2024 and was revised on 5/8/2025.


ADDITIONAL ARBOR ED™ ARTICLES!

videos on tree planting and watering!

Mitch Lippencott I Regional Manager, Russell Tree Experts

Mitch joined Russell Tree Experts in 2020 and has been in the green industry for over 20+ years with a diverse background ranging from working for a landscape design company, a retail garden center, and two municipalities! Mitch is an alum from The Ohio State University, a licensed pesticide applicator, a qualified tree risk assessor, and an ISA Certified Arborist®. Outside of work, he enjoys traveling, cooking, and gardening.

Fungicides in Full Effect! 

By TJ Nagel
ISA Board Certified Master Arborist® OH-6298B
March 20, 2025

Plant diseases love spring! As temperatures warm and tender new growth emerges, conditions are ideal for fungal pathogens to settle in and take up residence in our favorite trees. It is now when many plants are most susceptible AND treatable for fungal diseases, such as Dothistroma needle cast of Austrian pine, apple scab of flowering crabapple, Rhizosphaera needle cast of blue spruce, rust diseases on hawthorn and pear, and many others. So, rest easy as you see our tree wellness crews all over town arresting pathogenic perpetrators. 

For this article, I want to focus on apple scab because it may be the most aesthetically devastating disease of ornamental trees and it is one of the most common diseases we see daily out in the field. 

What is the disease and what does it do?

Apple scab is caused by the pathogen Venturia inaequalis.  It is a common disease targeting the rose family of plants which includes crabapple, apple, pear, hawthorn, mountain ash, cotoneaster and pyracantha.

Apple scab produces lesions on leaves, flowers, fruit and on young succulent shoots.  When infected areas are numerous, leaves can become curled and distorted and severe infections can lead to complete defoliation of trees and shrubs.

Several years of early leaf loss generally results in poor growth, reduced bloom and increased susceptibility to winter injury and insect predation.

images courtesy of OSU BYGL

How does the disease work?

Apple scab overwinters in fallen diseased leaves and in the soil. Disease development is favored by wet weather and cool temperatures that generally occur in central Ohio in the spring and early summer. Fungal spores are moved from the ground and carried to trees by raindrop splash and wind where they make their way to leaves, flowers, and fruit.  

During wet periods, newly emerging crabapple leaves are extremely susceptible to infection. The longer the leaves remain wet, the more significant the infection can be. 10-20 days after initial infection, new spores are released which infect new leaves. Repeated infections can continue through the summer until environmental conditions become too hot and dry for the pathogen.

What can be done to protect my crabapples?

For most crabapple trees, fungicides must be applied preventatively to successfully manage apple scab. Fungicide sprays should begin when the first green leaves are emerging with additional sprays being applied in roughly two-week intervals.  The number of fungicide applications needed can vary with weather conditions but generally, we recommend three separate applications.

Other cultural practices that can increase the effectiveness of fungicide applications when managing apple scab are:

  1. Raking up and destroying infected fallen leaves to reduce locations where the apple scab pathogen can overwinter

  2. Space crabapple trees generously to increase air circulation around trees

  3. Prune out crossing limbs, vigorous upright sprouts, and suckers to increase airflow and sunlight penetration into the canopy (this can help foliage dry faster after rain or dew)

  4. Avoid overhead irrigation, if plants need watering, apply water directly to the root zone. (Check out this article on best tree watering practices)

Additionally, much breeding and selection work has been performed within the nursery industry to introduce scab-resistant crabapples into the landscape. A short list of some of the most scab-resistant cultivars include:

  1. ‘Coralburst’,

  2. ‘Donald Wyman’

  3. ‘Prairifire’

  4. ‘Purple Prince’

  5. ‘Red Jewel’

  6. ‘Royal Raindrops’

  7. ‘Sugar Tyme.’  

Also, selecting a tree that is not a member of the Rose family would be a guaranteed way to avoid apple scab.

Other common fungal diseases of trees that can be managed using fungicides include Oak Wilt, Dutch Elm Disease, Powdery Mildew, Black Knot, Anthracnose, and Verticillium wilt.  

Remember, application timing is important and most fungal diseases of trees and shrubs are treated preventively. Treatments are far less likely to be effective when applied after the disease(s) has shown up. Tree disease diagnosis and treatment recommendations should be made by a professional arborist. Definitive disease identification may even require sending samples to a plant pathology lab. Russell Tree Experts will provide this service if needed or recommended.

If you have questions about fungal diseases of trees on your property, request a free quote by one of our 20+ ISA Certified Arborists® at (614) 895-7000 or RussellTreeExperts.com/Quote!

Please note: This article was originally published on 3/25/24 and was revised and republished on 3/20/25.

ADDITIONAL TREE PRESERVATION ARTICLES!

TJ Nagel I Scheduling Production Manager, Russell Tree Experts

TJ loves trees. He is an avid gardener and plant collector. TJ graduated from The Ohio State University with a B.S. in Agriculture with a major in Landscape Horticulture and minor in Entomology. TJ is an ISA Board Certified Master Arborist® and is well versed in plant pathology. TJ joined Russell Tree Experts in 2012.

How and When to Stake a Tree

By Walter Reins
ISA Certified Arborist® OH-5113A
June 5, 2025


“Spare the rod, spoil the child” — This is how I like to explain the staking of trees when someone asks about it. Sometimes the quote works, and other times they look at me funny. While it doesn’t do much to explain how to stake a tree, it’s actually a great way to think about why you may or may not want to stake the tree in the first place. Stick with me and I’ll explain.

For starters, I’m not condoning corporal punishment. Maybe you’re familiar with this somewhat outdated expression. To put it in different words, it could mean “Without discipline, a child doesn’t receive the guidance to grow up strong and self-sufficient.” That sounds better, doesn’t it?! Don’t make the mistake of equating the “rod” to the stake, it’s actually the opposite. The rod in this case represents “discipline” or "hard love.” In other words, not staking the tree if you don’t have to. If that doesn’t make sense yet, it will in a couple of paragraphs.

There are a few situations where staking a tree is beneficial or even crucial to its success. But for the majority of newly planted trees, it’s often not necessary. Let’s start with reasons to stake. A tutorial video is available at the end for you to watch and/or follow along to!

When Staking a Tree is a Good Idea

  1. An existing or newly planted tree that is “loose” at its base due to wind or improper handling when planted. Trees with trunks that can move around in the soil, even a little bit, are at a greater risk of further damage, lean, or complete failure (uprooting/falling over). Temporary and sometimes long-term support may be necessary to stabilize the tree for its own health and also safety.

  2. Newly-planted LARGE trees. These trees often have a much larger canopy-to-rootball ratio, and as a result, are at greater risk of shifting or blowing over from high winds after being planted. They also tend to take longer to re-establish a strong, supportive root system.

  3. An existing tree that is exhibiting a lean due to being located in an area with frequent high winds, or a newly planted tree in this same area.

  4. Same as number 3 but substitute high wind with frequently wet soil.

  5. A newly planted tree being placed on a steep grade or significantly sloped terrain. 

    Note: The above list does NOT say to “stake all newly planted trees, period.” Let’s revisit the expression at the top of the page to understand why. 

Why Staking a Tree is Often Not Necessary

Trees respond to their environments in some pretty fascinating ways. One of those is by changing the amount and quality of tissue that is grown in response to physical stressors (wind, gravity, lean, proverbial rods, etc.) We can call this geotropism (change in response to gravity) or thigmomorphogenesis (change in response to any mechanical or environmental stimulus). Jeopardy, here we come! When we plant a new balled and burlapped tree, many of (most of) the tree’s original root system was lost when it was dug out of the ground. In the case of containerized trees that have all of their root system still intact, that root system is concentrated into a very small space (within the container) and isn’t spreading out into the surrounding soil, at least not at first. In either case, research has shown that trees will often develop a stronger root system, in the long run and under normal conditions initially, when left unstaked and made to withstand these forces. The jostling and moving about that occurs with a newly planted tree in light to moderate winds, or the forces of gravity placed on a tree that has to overcome a slightly sloped terrain, will actually stimulate growth of the root system, much the same way our muscles will grow in response to first being stressed in a workout and technically damaged, but then recovering bigger and stronger than before. To further build on that analogy, that same response can be impacted by other factors, just like in people, like overloading (damaging high winds for a tree/a person trying to lift too much in the gym) or lack of proper nutrition (which impedes proper healing and growth, whether you’re a tree or a person). Under normal conditions, a tree will strengthen its root system and eventually be able to withstand greater forces exerted on its ever-growing canopy.

We’ve discussed when a tree should be staked, and when it shouldn’t. Now let’s talk about how to properly stake a tree when it’s deemed necessary. For the purpose of this article, I’m going to refer to two different types of support as “staking”. This includes actual staking, but also guying. When staking a tree, the materials used and where/how they are installed are very important.

The Stake

For smaller applications, wooden stakes or metal posts may be driven into the ground around the tree, just outside of the root ball (1-2’ form the trunk) or up to a few feet away if conditions require it (space restrictions can sometimes dictate stake placement). Stakes can commonly be 5-6’ in length and driven 1-2’ into the soil, depending on the structure of the soil and how easily it may loosen over time. They can be driven into the ground upright or at a slight angle away from the tree to compensate for the slight pulling forces, towards the tree, that they’ll be subjected to. Use a pole/stake pounder or a sledge hammer to drive the stakes into the ground. It might help to employ a second person for this - best to let them hold the stake. Like trying to swat a fly on someone’s head, it is always better to be the one swinging and not the one being swung at! The number of stakes or posts around a tree can vary, depending on the environment and reasons for staking. A tree subjected to frequent winds always coming from the same direction may simply need one stake upwind from the tree to prevent it from leaning or blowing over in the direction of the wind. A tree in the center of an open backyard, subject to wind from all directions, would do better with 3 stakes, placed in a triangle pattern, to support in all directions.

For larger applications, guying a tree with metal ground anchors may be a better option. A guy wire typically runs from a strong anchor point on the tree down to an anchor inserted in the ground. These are augur-type anchors that turn into the ground and provide an attachment point for wire running from the anchor to the tree. Turnbuckles can be used in these situations to achieve the proper tension on the wires if they’re supporting a tree of significant height and/or spread. This application is rarely something to be undertaken by a homeowner, and is usually performed by a landscape company as part of the initial installation of the trees. However, a homeowner may choose to implement this setup if adding support to an existing established tree that is starting to exhibit a lean due to winds, a damaged root system, or saturated ground (Caution: If you have any doubt as to the stability of a substantially sized tree that appears unstable, do not attempt to remedy it yourself. Call a professional tree care company and have the tree assessed immediately). 

The Wire or Strap

There are a number of materials that can be used to connect the tree to the stakes, but no matter what it is, one rule should always be followed - it shouldn’t damage, cut into, or compromise the tree’s branches or bark in any way. Wire remains a cheap and effective material to use, but it’s crucial that it not be directly wrapped around the tree. This will cut into the bark and possibly girdle the stem where it makes contact. Instead, short sections of old garden hose can be cut and used, with the wire running through them, to provide a soft and wide surface to make contact with the trunk of the tree. Straps or rope, if used instead, should be wide enough that they do not cut into the bark. Thin-barked trees such as Red Maples are extremely easy to damage if improperly staked. There are of course many store-bought, application-specific options to choose from that can work wonderfully and provide the right support. Whatever material you are using, the tension between stake and tree does NOT need to be extreme, and should instead be appropriate for the environment. Just enough to prevent excessive movement is usually appropriate. Strong winds or a tree with a larger canopy will call for more tension. Imagine Hippocrates planting this tree and, “First, do no harm.”

Illustration of a recently planted tree with three stakes secured with wire [click to enlarge]


A few more points

There are a few more points worthy of mention. If you determined that a tree needed staking, and after having successfully staked said tree, consider the following: 

  • Check the tree regularly. Every couple of weeks, check to see if the stakes have shifted or loosened in the ground. Check the portion of the support wire or straps that wrap around the tree for any signs of rubbing or wear that could potentially compromise the bark if left as is. Adjustments in tension or placement of support may be necessary.

  • Remove the stakes after a year. Generally, one full year of root growth and settling of the soil is sufficient to anchor the tree in place and provide adequate support, under normal conditions. Leaving stakes for longer than this can adversely affect the tree’s ability to adapt to its environment.

  • Fertilize the tree for the first several growing seasons. A growing tree will use all the nutrition you can throw at it (responsibly, left-over Timbits don’t count!). Fertilizing a new tree encourages root and shoot development by providing essential nutrients often lacking in our urban landscape soils. A properly planted, staked as-needed, and well-fed tree is on its way to providing many years of benefit to the landscape.

HOW-TO GUIDE

Click below to download the step-by-step guide!

A Note about Evergreens…

There’s one more application of staking that you’re perhaps wondering about, and curious why I have mentioned it or discussed how to do it - the staking of evergreens with a diagonal wooden stake strapped against the trunk. I’m mentioning it, but not recommending it. This is a very common way for evergreens to be staked, typically when installed by a landscape company, and a very common way to cause long term problems if forgotten about. In the 25 years I’ve been working in the green industries, I’ve seen countless examples of these stakes having been left in place, forgotten about as the tree put on new growth and concealed the stake and support materials. Out of sight, out of mind. This often leads to a girdling of the main stem (trunk) at the location where the strap or wire was placed, years after planting, and only discovered when the top half of the tree suddenly and “mysteriously” starts to die. If you absolutely must stake a tree in this manner, use natural twine, not any synthetic material to attach the wooden stake to the tree. This will break down after 1-2 years and is much less likely to girdle the main stem of the tree if forgotten about.

Remember, the staking of a tree is unnecessary more often than not. When you or a professional deem it a good idea, proper stake installation with appropriate materials will ensure that the stake benefits the tree and causes no long term harm. Please note that Russell Tree Experts does not offer tree planting or tree staking services, but we are always happy to provide professional advice for all things tree and shrub related! For a free tree work quote by one of our 20+ ISA Certified Arborists®, visit RussellTreeExperts.com/Quote or speak with our friendly, local office at (614) 895-7000!

TUTORIAL VIDEO

Please note: This article was originally published on 3/20/2024 and was revised on 6/5/2025.

ADDITIONAL ARBOR ED™ ARTICLES!

Walter Reins I Regional Manager, Russell Tree Experts

Walter became an ISA Certified Arborist® in 2003 and has a degree in landscape horticulture. He has 25 years of experience in the tree and landscape industries and originally began working at Russell Tree Experts in 2011. Walter is also the owner/operator of Iwakura Japanese Gardens, a small design/build/maintenance firm specializing in Japanese-style gardens, and also offers responsible tree planting for all landscapes.

Tree Work in the Winter?

By Mike McKee
ISA Certified Arborist®
January 2, 2025

[Please note: This article was revised and republished on 1/2/25 from its original publish date of 1/10/24.]

Can we get this work scheduled before winter kicks in?” “Do you complete tree work during the winter?” These are questions that I am often asked as the hibernal or winter soltice has arrived. In many cases, winter is the only time we can complete certain projects. This is due to the fact that many diseases and insects are not active, canopy visibility is increased, impact on landscapes is lessened due to winter’s colder conditions, and wildlife regulations are not in effect. Winter can be the perfect time for tree work.

Nitidulid beetles can transmit oak wilt between March 31st and October 15th, making this an unideal time to prune oak trees. On the flip side, October 15th to March 31st is the preferred time prune oak trees as nitidulid beetles will not be actively feeding in the Midwest, thus reducing the risk of oak wilt.

Winter is an opportune time for tree pruning to minimize the risk of insect and disease issues. For oak trees and elm trees, oak wilt and Dutch elm disease respectively are two devastating diseases that are be transmitted by insects (and root grafts) attracted to fresh pruning cuts. (Learn more here!) These insects are typically not active during the winter months, thus making approximately October 15th to March 31st the preferred time to prune oak and elm trees. If pruning cuts are required outside of this time window due to reasons such as storm damage, we highly recommend painting the cuts to minimize the risk of attracting the insects that can spread these diseases. Other trees that can benefit from winter pruning is the Rosaceae family which includes apples, pears, plums, and other fruit-bearing trees. The pathogens that infect many of these trees with diseases such as fire blight and black knot are typically not active during the winter months. Black knot is also much easier to see and prune out when the leaves are not present on our plum trees. Sanitation between cuts and proper disposal of these branches is imperative to slow down the spread of this disease.

Another reason for performing tree work during the winter months is the minimization of turf impact. Winter typically provides an absence of perennial and annual plants that are often planted under trees. Clients also tend to store their yard art, furniture, and other items that could be damaged during pruning and removal operations. This allows for our crews to be more efficient as less time is spent preparing the drop zone and moving items to a safe location prior to beginning any tree work. Thirdly, the winter months tend to be colder which provides a harder, sturdier ground that is more resilient to damage from limbs or equipment. As always, we do place mats on the ground if turf impact is a concern regardless of the time of year. Therefore, winter pruning becomes much more productive since there are fewer items that could be damaged otherwise.

Certain job sites such as golf courses, public parks, and street tree pruning, just to name a few, are performed during the winter months as there tends to be less pedestrians, allowing for better focus, less interference, minimized risk, and overall a more efficient and safe work zone.

With the absence of leaves on the trees, it is much easier for the trained eye to identify structural issues. Some structural issues may require a cable or even brace rods to secure your favorite tree in your landscape. Winter is also a great time to observe decay, fungi, or other pathogens that may not be visible during the summer when leaves are abundant and present. It is also the best time to observe cavities throughout the tree that may not be noticed while leaves are present. Dead, diseased, and broken branches are also much more visible when the leaves are not present in the winter months. Our arborists are trained to be able to identify the difference between dead and live branches even during the winter months. This time also allows the arborist to make quick decisions on improving the structure of the tree while pruning in the most efficient time of the year.

One example of projects that must be completed during the winter is anything that falls under federal bat tree regulations. This typically includes public property projects where large trees need to be removed or the removal of any tree that could be a nesting site for bats. These regulations are intended to protect the Indiana Bat and the Northern Long-eared Bat, which are both currently endangered species. The importance of bats in our ecosystem is a story in itself. Bats typically overwinter in caves but move out to their nesting sites as early as April, therefore removal of possible nesting sites is regulated from March 31 through October 1. This is the main reason that the majority of our clearing operations and trail creation projects are completed during the winter months. To learn more about endangered bats in Ohio, read here!

As you can see, there are many beneficial reasons and scenarios to have tree work performed in the winter! Every day can be a good day for tree care. Check out the video below to learn more. To request a free tree work quote from one of our 20+ ISA Certified Arborists®, visit RussellTreeExperts.com/Quote or give us a call at (614) 895-7000!


ADDITIONAL ARBOR ED ARTICLES!

Mike McKee | Regional Manager, Russell Tree Experts

Mike graduated from Hocking College in 1983 with a degree in Natural Resources specializing in urban tree care. He has been a certified arborist since 1991. Mike started his career in the private industry in 1985 before becoming a municipal arborist in 1989. He retired after serving thirty years before joining us at Russell Tree Experts in Sept. of 2018. His love of trees has never waned since trying to climb up the ridges of the massive Cottonwood tree in front of his childhood home.

The Oak Wilt Defense

The fall season is approaching, and cooler weather is hopefully just right around the corner. With changing temperatures, all our trees are going to be going through a change as well. As we enter the dormant season, we will be gifted with…

Anatomical Upgrades for Your Trees!

When you think of anatomy, what comes to mind? I think of humans specifically, and learning about the wonderful bone and organ systems in our body in middle school science class. You may think about the anatomy of various animals and how there is an abundance of variety depending on where you are in the world, but how often do we consider the anatomy of trees?

Surely trees are just trees, right? They grow without us even considering how or why they may grow in the ways that they do. We may be blissfully unaware of their anatomy or structure until we are confronted by the reality of a winter ice storm or a summer thunderstorm. Oftentimes, we may find trees with less-than-desirable structure having taken damage after these events, or worse, having caused property damage along with their own demise!

Two examples of trees with codominant stems

You may be asking yourself, what does poor tree anatomy look like? The answer to that question deserves its own article, however a majority of tree structural problems can be narrowed down to codominance, and that is what I want to address in this article. Codominance is when a tree has two or more similarly-sized trunks emerging from the same location and forming a distinct “V” shaped union. There are varying reasons as to why a tree may be codominant, and some species have natural habits that lend themselves to becoming codominant. 

Visual representation of codominance by Jacob Nau

To give you a visual representation of codominance, bring your elbows together in front of your chest, with your palms facing you. Now, spread your wrists apart, keeping your elbows together to form a distinctive V shape. Opening up your fingers you can picture the crown of a tree. Seems like an awkward, weak position to be in, right? Now, imagine adding the weight of tree branches, leaves, rain and 15-50 mph wind gusts, etc. (trees can go through a lot!), while you strain to keep your elbows together, and you can begin to imagine why a codominant union (V-shaped union) in a tree is not anatomically advantageous.

So what can be done to fix, or even prevent, codominant structure in a tree? The answer to this question largely depends on the age of the tree. If your tree is young and generally under the age of approximately 20 years, then a structural pruning plan can be performed to help guide the tree out of its codominance over the next 5-10 years. 

However, if your tree is large and mature, there are a number of services that can be used to help support your tree's anatomy. Those services include:

End-Weight Reductions

  • Reduce the length of long, lateral branches in the tree’s crown to reduce the weight and levering effect on the codominant union below. Typically performed before or with a cabling support system.

Jacob Nau performing an end-weight reduction on a tree.

Cabling Support System

  • Install a single, or multiple, static steel cable(s), or dynamic rope cable(s) in the tree’s crown to support the codominant union below.

A static cabling system in a Hackberry tree in Clintonville, Ohio.

Through-Brace Support System

  • Install a system of steel threaded rods into the codominant union to strengthen that area of the trunk. This is usually performed in-tandem with a cabling support system.

Top Left: Final result of a brace rod installation. Top Right: Close-up of a singular, installed brace rod. Bottom Left: Side profile of two installed brace rods. Bottom Right: A brace rod about to be inserted.

Propping Support System

  • Install a single, or multiple, semi-permanent wood prop(s) to support a lower, large lateral limb to ease the strain on a codominant union. This is a more unique way to support the tree's anatomy, specifically for low, long, and lateral limbs that are difficult to support with a cabling system.

A tree prop supporting a limb from the Angel Oak tree in South Carolina.

All of the services listed above, including the young-tree structural pruning, are services we perform at Russell Tree Experts. I highly encourage you to look out your window and consider your tree's anatomy! Can they be supported? Is it time for an anatomical upgrade? If so, give our local office a call at (614) 895-7000 and we will happily connect you with one of our Regional Managers to assist you in determining the best course of action for your trees!

Sincerely,

Jacob Nau I Training and Development Manager, Russell Tree Experts

Jacob is an ISA certified arborist and joined RTE in 2018. He has been involved in tree care for over 10 years. He enjoys climbing trees both recreationally and professionally and in his free time, he loves spending time with his family.

3 Knots for Your Backyard!

What uses come to mind when you think of knot-tying? Putting up a rope swing, securing a load in a truck bed, or installing a makeshift fence around the garden perhaps?

Rope handling and knot-tying may be overlooked by many today as an antiquated skill lost to history. When questioned, most people may only think about knot-tying and rope handling as a badge that is to be awarded to young Boy or Girl Scouts. 

Or, if you are an avid history aficionado like myself, knot-tying may even conjure up images in your mind of the seafaring sixteenth and seventeenth centuries. The age of sail was one of the pinnacles of human technology with navigating the oceans on massive wooden ships. Skilled crews used miles of rigging consisting of ropes and knots to help steer the large vessel.

The rigging for a British ship-of-the-line.

All of these scenarios are just a brief glimpse into how interwoven human history is with knot-tying and the use of rope. Some historians even believe that knot-tying and rope handling is a technology older than the wheel. It is a relationship as old as recorded history itself! 

In a world full of technological advancements and mechanical wonders, you won’t be able to find a replacement for good knot know-how and rope handling. Just think of some of the industries we wouldn’t have without them: rope access, technical rescue, arboriculture, commercial trucking and shipping, commercial fishing, performing arts, the list goes on and on!

Let’s take a look at three knots that you may find useful in your own backyard or around the house. I will let the videos speak for themselves on how to tie the knot, but I will include some common uses down below!

Figure Eight Stopper Knot

The figure eight stopper knot is a relatively easy knot to tie and functions as the name implies. Tying this knot on the end of a rope may prevent it from slipping out of your hand or falling out of your reach. The figure eight knot is the building block of a whole range of more knots relating to or requiring the figure eight knot!

Tying a number of these knots about a foot apart from each other on an anchored rope will give your kids a simple way to climb a rope. Using a short section of 2x6 wood with two equally spaced holes, two equally-long pieces of rope, and two figure eight stopper knots, you can have yourself an affordable rope swing!

But how do we anchor our rope swing?

Bowline Knot

This particular knot forms a secured loop at the end of a rope that can be used to attach the rope to a suitable anchor. Commonly referred to as the “king of knots”, this knot is also the building block of a whole family of bowline-related knots. It may be more difficult to tie than our figure eight stopper knot, but this is a very appropriate knot to use for anchoring our rope swing as well as anchoring a rope to a truck bed or trailer when you are trying to secure a load,

Chain Sinnet (Daisy Chain)

This knot is used primarily for shortening or storing a longer rope and having quick access to all of its length, without the hassle of coiling or tangled, unwanted knots! I use this knot extensively to store longer extension cords in my garage so that I can plug them in and then transport them to where I need them on my property without having to deal with a tangled, jumbled up mess.

BONUS Knot: Slipknot

If you have mastered the chain sinnet, then you may have learned a fourth knot without even realizing it! The chain sinnet is started by tying a Slipknot. We have our arborists first learn this knot when they begin working at Russell Tree Experts. It is an easy, quick knot to learn and allows you to add a loop anywhere along the rope. To retain the loop in the rope, be sure to clip a carabiner or some sort of equipment to the loop. We use this knot daily to send equipment into a tree’s crown. You may find a use for it such as when adjusting the height of a hammock!

I hope this article has inspired you to look into how tying knots can improve your day-to-day activities around the house. Cheers to the craft of knot-tying!

Sincerely,

Jacob Nau I Training and Development Manager, Russell Tree Experts

Jacob joined RTE in 2015 and has been involved in tree care for over 10 years. He enjoys climbing trees recreationally (in addition to professionally) and spending lots of time with his family.

Meet Mitch Lippencott!

Dear Reader,

I’m proud and excited to announce the newest member of our regional management team, Mitch Lippencott. Mitch is someone I always enjoy working and sharing tree talk with. If you are fortunate enough to reside in the Grandview, Franklinton, Hilliard, Dublin or Plain City/Marysville areas, Mitch will be your new Russell Tree Experts representative!

Mitch has more than 20 years experience in the green industry. His background is diverse - before Russell Tree Experts, Mitch worked for a landscape design company, a retail garden center, and performed municipal tree work for two different communities. His experience gives him a wide spectrum of knowledge in horticulture and tree care.

Mitch joined Russell Tree Experts in 2020 as a ground worker and progressed quickly to plant health care and production crew leader before joining our management team. Mitch is an Ohio State graduate, a licensed pesticide applicator, a qualified tree risk assessor, and an ISA Certified Arborist®. He is preparing to take the ISA Board Certified Master Arborist® exam this winter. We wish him well in this new position and all endeavors!

Sincerely,

TJ Nagel | Scheduling Production Manager, Russell Tree Experts

ISA Board Certified Master Arborist® OH-6298A // Graduated from The Ohio State University in 2012, Earned B.S. in Agriculture with a major in Landscape Horticulture and minor in Entomology // Tree Risk Assessment Qualified (TRAQ) // Russell Tree Experts Arborist Since 2010

Magnolia Scale: They're Back!

By Mike McKee
ISA Certified Arborist®
June 20, 2024​

Hello! We have decided to revisit the topic of magnolia scale and add more information to this previously published article as we are in the middle of a larger magnolia scale infestation compared to last year (2023).

- - - - - - - - - - - - - - - - - - - - - - - - - - - - - -

Please note: This article was originally published on 8/9/2023 and was revised and republished on 6/20/2024.

Is your magnolia tree turning black? Is it attracting ants, flies, bees and wasps? Is there a sticky substance covering the leaves and everything under the plant? If you look closely, you will also see white blotches on the twigs throughout the tree.

This is an invasion of magnolia scale like we have not seen in several years. They happen to thrive in warm summers with abundant moisture. The population is building and is very apparent this year.

The insect overwinters on twigs and is inconspicuous to the untrained eye until it starts feeding and producing honeydew. Honeydew is the very sweet, sticky substance secreted by the insect that in turn coats the leaves and anything under the plant. This is what attracts other insects to the plant. Eventually the insect covers itself with a waxy coating that protects it while feeding. These are the white blotches we are now seeing on the plants starting early summer through August.

Nymphs emerging from a recently plucked adult Magnolia Scale

The juvenile stage of magnolia scale emerges from these waxy coatings (the adults) in mid to late August through September as crawlers. This is when scale are most vulnerable to insecticides and we attempt to control their population. We typically recommend 2 to 3 topical insecticide sprays during this period spaced a couple weeks apart for the best control of the insect due to the extended emergence. During seasons with larger infestations, it is unlikely that insecticide sprays will completely eliminate this insect. The overall goal of plant healthcare is to keep the population at a threshold that minimizes damage and maintains aesthetics of the host tree.

If the tree’s owner is concerned about the population of magnolia scale before the appropriate window for insecticide applications is open, there are a few DIY options that can be done. First, the insects can be scrubbed off from branches and leaves in June and July. This is when the adults are visible before the hatch begins. You could also prune out heavily infested Interior branches to help reduce numbers. Be sure to completely dispose of any pruned branches as the insect will still hatch. Spraying the trees with a medium pressure garden hose can also eliminate some insects as well as reduce the honeydew on the plants.


The insects feed by sucking sap out of the tree. If left untreated the scale population can grow to levels that will cause decline and eventual death in your tree.

Another issue with Magnolia scale is the occurrence of sooty mold which is a byproduct of the honeydew produced by the scale. It is a black fungal growth which is what most people notice first. Although this generally does not harm the tree, it is very unsightly.

In closing, if you have a magnolia in the landscape, give us a call and we will dispatch a certified arborist to your property to come out and complete an evaluation of the tree and make recommendations for the best management strategy. Timing is everything.

Sincerely,

Mike McKee | Regional Manager, Russell Tree Experts

Mike graduated from Hocking College in 1983 with a degree in Natural Resources specializing in urban tree care. He has been a certified arborist since 1991. Mike started his career in the private industry in 1985 before becoming a municipal arborist in 1989. He retired after serving thirty years before joining us at Russell Tree Experts in Sept. of 2018. His love of trees has never waned since trying to climb up the ridges of the massive Cottonwood tree in front of his childhood home.

Plant Native – But why?

We all hear that incorporating more native species into the landscape is beneficial; but do we know why? Native plants in the landscape are important because all of the plants’ neighbors, including animals and insects, have all evolved together to create a cozy, co-existing ecosystem. Pollinators also thrive in native plant landscapes because they have evolved to pollinate those plants, and they are a good food source and shelter for our pollinator friends. Native plants also require less maintenance than non-native species and therefore have easier upkeep in your gardens. Even if you are unwilling to go 100% native, it’s generally good practice to try and aim for 70% native species. And be sure to check with your local arborists and horticulturists to verify if a particular species is not invasive if you choose a non-native plant.

Did you know that a landscaped area can have layers? The uppermost layer is referred to as the canopy; this encompasses all of your large woody plants such as the Shagbark Hickory and the Northern Red Oak. After the canopy, you have the understory; this includes slightly smaller woody plants, often providing delicious food for consumption to wildlife, such as the Pawpaw and Eastern Redbud. Then you get to the shrub layer which is even smaller woody plants such as Sweetshrub, Oakleaf Hydrangea, and Spicebush. They are also a good source of food for native species of wildlife.

At the very bottom layer of the landscape, you get into all of the herbaceous perennials; these include ferns, grasses, spring ephemerals, and other perennials with various blooming times throughout the growing season. Listed are a few of my favorites:

  • Virginia Bluebells (early bloom, shade, spring ephemeral)

  • Solomon’s Seal (spring bloom, shade, perennial)

  • Wild Blue Phlox (spring bloom, partial shade, perennial)

  • Joe Pye Weed (summer bloom, full sun, perennial)

  • Cardinal Flower (summer bloom, full sun, perennial)

  • New England Aster (fall bloom, full sun, perennial)

  • Northern Maiden Hair Fern (shade, perennial/fern)

  • Little Bluestem (full sun, perennial/grass)

This year I had the opportunity to start my native garden from scratch! So hopefully I’ll have an update for you all next year when everything is beautifully in bloom. Until then, plant as many native species as you can so we can help our pollinator friends thrive and provide food and homes to other wildlife dependent on the natural ecosystem in your own yard.


Lindsey Rice | Office Manager, Russell Tree Experts

Lindsey joined Russell Tree Experts in 2015 with a B.S. in Agribusiness and a minor in Horticulture from The Ohio State University. Growing up in Northwest Ohio, she participated in various sports, band, and FFA which ultimately inspired her love for the tree industry. She loves to spend her free time outdoors with her husband and daughters.

Bells in the Park

Tree climbing competitions have been around since the 1970’s and are currently orchestrated by the International Society of Arboriculture. This is the same professional group who many in the industry receive their Certified Arborist credential from each chapter within the ISA, both state-side and international, in turn have their own chapter-wide tree climbing competitions each year.

English Ivy: the Silent, Selfish Assassin

By Krista Harris
ISA Certified Arborist® OH-6699A
February 20, 2025

English ivy climbing the trunks of your trees can look so natural and attractive in the landscape.  It is a lovely and effortless groundcover with glossy, emerald, evergreen foliage. However, English ivy is also a non-native species in the US and will clamber defiantly into your tree’s canopy, threatening the tree’s ultimate survival. You may be tempted, as I have been, to allow this beautiful European invader to engulf the scaffold limbs of your defenseless trees, but please do not be misled by this aggressive charmer. English ivy seeks to deprive your trees of water and nutrients at first, and over time, envelop the tree’s crown and hinder its ability to create food for itself through photosynthesis. The tree is ultimately outcompeted by the vine and slowly declines, while the ivy thrives on its new framework, acquiring all the water, soil nutrients and sunlight for itself.

English ivy can be a very heavy burden for your tree to bear. It can ascend 100’ and achieve 12” diameter stems. The sheer weight can weaken limb attachments, causing failure of limbs or entire trees, especially in wind or snow events. Vigorous vines can block natural air and sun penetration to the bark and encourage pest and disease development. When bark is thickly concealed by vines, tree decay and diseases are also very difficult to observe and can go unnoticed.

If you have unwittingly endangered your trees by allowing English ivy to establish itself on their bark, take action now to exterminate this clingy aggressor. The vines should be cut at the base of the tree, removing a 2-3” section from each stem. Repeat this process at 4-5’ up the trunk.  Carefully spraying or painting the section still attached to the roots with herbicide will help ensure the ivy does not regrow. Maintaining all English ivy 3-4’ away from the trunk is also a great habit. Do not attempt to remove the severed vines from the tree’s bark.  This very grippy greenery is firmly attached using modified stem roots called “hold fasts” and removing the vine will remove the tree bark as well. The remaining, now dead, vines can be safely removed without causing damage to the bark in 2-3 years, if you find them unsightly.

Process to abate English ivy from a tree

4 weeks after Russell Tree Experts abated the English ivy on a large American sycamore specimen

For a free tree quote from one of our 20+ ISA Certified Arborists®, please give our local office staff a call at (614) 895-7000 or visit RussellTreeExperts.com/Quote! One of our skilled arborists can tackle this important, tree life-saving task or any other tree care needs! Your trees will express their gratitude with many more years of healthy, unrestricted growth!

[Please note: This article was revised and republished on 2/20/25 from its original publish date of 3/10/23]


ADDITIONAL ARBOR ED ARTICLES!

Krista Harris | Journeyperson, Russell Tree Experts

Krista grew up in the central Ohio area and became an ISA Certified Arborist® in 2017. She graduated from The Ohio State University with a Bachelor of Science in Crop Science and a minor in Plant Pathology in 2000 and has been in the green industry ever since. Her favorite trees are the American sycamore, American beech, and giant sequoia. [BS in Horticulture Crop Science, The Ohio State University / ISA Certified Arborist® OH-6699A / ODA Comm. Pesticide Lic. #148078]

Why is Tree Pruning Important?

By Enrique Arayata
ISA Certified Arborist® OH-7252A
January 12, 2023


Tree care comes in many forms: insect and disease management, pruning, fertilization, cabling, lightning protection, and removals. Today I would like to talk about the importance of tree pruning and the various reasons why a tree may need to be pruned.

ISA Certified Arborist Andy Bartram making a tree pruning cut!

Tree pruning is the selective removal of branches from a tree with the general goal of improving the overall quality of the tree, whether it be for safety, health, structure, fruit and flower production, aesthetic appearance, and more. Some may view pruning as unnecessary as there are hundreds and thousands of beautiful, healthy, and unpruned trees out in the world that have grown successfully without human intervention. Although this is true, there are also many trees out in nature that are dead, dying, or unpleasant to look at. A native volunteer tree out in nature grew naturally from one of hundreds of seeds and competed with all the surrounding trees for resources. They are tough and independent and do not need any human assistance. However, the same cannot be said for a single tree or sapling planted by a human in a site where that tree might not have ever grown there naturally. These human planted trees often need extra care like watering, mulching, and fertilization in order for them to be strong and healthy.

Planting a tree sapling for our TREE FOR A TREE® program.

“Pruning” differs from “trimming” as pruning prioritizes a tree’s health and structure. Only the necessary limbs are removed and aesthetic appearance is a byproduct. With “trimming”, plants, shrubs, hedges, and trees are trimmed with the goal of improving their appearance. Depending on the individual trimmer, health and structure may be sacrificed in order to attain a certain look.

Andrew Schneider making a tree pruning cut!

A tree may need to be immediately pruned if it poses a safety concern. If there is a large or dead limb overhanging something significant such as a house, car, sidewalk, or valuable lawn decoration, that limb may need to be removed as it could be hazardous during a storm.

ISA Certified Arborist Mac McGuire pruning a dead limb overhanging a busy road.

If there are any limbs with clearance issues, it may also need to be removed. This applies to limbs that are touching any house siding or utility lines or any low hanging limbs that impede lawn activities or pulling into a driveway.

Another important aspect of tree pruning is for health and structural reasons. A tree’s overall health and structure will increase by removing any dead, dying, damaged, disease-infected, codominant, or crossing limbs. Removal of these limbs promotes new growth and increased flower and fruit production. When a tree is pruned, nearby trees, shrubs, plants, and grass can also benefit by receiving more resources like sun, water, and air. These additional resources can improve aesthetic appearance and promote new growth. If the pruned tree was also close to a window you may even have a better view from inside your house or more sunlight coming in during the day!

Unruly lilac in need of pruning.

As mentioned earlier, tree pruning can improve aesthetic appearance. Pruning does not focus on looks but removing dead, dying, broken, weak in structure, or clearance-issue limbs generally makes trees look neater, cleaner, and overall better. The pruned tree may not have a specific shape desired by an individual, but it will be healthier and safer. Another small factor to potentially consider is property value. An unmaintained tree can look unpleasant, unruly, and unsafe which can hurt the value of a property. When it comes time to sell, having a beautiful, healthy, and pruned tree can potentially increase property value, making it an easy worthwhile investment!

So now that you have read about the various reasons for tree pruning, you may be wondering when a tree should be pruned, how often should a tree be pruned, or how much of a tree should be pruned? The short answer is that it depends. Some trees are best pruned during a specific season and some may have no preference. For example, oak trees are not recommended for pruning from roughly April to October due to the risk of oak wilt. A sugar maple can generally be pruned any time of the year, but it is recommended that you prune a sugar maple during the summer rather than winter to avoid sap leakage from pruning wounds, which does not pose any significant problem to the tree’s health. 

Multiple water sprouts shooting straight up from a larger branch due to stress.

In terms of frequency, younger trees may need to be pruned every two to three years while more mature trees may need to be pruned every three to five years. The specific timing can fluctuate and vary based on planting site, climate conditions, potential insect and disease issues, and more. In terms of how much to prune, there should be no specific goal. Only remove the necessary branches. However, a general guideline is that no more than 25% of a canopy should be removed at one time as the tree may “go into shock” and grow watersprouts in an attempt to replace the stored energy lost from the removed branches.

If you decide to have your tree pruned, two incorrect methods of pruning that Russell Tree Experts and I strongly advise against are tree topping and lion’s tailing. Tree topping is pruning to create a rounded canopy that often requires cutting through a stem at an improper location. Lion’s tailing is the removal of many, if not all, secondary or tertiary branches from the interior of the crown, leaving most of the foliage at the edge or top of a canopy. Although the look of both of these tree pruning methods may be desired by a specific individual, they do not improve the overall health or quality of a tree and can actually shorten its lifespan and promote decay.

Examples of improper tree pruning: Tree topping (left) and lion’s tailing (right)

Tree pruning is a very large and vast subject with much to cover. Someone could write a novel about tree pruning and still not cover every single detail. The goal of this article was to discuss the many reasons for tree pruning, not necessarily to teach someone how to become a tree pruning expert. However, we do have an article and a video on the 3 cut method that will be linked down below for anyone interested in learning how to safely and effectively remove a limb! A few additional tree pruning-related articles will be linked down below as well.

Interested in Pruning Your Own Tree?

Enrique Arayata I Media Production Manager, Russell Tree Experts

Enrique is an ISA Certified Arborist® and FAA Certified Remote Pilot. In his free time, he enjoys working out, hanging out with his family and girlfriend, video production, photography, cars, technology, and cooking. Enrique has a BA in moving image production with a double minor in film studies and studio art specializing in photography from The Ohio State University, and an AA in web graphic design from DeVry University. His favorite tree is the Kwanzan cherry tree.

Are Hickory nuts better than Pecans?

Are Hickory nuts better than Pecans? A Journey by T.J. Nagel

We have six native species of Hickory in Ohio: Bitternut hickory (Carya cordiformis), Pignut hickory (Carya glabra), Red hickory (Carya ovalis), Mockernut hickory (Carya tomentosa), Shagbark hickory (Carya ovata) and Shellbark hickory (Carya lacinosa). Some folks believe that Pecan (Carya illinoinensis), another hickory, is also native to the Southwestern portions of Ohio. Others maintain that it has only naturalized. I personally am indifferent.

In any case, I’ve recently become interested in learning more about the subtle differences between these seven species. I want to be able to confidently identify them by their habit, bark, nuts, and buds, regardless of the season. As I have researched and explored the woods for these different trees I have decided that Shellbark Hickory is my favorite. I could elaborate further but the goal of this article is to tell you about Shellbark Hickory pie so I’m going to skip ahead.

Shellbark Hickory (sometimes called Kingnut Hickory) is a slow-growing and long-lived shade tree reaching heights of 70 - 80’ at maturity with a spread of about 40’. In Ohio, I find it naturally in bottomlands and floodplains although I’ve observed it performing well in parks and landscapes as well. It has large, 1 - 2’ long pinnately compound leaves that are dark yellow-green turning a nice golden yellow color in the Fall. The bark is shaggy, almost identical to the bark of its relative, Shagbark hickory, and the two species can be quite difficult to distinguish from one another. The two trees are so similar that I’ve noticed many folks will erroneously refer to their Shellbark Hickory as a Shagbark. I also realized recently that many of the “Shagbark hickory” I have grown up with are in fact Shellbark.

In a nutshell (pun intended), there are 3 subtle differences I use now to be able to tell the Shellbark and Shagbark hickory apart:

  1. A Shellbark hickory leaf generally has 7 leaflets compared to the 5 leaflets of a Shagbark hickory leaf.

  2. The terminal bud of Shellbark hickory is significantly larger than that of Shagbark Hickory

  3. The nut of Shellbark hickory is also much larger than Shagbark, measuring 2 ½ - 3” in diameter compared to the 1 ½ inch diameter of Shagbark.

A few more interesting facts: Shellbark hickory is also a great tree for wildlife. The nuts are sweet and edible and are relished by deer, fox, rabbit, squirrel, wild turkey, ducks, and bears. Interesting side note: my dogs also love Shellbark hickory nuts. The flowers, although inconspicuous, provide nutrition for bees in the Spring as well. And historically, early settlers used Shellbark hickory nuts as a source of food as well as the tree itself for making furniture, tool handles, lumber, and fuelwood. This reminded me of the history of the American chestnut and really got me excited.

My girls this summer at the site of my best producing Shellbark hickory - note all the nuts ready for harvest in the driveway.

As I read more and spoke with more people about the merits of Shellbark hickory, I found that a lot of folks preferred this nut over the flavor of pecan. Some even claimed that Shellbark hickory was a far superior nut and that Pecan had become famous only because it has a thinner husk and thinner shell and is an easier nut to clean. Now, this is a bold statement. Folks in Texas might even consider these fighting words. I knew that I needed to form my own opinion. I decided I would make Shellbark Hickory pie for Thanksgiving.

This pie-making project started with identifying a stand of Shellbark hickory in the woods near my office in Westerville. Between mid-August and mid-October, my father, dogs and I made several weekend trips to this stand of trees to collect Shellbark hickory nuts. Most of the nuts we collected from the ground but some we picked from the trees with a pole pruner. Over the course of 2 months, we collected approximately 20 gallons of Shellbark hickory nuts. This coincided with paw paw season (Asimina triloba) which made our walks in the woods even more rewarding (next year I’m making paw paw hickory pie).

By mid-October Dad and I knew we would need to start cleaning our bounty if we were to have pies by Thanksgiving. The art of cleaning Hickory nuts by hand is a slow art and rushing will only ensure that you eat lots of shells.

Our Hickory nut cleaning process was simple - Dad used a screwdriver and a hammer to remove the hickory nuts from the husk and I used the Cadillac of nutcrackers I purchased on Amazon to crack the shells. From here we used pliers, vice grips, and even dental tools to get the kernel (the edible part of the nut) out of the grooves and different crevices of the shell. We spent 3 separate weekends perfecting our nut-cracking skills and in hindsight, I wish I had kept time so I could compare our speed to next year. The process was at least as long as three OSU games and the entire Cat Stevens discography.

Approximately one-third of our hickory nut kernels were either dried up, infested with weevil larvae, or rotten. These went to the compost. Most of the remaining kernels went into a couple of mason jars and were placed in the freezer until we had time to bake. Anything questionable was set aside for the squirrels. From our original 20 gallons of nuts, we scored about 6 cups of edible Shellbark hickory kernels. This would be enough to make 4 pies.

The following is my recipe for Shellbark hickory pie:

On Thanksgiving day I arrived at my inlaw’s table with two freshly baked Shellbark Hickory pies. I was delighted to see that my sister-in-law had also brought a homemade Pecan pie. I realized that this was the moment I had been waiting for. Today all my questions would be answered. After two helpings of the usual thanksgiving fixings, I made my way to the dessert table and cut myself two equal-sized pieces of pie. One Shellbark Hickory and one Pecan. I covered both with equal amounts of whipping cream and returned to the table. First I had a bite of Pecan. I chewed it slowly and swallowed and then took a sip of water to cleanse my palate. Then I had a bite of Shellbark Hickory. Rinse and repeat a dozen or so times and here are my final thoughts.

  1. I like pie

  2. My sister-in-law’s Pecan pie was prettier than my Shellbark hickory pie with all of the perfectly formed pecans laid out on the surface in a perfect basket weave configuration.

  3. Despite our best efforts, the Shellbark Hickory pie had more shell pieces in it than the Pecan pie.

  4. The flavor of the Shellbark Hickory Pie and Pecan pie was very similar - so much so that most folks would probably not be able to distinguish one from the other if they were not eating them simultaneously.

  5. I think I preferred the flavor of the Shellbark hickory pie but I could be biased after everything we've been through together.

  6. Pecan pie was a delicious and worthy opponent and I mean no disrespect to my sister-in-law or her pie-making abilities.

  7. In all seriousness, I think what really makes Shellbark Hickory superior to Pecan for me is its local proximity (to me), having a knowledge of and a relationship with the trees that the nuts have come from, and all of the memories of my father and I together picking them.

I am in the early stages of my Hickory infatuation and still have lots to learn. If any of you possess any hickory stories, fun facts, or recipes please share them with all of us - you can do so at the bottom of this article. I have one last interesting Hickory side note to share:

I randomly stopped at Watts Restaurant in Utica, OH this Fall while working in the area. If you haven’t had the pleasure of dining there, I encourage you to do so. Watts restaurant is a staple in the Utica community. It has been around for over a hundred years and survived two pandemics so they must be doing something right. They make a number of tasty and authentic family-style country recipes and serve a number of home-baked goods including Hickory nut pie. I bought a Hickory nut pie from them to take home and decided within a couple of bites that it was better than mine. I decided I would go back to Watts Restaurant and ask more questions. I wanted to know primarily (1) what species of hickory they were using in their pie and (2) where were they sourcing their hickory nuts. Might they be from local trees or were they buying them from a faraway land?

When I returned to Watts recently to ask about their Hickory nut pie I discovered that most of their baked goods are actually brought in from Hershberger’s Bake Shop, an Amish wholesale bakery in Danville, OH. For the record, Watts Restaurant does make all of its own cream pies in-house and they are equally delicious! But I still had unanswered questions so I decided to drive to Danville and make a visit to Hershberger’s Bake Shop.

I arrived at Hershberger’s Bake Shop on a cold afternoon this week but received a warm welcome from Naomi Hershberger and two of her colleagues who definitely were not expecting to see a Russell Tree Experts truck come down their driveway. I shared with them my love of Hickory trees and affinity for Hickory pie and that I had happened across their Hickory pie in Utica and that it was better than mine. They were patient with me and answered all of my questions and this is what I learned:

  1. The Hershberger’s are far better at baking delicious pies than tree identification and had no idea what species of hickory nut they were using in their Hickory nut pie (after careful dissection I believe it is a mix of Shagbark and Shellbark).

  2. The hickory nuts are collected locally from native trees in Knox and Holmes counties, Ohio.

  3. They make Hickory nut pie most of the year.

  4. They deliver new pies to Watts Restaurant in Utica every Tuesday and Friday but only a couple of Hickory nut pies each time.

So if you want to try Hickory pie but don’t have time to collect and clean the nuts make a trip this Winter to Watts Restaurant, 77 S. Main St. Utica, OH 43080. I recommend the chicken and noodles over mashed potatoes and a Hickory nut pie to go.

TJ Nagel | Scheduling Production Manager, Russell Tree Experts

ISA Board Certified Master Arborist® OH-6298A // Graduated from The Ohio State University in 2012, Earned B.S. in Agriculture with a major in Landscape Horticulture and minor in Entomology // Tree Risk Assessment Qualified (TRAQ) // Russell Tree Experts Arborist Since 2010

How to Plant a Tree

By Enrique Arayata
ISA Certified Arborist® OH-7252A
November 15, 2022


Today I would like to discuss step-by-step how ISA Board Certified Master Arborist® TJ Nagel plants a tree! He very kindly planted a kwanzan cherry tree for me at my house that was donated by him, Cindy, one of our office managers, and Mark, our fleet manager! At the bottom of this article is a YouTube video where you can visually follow along!

THE STEPS

  1. First, pick out a tree! TJ and I went to Oakland Nursery and selected a kwanzan cherry tree. To help in the planting process, we brought mushroom compost, mulch, a trowel, a shovel, and a pickaxe. Mushroom compost will help enrich the soil. Mulch will help with water retention, temperature regulation, protection from lawn mowers, and curb appeal. A trowel, a shovel, and a pickaxe will help in the digging process.

  2. Choose a tree planting site! We chose in front a picture window in the front yard for viewing pleasure and as it was a few feet away from any obstructions such as my neighbor’s driveway, the sidewalk, my front porch steps, and nearby plants. We also knew that we were not planting directly on top of any pipes or water lines.

  3. Dig your hole! The hole should be slightly wider but just a few inches shallower than the size of the tree’s pot. You will want a couple extra inches around the circumference of the root ball to pack in compost and dirt. We also like to plant most trees a few inches above the surrounding ground level as the tree could settle over the next couple of years, which is why the hole can be a few inches shallower than the depth of the root ball.

  4. Take the tree out from the pot and cut 4 straight lines across the root ball. This will break up and loosen both the dirt and roots which will help minimize the risk of stem girdling roots. Optionally, you can also clean up and remove any small or entangled surface roots.

  5. Test fit your tree and check if the hole’s depth is adequate. As mentioned earlier, you will want a few extra inches of space around the circumference of the tree and you will want the tree to sit a few inches above the surrounding ground level. Make adjustments to your hole if needed.

  6. Mix up the mushroom compost with the existing, dug up soil with an approximate 1:1 ratio to help enrich the soil and promote growth. You can break up any chunks of dirt to obtain a fine, well blended mixture. If a few grass blades end up in the mixture, it is okay as it will decompose and help enrich the soil with nutrients. As long as there is no significant sod or roots on the surface, there should be no significant risk of weeds. To further minimize the risk of weeds and for aesthetic purposes, we will be placing mulch over top of the soil.

  7. Place your tree in the the hole and fill it with your blended soil mixture! Be sure to keep your tree straight and upright while filling in your hole. You will want to lightly compact the soil mixture so that way the tree is stable during windy weather and does not lean or fall over.

  8. Water the soil!

  9. Apply a couple inches of mulch on top of the soil! Keep the trunk exposed and not covered with soil and also avoid creating a mulch volcano in order to minimize the risk of stem girdling roots. We shaped a small, subtle and almost unnoticeable moat around the perimeter of the elevated soil level to help water flow and soak towards the trunk.

  10. Water the mulch!

  11. And voila, your tree is now planted! Or in this case, this beautiful kwanzan cherry tree is now planted! If there are any tags on the tree, you can remove them now if you have not done so already. Optionally, TJ also made a few minor pruning cuts but this is not always necessary.

The first year is vital for a newly planted tree’s survival so make sure that it does not lean over, that it does not get chewed on or rubbed by any animals like deer, and that it gets properly watered, which can be once to twice per week depending on the season, your local climate, and the way the tree is packaged. You can optionally use a tree trunk guard or posts to help protect your tree and keep it straight but it may not be necessary depending on where you live.

I personally would like to give the hugest shoutout to TJ, Cindy, and Mark for donating and planting this tree. Earlier this year, my sister passed away and she loves kwanzan cherry trees. She loves their spring colors, has posters and images of them in her room and on her phone, and uses the Japanese cherry blossom scent for all her Bath & Body Works products. This sentiment is incredibly touching and meaningful and I cannot be more appreciative.

As mentioned earlier, linked down below is a step-by-step YouTube video you can follow along with as well as a few related tree planting articles! Hopefully you found this article educational and entertaining!

HOW TO PLANT A TREE BY AN ISA BOARD CERTIFIED MASTER ARBORIST

ADDITIONAL READS

How to Mulch Around a Tree
by Enrique Arayata

10 Trees with Amazing Fall Color… And One You Should Avoid!
by TJ Nagel

Why Can’t I Plant a Tree Just Anywhere?
by Enrique Arayata

Planting Trees for a Purpose
by Mike McKee


Sincerely,

Enrique Arayata I Media Production Manager, Russell Tree Experts

Enrique is an ISA Certified Arborist® and FAA Certified Remote Pilot. In his free time, he enjoys working out, hanging out with his family and girlfriend, video production, photography, cars, technology, and cooking. Enrique has a BA in moving image production with a double minor in film studies and studio art specializing in photography from The Ohio State University, and an AA in web graphic design from DeVry University. His favorite tree is the Kwanzan cherry tree.

10 New Fall Favorites

This has been a great year for Fall color!  The color has lasted longer than any previous season I can remember.   Most of us Fall fans are familiar with and look forward to the standard maples, oaks, and hickories.  Although these have all been beautiful this year,  over the past several weeks I’ve noticed several additional color contenders that deserve their opportunity in the Fall garden spotlight.  This article is dedicated to them.

Sourwood

Oxydendrum arboreum

On my way to the Paw Paw Festival in Athens, Ohio on September 16th  I noticed several groves of Sourwood along the hills of U.S. Route 33 in all their red Fall glory.  And while hiking the trails of the hocking hills toward the end of October I was pleasantly surprised to see Sourwood still holding onto most of its red Fall foliage.  In the landscape Sourwood is generally a small, slow growing pyramidal tree,  flowering mid summer with white bell shaped flowers that remind me of Lily of the Valley.  The flowers and attractive fruit persisting late into the season along with its interesting bark texture at maturity make this a great tree for all seasons.   In Fairfield, Hocking and Athens counties I observed trees that were 40’+ in height.   NOTE:  Well drained and acidic soil is a must for this tree to thrive - Not suited for the average urban landscape without thorough efforts to amend the soil to its liking.

Sawtooth Oak

Quercus acutissima

What a great tree!  I’m seeing Sawtooth oak gradually getting used more as a street tree by different municipalities and also as a front yard specimen in the landscape.  I’ve planted some for neighbors in my community and continue to be impressed with the merits of this tree.  Sawtooth oak has great form, moderate to fast growing speed, abundant acorn crop for wildlife and nice Fall color.  The leaves are a lustrous dark green all summer before during a brillant golden bronze in the Fall.   Not one of our native oaks but definitely a tree to consider if you are in the market for a fast growing, beautiful medium sized shade tree.  

Persian parrotia

Parrotia persica

Full disclosure, this is probably my favorite deciduous tree.  If I could only have one tree in my yard, this would be it.  This exotic (non-native) member of the Witchazel family is a head turner year round with its glossy green foliage, interesting bark character, pink late Winter flowers and outstanding Fall color.  The nursery industry has selected dwarf cultivars (cultivated varieties) , upright cultivars, variegated cultivars and even a weeping cultivar so there truly is a parrotia suitable for every landscape.  This year the Fall color on my parrotia was a mix of yellow, orange, red and purple. 

Lacebark Elm

Ulmus parvifolia

This underutilized tree produces  noteworthy Fall color ranging from yellow to pink to reddish purple.  A very easy to grow medium sized tree, adaptable to most sites and soils.   The mottled exfoliating bark character makes this tree stick out in the landscape year around.   The columnar cultivar ‘Dannaspire’ and variegated cultivar ‘Mottled Molly’ are two of my favorite selections of this tree. 

Moraine Sweetgum

Liquidambar styraciflua ‘Moraine’

There can be a lot of variation in the Fall color of Sweetgum trees.   The nursery industry has selected several cultivars for more reliable Fall color.  Sweetgum can get a bad rep for its messy fruit but  when I recently happened across a planting of Moraine Sweetgum while working on a street in Westerville, I realized what all the excitement is about!  In central Ohio, the glossy dark green foliage turns to a vibrant mix of yellow, orange, red and burgundy  in October!

Paw Paw

Asimina triloba

If you are looking for a small exotic looking tree  that provides a tasty late season treat then look no further.  This easy to grow, native tree, and Ohio’s official state fruit, is adaptable, has attractive Spring flowers AND beautiful  golden yellow to orange Fall color.  Paw paw can make a great street tree or ornamental for smaller spaces.   This year my grove of Paw Paw (which are planted as 3 consecutive street trees) produced fruit from Late August into early October.   

Persimmon

Diospyros virginiana

Another great native, medium to fast growing, urban tolerant and adaptable tree with edible fruit.  Fall color can be yellow to reddish purple.  This year some smaller seedlings in my yard developed a nice orange color while my larger street tree turned a handsome yellow.

Gray Dogwood

Cornus racemosa

I have never paid much attention to this plant over the years but stumbled across an attractive grove recently while taking a walk in Franklin park.  The white fruits really stood out on the dark green turning burgundy foliage.   Gray dogwood is native and makes a great shrub border/screen.   I have also noticed other specimens recently that have been pruned to form a small tree.

Fullmoon maple & Korean maple

Acer japonicum & Acer pseudosieboldianum

I happened upon these two trees several years ago while at a nursery in Lake county and they have been on my mind ever since.  If you want a hardier and interesting alternative to the more commonly used Japanese maple (Acer palmatum), consider these two trees.  The leaves have a wider palm and a reliable intense Fall color.

Korean Evodia

Tetradium daniellii

The city of Columbus has used Korean Evodia as a street tree along parts of Long street on the near east side.  And this pictured specimen is thriving in the main parking area of the Franklin Park Conservatory.  Very adaptable and medium to fast growing, this is a true summer flowering tree that provides for pollinators from June through August, sometimes referred to as the bee tree for this reason.  The Fall foliage can be a decent yellow but the REAL fall show is the red to black shiny fruits that arrive late August and persist well into November.  NOTE: Korean Evodia could be difficult to source but is definitely worth the search.

☆Bonus☆

White Ash

Fraxinus americana

I am so happy that we still have some nice Ash trees around town.  Once as common a Fall sight as Sugar maple, the number of noteworthy White ash specimens I see in the Fall in central Ohio  has been dramatically reduced by the insect pest Emerald Ash borer.  When I happen upon a new healthy/vigorous Ash tree (of any species)  that I haven’t seen before it makes me feel warm and fuzzy.  Ten years ago I was getting calls about Ash trees every day - today it is a rarity.  Here are a couple nice White ash I’ve noticed around town this Fall.  Kudos to everyone who has worked diligently to help preserve this important genus. 

TJ Nagel | Scheduling Production Manager, Russell Tree Experts

ISA Board Certified Master Arborist® OH-6298A // Graduated from The Ohio State University in 2012, Earned B.S. in Agriculture with a major in Landscape Horticulture and minor in Entomology // Tree Risk Assessment Qualified (TRAQ) // Russell Tree Experts Arborist Since 2010